While working on images in Photoshop Elements, there are many techniques you can use to manipulate your photographs. One of the fun methods of altering a photograph involves playing with the background in the image. Here are some things you can do with backgrounds using this software.
Adobe offers a number of software packages for editing, including the powerful Photoshop. For those on a budget, Photoshop Elements is a lightweight package that shares some of the features available in the bigger package and one of these is working with backgrounds. While many people have heard about shooting on a green screen in order to add new and innovative backgrounds to their photographs, the tools for Photoshop Elements backgrounds allow a user to manipulate regular backgrounds to create fun and fresh photos. Here are a number of things you can do with this software when it comes to backgrounds.
Removing the Backgrounds
Photoshop Elements offers tools specifically for the purpose of isolating an image in a photograph. Tools available for this purpose include the magic eraser tool, background eraser, magnetic lasso and selection brush. It is a good idea to familiarize yourself with these tools and become comfortable with them because each of them work in different ways to accomplish this goal.
I’m going to discuss the magic eraser tool because I feel it works better when meticulously removing the background of an image.
Before working with the image, duplicate the background layer so you can still have the original image to work with until you get it just right. This protects the original work in case something goes horribly wrong while erasing the background. To do this, make sure your layers palette is visible - click on the background in the palette and then drag and drop it onto the new layer button at the top of the palette. This creates a duplicate layer in your composition.
Click the Eye icon on the new layer to hide it. Now, select the Magic Eraser tool from the toolbox, set the tolerance to a level that is easy to work with (35 is a good number) and click on the areas you want to make disappear. Click around as you find more colors you want gone but avoid colors similar to the subject that you want to remain visible.
When you are satisfied with the amount of background erased, open a new black background in the image by using the Create Adjustment Layer button in the layer palette panel. When you get it created, drag and drop it into your composition and the area that is erased will now be black. Now, open the regular Eraser tool from the toolbox, choose a smaller, more precise brush, and use it to eliminate other areas of the background that still exists.
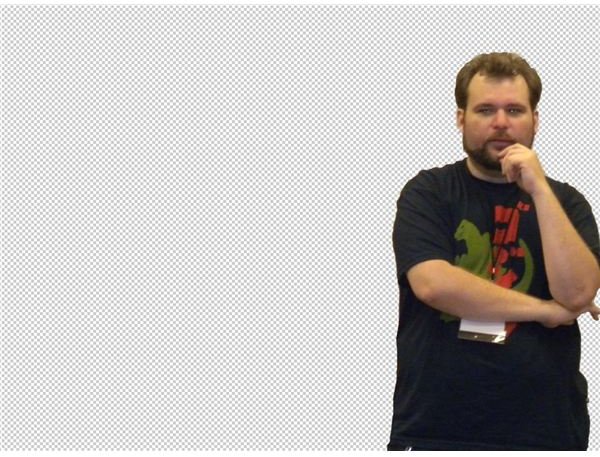
Next, double-click on the background copy in the palette and rename it Mask. Now, make another duplicate of the original background and move it to the top of the palette. While selecting the new duplicate layer in the palette, click Ctrl+G to create a clipping mask and the layer below is now a Mask layer. With the mask selected, use the paint brush (any color is fine) and go over any area that disappeared from your main subject. Zoom in on the image to get more control over your work. Click the eye on the black layer and switch between the paint brush and erase tool until you are happy the background is completely erased and your subject is still visible.
Next, use the Gaussian Blur (Filter > Blur > Gaussian Blur) and set the radium to about 0.5 to smooth out the jagged edges. Finally, save the file under a new name as a Photoshop file once you have the image’s background removed.
Adding Backgrounds
With the image removed, you can now add whatever backgrounds you heart desires. Once you have removed the background from your image using the above instructions, you can start to work on adding new effects as well as new backgrounds. You need to do this with the Photoshop file you created above, and not a JPG or another image type file.
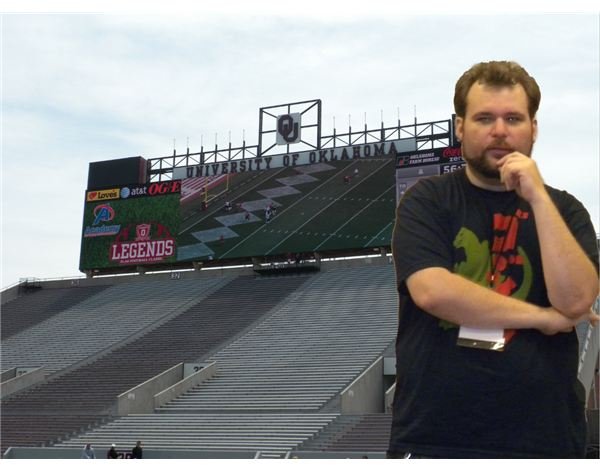
Preferably with the original Photoshop file still opened, make sure the eye beside the original image and black layer is clicked so they are invisible and you are only working with the image you manufactured with the background erased. Create a new layer in the composition and place it below the doctored image you have been working with. Now, find the background you want to add to the image. Make sure the new layer is selected and click File > Place and choose the new background. Click OK and the background is now behind the original photo.
The next question might be where to find cool backgrounds. I like to use photographs I already have taken personally but you can find ones online as well. For personal photographs, let your imagination run wild.
References
Author’s personal experience.
Images are from author’s own collection.


