Learn how to take HDR photos, then use the free software program GIMP to merge your photographs and make them look even more dramatic.
What is HDR Photography?
HDR or “high dynamic range” photographs involves capturing different shots of the same object or subject, but you are manipulating the exposure for each shot. If you are just starting to take HDR images, start with three shots: lightest exposure, middle exposure and darkest exposure. These images will give you a starting point from which you can build on later.
GIMP is a free program that allows you to edit and add effects to your images. This program is similar to Photoshop, allowing you to perform many of the same functions as the expensive Photoshop. This program comes with a Layers feature just like Photoshop, which is necessary to create HDR photographs.
Taking HDR Images
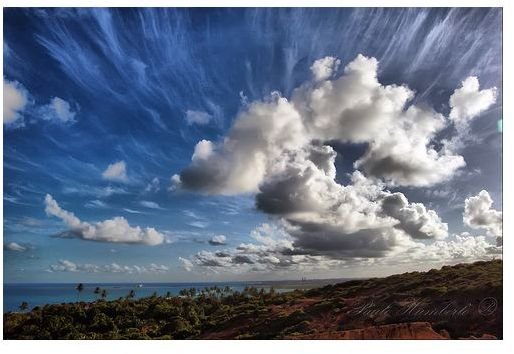
If you want really interesting HDR images, take photographs of something that lends itself to amazing contrast. HDR photographs often involve the morning or evening sky, trees or landscapes. These subjects already have contrast. You are just enhancing that contrast.
Set up a tripod and take your photographs at the three different exposure levels. Keep the camera in the same spot and steady between shots. Simply change the exposure.
When you are ready to start manipulating your images, upload them to your computer and give them a name relevant to the exposure level. For example, give the darkest exposure photo a name like “dark” or something similar. This helps you distinguish between the different levels.
Manipulating Your Images in GIMP
Start GIMP and open the middle range exposure image. This is your base image. Open up the dark image in a different window. Next, go to Layer and then New Layer. Give your layer a name so that you know that it is the darkest layer. The middle range image must be the background layer. If it is not, change it to the background image.
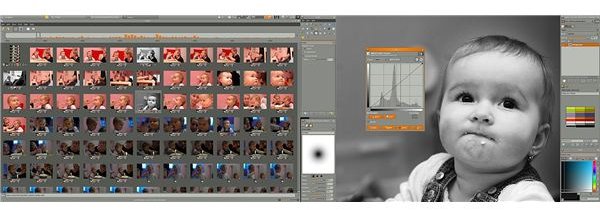
Copy the dark layer. Select your dark image, and go to Layer, Colors and then Desaturate. This will make the white sections of the image opaque. You can lighten the layer a bit if it is too dark. Add a Layer Mask to the dark layer. Paste the mask into the image.
Next, open up the lightest image in a new layer. Desaturate the layer, but then invert it by going to Layer, Colors and Invert. Copy the light layer and create a layer mask. Paste the mask image.
Merge the layers to create the HDR image. Experiment with the contrast and gradient to make the image even more dramatic.
This GIMP HDR tutorial only gives you a brief overview of how you can create dramatic HDR images. If you want even more interesting images, take images at multiple exposure levels. This creates deeper colors and contrast. Also, experiment with the opacity and colors.
References
GIMP, https://www.gimp.org/screenshots/
Paulo Humberto, https://www.flickr.com/photos/paulohlins/3206931385/
Rowse, Darren. “An Introduction to High Dynamic Range Imaging (HDR), https://www.digital-photography-school.com/an-introduction-to-high-dynamic-range-imaging-hdr


