These travel photography tips can help you preserve memories from any trip you take and help you get started in a fun hobby. Learn how to make great photos that capture the essence of a place.
1. Plan Your Trip
Planning is the key to success in a lot of what you do, and photography is no exception. This is chief among all travel photography tips. I have checklists for almost every type of shoot, listing things such as camera, lenses and memory cards, all the way down to chargers, cables and extension cords. I don’t make checklists to be rigid, but rather to remind myself of the important things I need for a shoot. Nothing is worse than arriving at your destination only to find that you left your memory cards at home.
Also, plan what you want to see and photograph before leaving home. Have an idea of the places you want to see and photograph. What’s special about the area you are traveling to? What’s on the way that you can stop at and document?
2. Pack for Travel
Proper packing is essential. As much as the checklist is a good thing, it sometimes encourages a mentality of bringing everything you possibly can, rather than being judicious with what you bring. My general practice is to follow my checklist, then try carrying my equipment for about ten minutes around the house or neighborhood. If you are tired after ten minutes, you have too much stuff. Jettison some of your kit.
Another thing to consider is how to carry all this stuff through an airport. I pack all my electronic camera equipment into one carry-on camera bag. Other things, such as a tripod, can be disassembled and stowed in my checked luggage. Check with the TSA to see what the current regulations are for carry-on items.
3. Mind Your Lighting
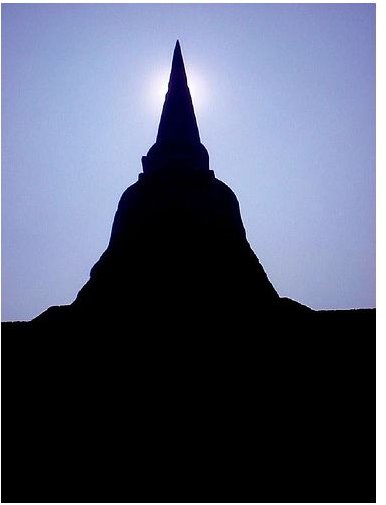
Lighting is going to play an important part in the quality of your photographs. I rely on natural and ambient lighting for almost all of my travel photography for two reasons. First, carrying a flash and batteries adds extra weight I would rather not have. Second, unless I am making a portrait, what I want to do is capture the way someplace looked, not how my flash made it look. I want to capture the shadows and streams of light. When you think of your trip after you get home you will remember the light coming through a church’s stained glass windows and how it played on the slate floor. Photograph that. Don’t light up the whole place and lose the beauty created by the darkness.
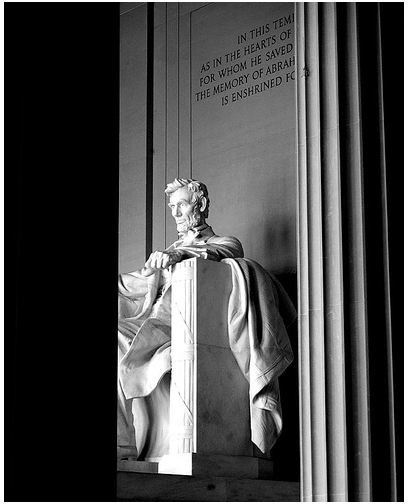
4. Keep it Simple
Your best shots are going to be the simple ones, more than likely. You can have complicated elements to your photos, but try to set them off with a simple theme. For example, some of the most striking cityscape photos I have seen have incorporated the jagged, saw-tooth look of a place like New York, but also show the sky above the city – the simplicity of nature – in contrast to the busy man-made part.
Another example is when photographing people, focusing in on their eyes in the midst of what is going on around them. This simplifies the photo, giving the viewer a sense of connection with the subject, a shared moment of intimacy caught on film.
5. Zoom In and Zoom Out

Zoom in. Capture details that are unique to the location you are visiting. Sometimes the details are more interesting than the whole. For instance, architectural details may be more interesting than the whole of a building. The photo at right shows some beams protruding from the adobe wall of a building in Albuquerque, New Mexico.
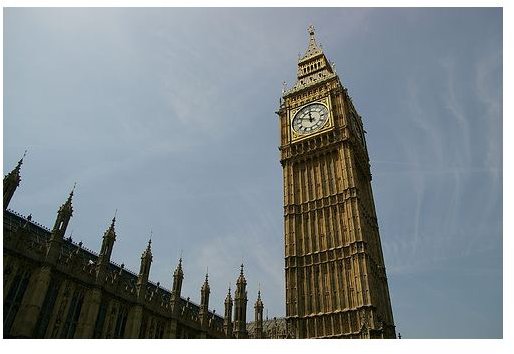
Zoom out. Don’t get mired in the details. Capture the whole as well as the minute. A photo of the whole of a building shows how all the constituent parts are fitted together with such exact nicety as to produce a complete structure, whole in all its parts. These are not contradictory travel photography tips, but a reminder to try both ways as an exercise and see what works. Sometimes it takes looking through the viewfinder to really see what you are looking at.
6. Capture the Human Element
A lot of time what makes a photo interesting is the human element. People are what we want to see when we look at photos. Seeing other people in photos makes us look longer. We wonder what it would be like to be that person. What does that expression mean? Why is the person looking away? What is she looking at? Humans in photos always lead us to ask questions, thus making the photo more interesting.
When photographing people, though, be sure to get their permission and do a bit of research ahead of time about what is legal and culturally acceptable to photograph and what is not. Even in a foreign country, if you do not have the language, you can gesture to the camera and smile to let people know you want to photograph them. They will indicate their preference.
7. Remember your Rules of Composition
A plain photo with no thought to composition is boring. Include your compositional elements to make a more interesting photo. However, don’t go overboard. Remember to keep it simple. Include two or three bits of composition, not every single rule you have ever heard of. The idea is to stimulate the viewer’s eye and get it to stay on the picture. Too much going on in the photo will over stimulate the viewer. Not enough will bore him. It’s a delicate balance. I typically like to include various lines in my pictures, whether converging or intersecting, and also try to incorporate the rule of thirds. Whichever style you go for, just be sure you are conscious of your composition.
8. Practice Good Record Keeping
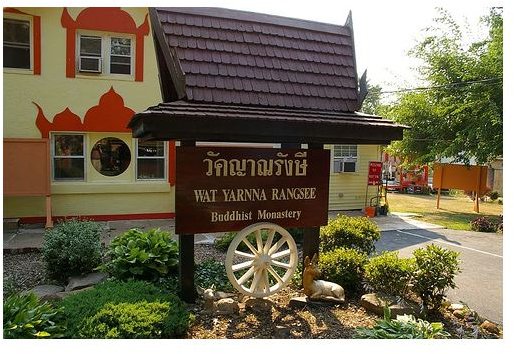
If you are visiting a place you are not so familiar with, you will want to keep good records and slate your photos so you can identify them later. Fortunately, your camera will keep track of the date and time of the photo, but you have to do the hard part of keeping track of what is being photographed. I use a few simple methods for this. One is to take a picture of a relevant sign so I might be enabled to identify the spot where it was taken. Another method is to write in a notebook what you are about to photograph, then photograph what you wrote. This is a simple enough task that you can figure out a way that works best for you. The most important thing is to keep track of it all somehow.
9. F8 and Be There
Sometimes things just happen and you come across the perfect scene you want to get. An old photojournalists’ adage is “f8 and be there.” F8 gives you adequate depth of field to make almost any type of photo quickly and decently, or at least good enough for editorial purposes. You don’t have to have your camera set to f8, though. The idea is to be prepared. Have your camera set up so you can quickly raise it up and get that shot you want, however you like to shoot. This includes all your elements of exposure : f-stop, shutter speed and ISO.
10. Break all the Rules
Duke Ellington once said of music, “If it sounds good, it is good.” The same is true in photography. Your goal is to make great photographs. Don’t worry about the rules you read here. If you look through the viewfinder and see an image that breaks all the rules and still looks good, take it. Also, as a traveler you should have fun. Deviate from the plan you set forth at the onset of your trip. Get lost. Lose track of time. Whatever you do, just keep taking photos. Experiment with your camera and figure out what your style of photography is. Your vision is your own and if it looks good, it is good.
References
Written from author’s experience as a professional photographer and photography teacher.
All photos by Carl Weaver .


