Learn to make a perfect selection in Paint.NET with the selection tools available.
Selection is very important in Paint.Net because it restricts many of the other functions to a certain area of the image. If you want to change the color configuration or apply effects to a portion of a photo rather than to the whole, you have to isolate it first by selecting it. That is why programmers have given it a lot of thought and have invested much effort in making the selection tools as complex and versatile as possible. And taking into account that selecting an area is not always easy and smooth, we must admit they have done a great job.
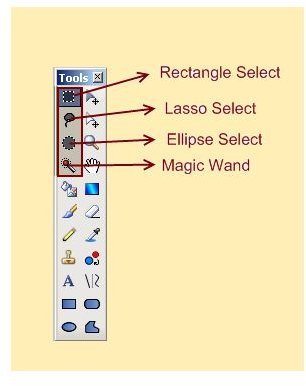
There are basically four selection tools in Paint.Net. The first three have something in common: they let the user draw a selection region with the mouse via the “drag and drop” method. The fourth tool and one of the most powerful features of this program enables you to make more complex selections based on similar colors with only one click of the mouse. To identify the right icons in the Tools bar see the image below.
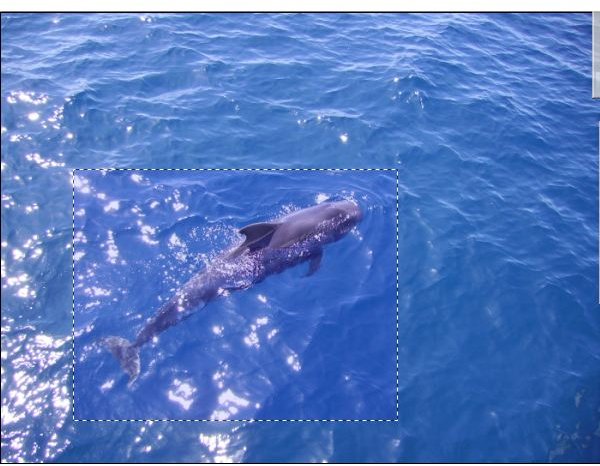
Rectangle Select
As the name suggests, the Rectangle Select tool lets you draw a rectangular or square selection region. Simply choose a point to start, move the cursor of your mouse to that point, hold down the left button, drag and drop. A dotted rectangle will appear to mark the boundaries of your selection area. To draw a square instead of a rectangle, hold the Shift key while performing the above operation.
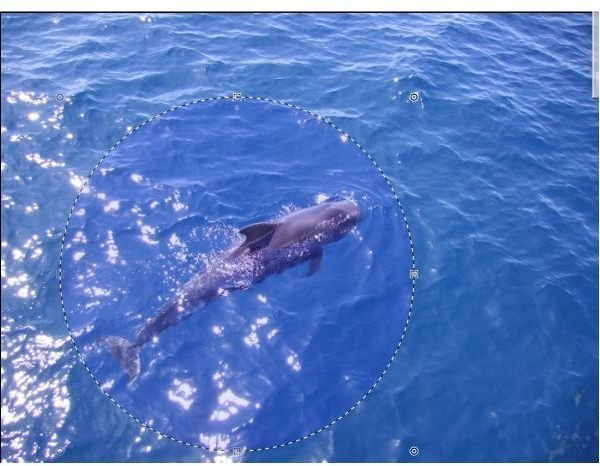
Ellipse Select
The Ellipse tool lets you select an elliptical or circular area. The principle is the same as in the case of the Rectangle Select. Drag and drop. Hold down Shift key to restrict the shape to a circle.
Lasso Select
With Lasso Select, you can draw a freeform selection region.
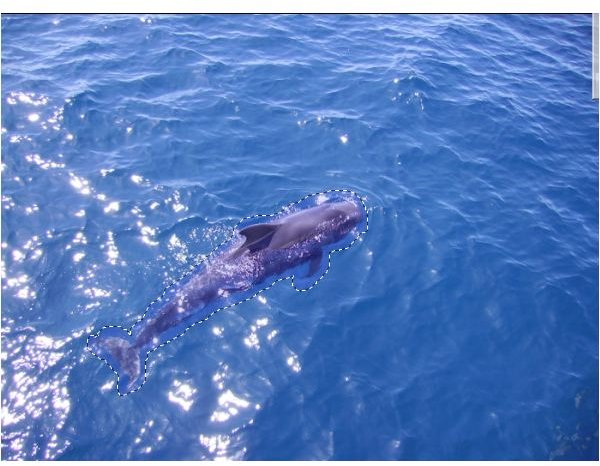
Magic Wand
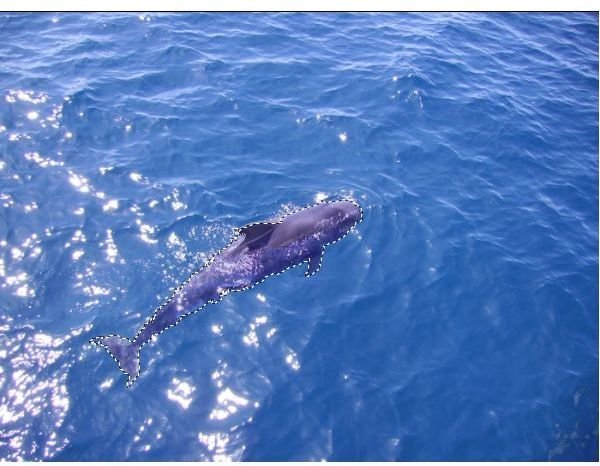
Magic Wand adds a new dimension to the selecting process. Instead of letting you draw the selection, it makes it by including areas of similar colors. To make a selection with Magic Wand, you no longer have to drag and drop. All you have to do is click anywhere in an image and let the program do the rest. The selection will be automatically generated and it will include colors similar to the color of the pixel you clicked. Depending on the tolerance level you choose, more or less colors will be included. The higher the tolerance level, the larger the selection. Don’t worry if you don’t get it right from the start. Change the tolerance level and try again until you get as close to the desired result as possible.
Two methods for selecting a complex image
1. The Additive Method
- choose Magic Wand from the Toolbox
- lower the tolerance
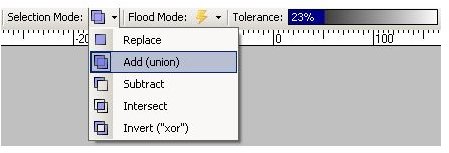
- set the selection mode to Add (union) (see image below)
- keep adding small color areas to your selection until you achieve the desired result.
2. The Substracting Method
- start by making a broad selection with the Lasso tool
- set the selection mode to Substract
- select Magic Wand
- subtract small color areas from your initial selection until you achieve the desired result.
TIP
You can always move, expand or shrink a selection without affecting the selected pixels by using the Move Selection tool.


