Bring your photographs to perfection with this user-friendly and efficient tool.
Inpaint is a little application from Teorex that helps you remove unwanted parts from a photograph without leaving a blank gap behind or altering the image unity. How does it work? Very much like the classical clone tool in a graphics program like Photoshop, Paint.net or GIMP. It analyses the pixel closest to your selection and reconstructs the area from there. The only difference is that here the program does virtually everything for you. All you have to do is select the spot you want to delete, click a button and wait for the result. It is ideal for erasing scratches or marks from scanned old photos but also for removing objects you don’t want in the picture. To download the free trial version, click Download Inpaint 1.0 .
What you need
- Inpaint (the full or trial version)
- A photo with an object or part you want to remove
What to do (Steps)
1. If you haven’t done it yet, download the trial version of Inpaint from Teorex .
2. Open the application from the shortcut icon on your desktop or from the Start menu – Programs – Teorex - Inpaint.
3. Open the photo by clicking the folder icon in the toolbar or File – Open and selecting the image file from your disk tree structure displayed.
4. Choose a selection tool from the toolbar (either the Lasso or the Rectangular tool, depending on the regular or irregular shape of the object you want to select).
5. Use drag and drop to select the part of the image you want to remove. Try to select as closely as possible. A bigger dotted rectangular border will appear including the smaller dotted area that contains your selection.
6. Go to Menu > Inpaint and click Run. At this stage you will have to wait patiently as the actual process can take several minutes depending on the size and complexity of the image.
7. If you are not pleased with the final result, click Edit < Undo and try to make a closer selection. Then repeat step 6.
8. Click File – Save As to save the result as a new image. Click File – Save to replace the old image with the new one.
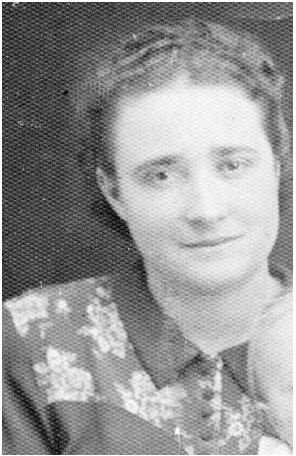
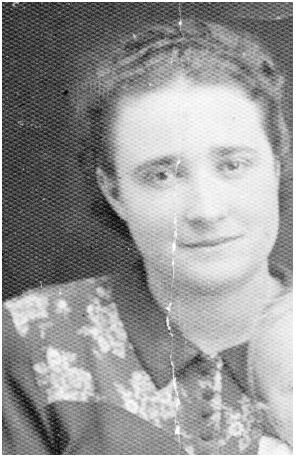
In the images below you can see the difference between the original photo (with a vertical scratch running from top to bottom) and the final result after processing the image with Inpaint (no scratch).
Original vs. Final