You can easily load audio tracks from a CD or hard disk into WavePad and start trimming, add audio effects and even make a selection of a portion of a track and save it as a separate audio file. Learn some basic tips on how to use WavePad here.
WavePad is a versatile audio editing program that helps you perform various audio editing tasks, such as trim audio clips or add effects - like amplify and normalize - you audio clips.
In this tutorial we will look at basic tips on how to use WavePad. You will learn how you can load audio tracks from a CD into WavePad and start editing. We’ll also look at how you can make a selection of a portion of the audio clip so that you can delete or copy/cut paste it or add effects.
Importing Audio Files
You start working with WavePad by importing audio files into the program. If you’ve an audio file ready in the hard disk, you could use the Open File command from the File menu. Your audio clip will be loaded into the timeline.
Load Audio from CD
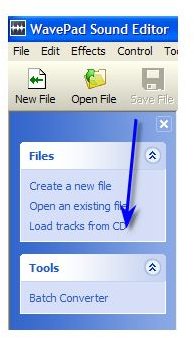
There’s another feature found in WavePad not usually found in audio editors of its range – load audio tracks from a CD.
Usually, when you want to edit an audio track from a CD, you would have to convert it to WAV, MP3, WMA or other popular formats with an audio converter . With WavePad, you can import any audio CD track into the timeline without having to convert it first.
You do this by using the Load Tracks From CD command either from the file menu or from the command panel towards the left of the program interface. Alternatively, you can click on the Load CD icon on the top half of the program interface.
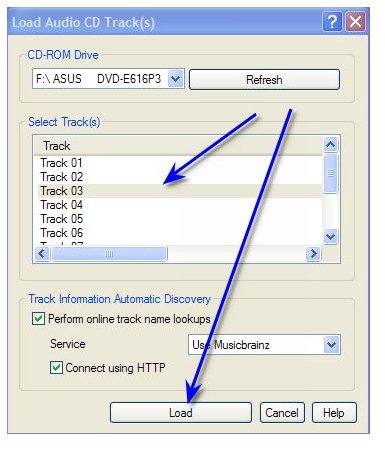
Clicking on the command brings up the Load Audio CD Track(s) window. The tracks in the CD will be displayed in the window. Select the track you want to work with and click Load.
The selected audio CD track will be loaded into the timeline and you can start working with it. To be on the safe side save the track into your preferred format before you start working on it. You could do this with the Save File As command from the File menu.
Making a Selection and Editing
Once your clip is in the timeline, you can trim your video or cut/copy paste portions of it into the same timeline or a different one. Before you could do that, you would have to make the selected of the portion you want to trim, cut or copy.
You can easily to do this by clicking your mouse in the time at the start point of selection and drag it to the end point of your selection. The selection you’ve made will be highlighted in the timeline.
Precise Selection
If you want a precise selection that would be difficult to achieve with a mouse drag, you can use the Select Specified Time from the Edit menu.
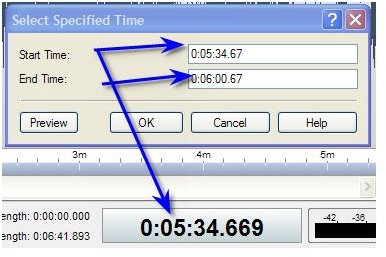
Before using this feature, however, you should note the start and edit time of the selection you would be making. You could do this with the help of the timecode counter at the bottom half of the program interface.
Once you’ve entered your start and end time and clicked OK, the selection would be made for you on the timeline.
You can now start trimming, copying and pasting or editing the desired effects to the audio clip.
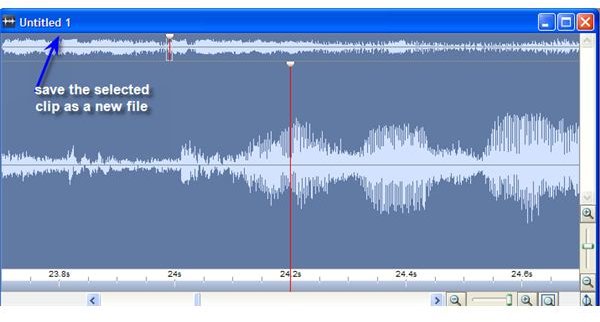
Saving Selection as New File
If you would like to save your selection as a new file, you would have to create a new file first ( File>New File) and then copy it into the new file timeline. Once the selected audio portion is there, you could save it as a new file by using the Save File As command from the File menu.