
Does your audio file suffer from background noise that lowers your listening experience? You can get the problem fixed easily with these simple steps using a free software program.
Recording audio is a pretty straightforward affair these days. If you have a computer equipped with a sound card, you’re game for the task. You don’t even need sophisticated equipment to get started recording audio. A headset microphone should set the ball rolling. On the software front, there is no need to purchase anything costly. If you’ve a Windows system, you can make do with the sound recorder that comes with your operating system.
While, you can get started recording audio easily, the quality of your recording may leave much to be desired. If you’ve a soundproof room for your audio recording, you would not have to worry about audio recording quality. What if you have to record in ordinary circumstances and have background noise (aka white noise) creep into your recording?
One way of eliminating the problem is to rerecord your audio, hoping that the next version comes out better. If for some reason you can’t do that, worry not. You can get rid of unwelcome background noise with a simple procedure using a free software program called Audacity which you can easily download from the Internet.
Let’s now get on to the business of how to remove unwanted background noise from your audio file.
Importing the Audio File
Launch Audacity to get started. Once the Audacity interface is open, go to File and click on Open. You have to ensure that the audio file format you wish to import into Audacity is of the supported type. So, make sure it’s in the WAV or MP3 format to be on the safe side. Audacity also supports OGG and FLAC and AIFF if you must know.
There’s one thing you should bear in mind before getting started. Make a backup copy of your audio file should anything go wrong during the noise removal process.
Selection
Once you’ve imported you audio file into Audacity , the next step would be to select the portion of the file where the background noise is located. You would want to play back your file to identify the part for this purpose.
The selection process is straightforward. Click on the timeline where you want to start selection. You will see the icon of a pointed finger. Hold mouse button and drag it across the timeline to make your selection.
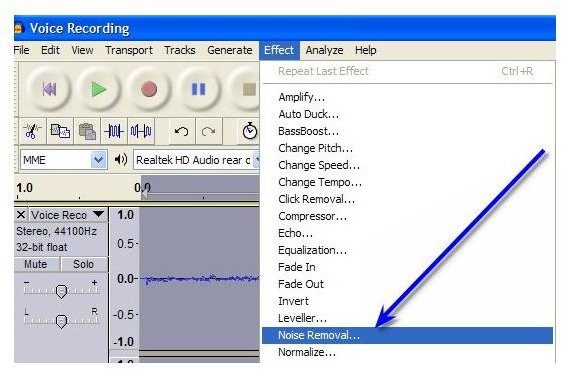
Effect Menu
Once your selection has been made, you would want to click on the Effect menu. Under the Effect Menu choose Noise Removal. The Noise Removal dialog box requires you to undertake two steps.
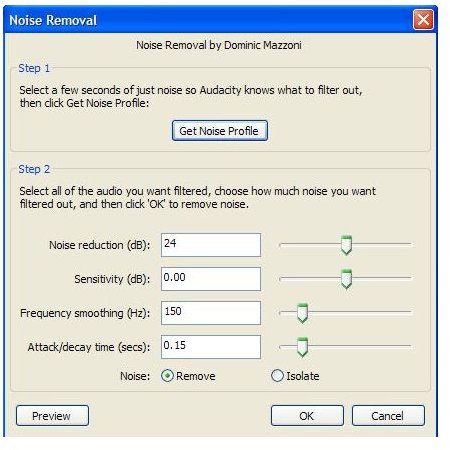
The first step would be to get the noise profile and the second is to determine how much noise you want removed.
Since you already have a sample of the background noise selected, go ahead and hit the Get Noise Profile button.
Select Entire File
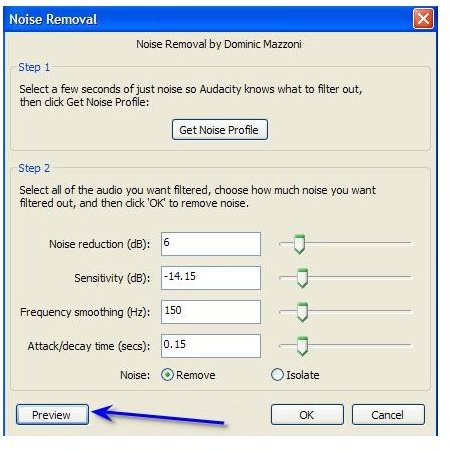
The next step would be to select the entire file. Do this easily by hitting CTRL+ A over your keyboard. Then go back to the Effect menu and choose Noise Removal again. When the dialog box comes up, you’re ready to set how much noise you want to remove. Always start with a low setting to see how things go. Click on the Preview button to hear what your audio file will sound like after noise removal
If you’re satisfied with what you hear, hit the OK button. You may not get it right the first time. If you’re not satisfied with what you get, you can undo the process by hitting CTRL + Z and start all over again.
Exporting File
When you’ve successfully removed or minimized background noise, you’re ready to export your `cleaned’ audio file. Go to File and choose Export. You can then save your audio file in the format you desire.
Refernces
Tutorial based on writer’s experience of removing background noise from audio
Tutorial screenshots by writer.


