
Do you own the HTC Touch Pro by Verizon? Are you tired of the slow TouchFLO response? How about the subpar battery life? And what about the GPS being locked! If you have the hour, Windows PC, and Synced Device, then you can fix all of these problems and more in a jiffy with this How-To
Intro / WARNING
It was the middle of April, and my LG Voyager bit the dust.
I’ve been sick of all these BREW phones, which came complete with extremely limited features, and lack of any useful abilities. So I went on over to my Verizon Store, and picked up their top of the line PDA Phone: HTC Touch Pro.
It was a sleek black, complete with a glossy finish all over the device. it fit well in the hand, and had a full QWERTY Keyboard.
However, it also had slow RAM, horrid battery life, and a locked GPS offering: things you don’t want with a phone, Especially one with Windows Mobile!
Even worse, The competitive carriers (AT&T, Sprint) actually have better quality over the Verizon edition! What’s up with that?
It took me a few weeks, but I’ve successfully been able to fix ALL of these features, using my PC, the Touch Pro, and about an hour of elbow grease.
Now, before you decide to do this, be warned that this will not only VOID YOUR WARRANTY AND INSURANCE UNDER VERIZON WIRELESS, but that this will also HARD RESET your device, AKA, you will lose Everything on it, unless you backup! Don’t worry, we cover that, and more in this How-To. Read on if you want to get the most out of the HTC Touch Pro.
Requirements, Credit.
In order to actually begin this how to guide a bit of software is required to undergo the process. It may take you some time (Depending on registrations necessary, speed of internet connection, etc.) to actually acquire the software, but it is absolutely vital you do, so that you have everything you will absolutely need to have a working, and optimized Verizon Touch Pro
Make sure you have at least an hour of time to Dedicate, along with a Windows PC, Synced Touch Pro, with at least 50% battery life.
-
Advertisement
-
A Registration at PPCGeeks
-
The Unlocker (THIS VOIDS THE WARRANTY IF NOT RELOCKED)
Advertisement -
7ZIP (Or some sort of Unzipping Program)
-
Advertisement
-
This File (A Configurator)
-
This File (MMS Compatibility)
Advertisement -
Finally, This GPS File
Make sure you order them in some way where you can access them easily. You will be using them in the order shown. Credits go out to… Mightymike (From PPCGeeks) for his ROM Lordshadowz (from PPCGeeks) For his fixes TELUS (for the radio to improve Battery) IIIBoredIII (for the GPS Fix) Now, Onto Pre-ROM Flash, Backup!
Preparing to Flash, Backup
In order to update and optimize the Touch Pro, there unfortunatly must be some changes made to the actual operating system that runs on it. Because of this, you must perform a Hard Reset of the device, where all information stored on the internal memory (All Files not in a storage card, and all programs and Registry entries) will be removed and wiped clean. In order to ensure your data is never lost. Be sure to use PIM Backup (an Executable you can put on your device) to backup your contacts, appointments, and other items. Anything else however cannot be backed up, so have your CAB files (That you use to install new programs) ready.
If you have no idea of what to backup, just use PIM backup, and you should be good to go, unless you installed any outside software.
Any files you want to keep should be synced to your PC or stored on a MicroSD Card on your device. You now should be ready to actually flash the device, after of course voiding your warranty (With an unlocker!)
UNLOCK your Verizon TP
Ready to void that warranty?
Sometimes it is really irritating how a piece of electronics can’t even achieve the most potential without voiding the warranty and customizing the internal features and software to the point where you can’t even remember how cruddy it used to be.
In this case, that is the same situation, Go ahead and unzip and remove the executable inside the MANUAL folder of the ZIP located in number 3 of your requirements.
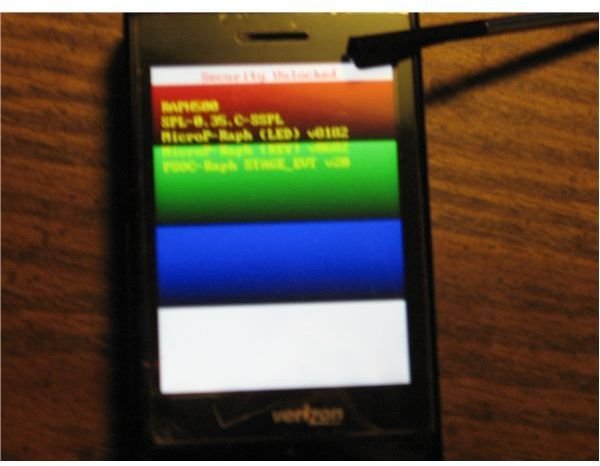
In order to use this, you must be syncing your Touch Pro, and be able to add files to it. Take the EXE that comes from the manual and run it on your device. If you did this correctly a RGBW (Color Coded) screen will come up and at the top will tell you of your security. if it is locked, proceed on. If it says unlocked, skip to the flashing portion and soft reset (press the red button near your usb connection cable)
Now that you are in this mode, ensure you are synced (it will say USB at the bottom) and then run the unlocker EXE, located in the unlocker folder in the same folder you found the manual folder. Run that file, follow all instructions, then soft reset. The relocker file is used to relock the device to un-void your warranty (But you will need a stock ROM for that.)
Now, your device is unlocked, meaning it is open for the wide and wonderful world of ROM flashing!
Flashing MIGHTYROM
Ready to flash a whole new experience onto your device? I hope so, since MIGHTYROM is an excellent CDMA ROM for your HTC Touch Pro. If you dont want to use MIGHTYROM, there are plenty of other choices here . Be warned that this guide has only proven to be successful for MIGHTYROM users.
Once you have the .EXE from MightyROM on your desktop, Unzip it and move it’s contents into a folder. Within this folder will be a “PAGEPOOL_CHANGER” File, be sure to run that.
Once it is on, you will see a lot of strange information and a ROM Uploader. click the uploader, bring it to the folder you extracted all the files to, and pick the custom_RRU it will offer you to upload it.
Once it uploads, it will give you something called Pagepool information of the device, which can be changed to increase optimization. The only thing we will edit is the first level of changeable settings (Noted with little circles that range from 4 through 64 and named whole parts). This is the RAM Allocation for the Pagepool. Change it to the circle labeled as 8, and then commit to the changes by clicking CHANGE TO. Then close the software
Once this is edited. Run the RomUpdateUtility.exe, which will bring up a program name, in this case MIGHTYROM.
Follow the instructions, by syncing your device, much like in the unlocking process, you will be flashing the device with MIGHTYROM 4. Congratulations! Now its time to tweak!.
Optimization
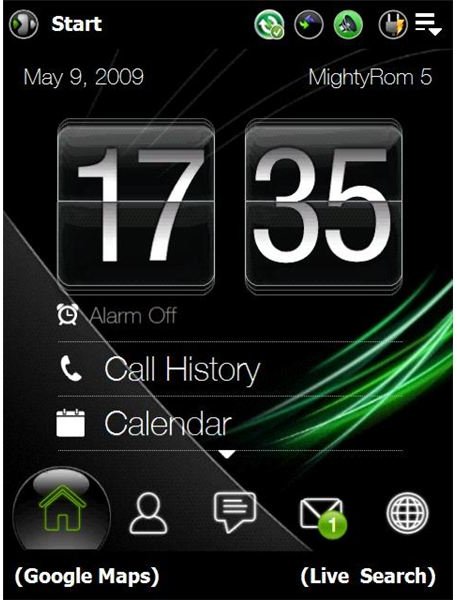
So, how does that fresh ROM look? It takes a few minutes to setup, and if you remember your backed up files from before, run the same file (except in restore mode) and you can have all your contacts and such back. However, there is still work to do!
Remember that Configuration CAB file you downloaded? Go ahead and install it. Also be sure to install the Arcsoft MMS CAB, so you can receive picture messages without error. If it asks you to soft reset at any point, be sure to.
This only starts the beginning of our customization. For the next part, we will need to turn on our Advanced Configuration software, and proceed to the phone section. You’ll see a lot of strange configurations and options, don’t worry about them. Simply go to the option for the phone dialer skin, and switch it to off. then reset. In the process, you will save 10 Megabytes of sacred RAM to run TouchFLO3D with.
Last but not least, our GPS Fixing Cab. Run that cab, and do not soft reset. Then use the file explorer (In the start menu) and proceed to \windows\ppst.exe . Run that file, and hard reset.
Now make sure everything is in working order by dialing *228 (OTA Updating service) and press 1. The system should fix everything right up, and you are then ready to use your updated, and optimized touch pro!
Conclusion
Hopefully, when we’ve reached this part of our how-to, the device is safely working much faster in your hands. We have our phone working in regular order, with the open GPS, improved RAM, and many more advantages just waiting for you to stumble upon.
If you are looking for further ideas on modifications and upgrades, there is much more to experiment with! For instance there are plenty of ROM cookers and builders out on the Pocket PC Geeks Forum for the Touch Pro, and so long as you make sure you search for CDMA or Verizon compatible modifications, feel free to experiment. Remember that you can always reverse this process if you have the time and dedication to do so. But still remember, that as of now, your device is out of warranty, good luck, and happy hacking!


