The Motorola RAZR mobile phone can be synced to your PC so that you can back up important information. In order to sync your phone to your PC, you need to use the Motorola Mobile PhoneTools software. Let’s take a look at the process.
Motorola’s RAZR mobile phone comes with a feature that allows you to sync data between the phone and your PC. By doing this, you can ensure that certain information (such as contacts or important dates) stored on your phone is not lost if something happens to it. In order to use this feature, however, you need to have Motorola’s Mobile PhoneTools software installed on your computer. You also need to use a USB cable to connect your phone to the computer.
Installing Mobile PhoneTools Software
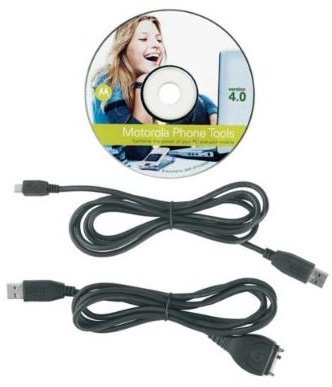
Insert the Mobile PhoneTools installation disc that came with your RAZR phone into your computer’s CD-ROM drive and the installation program should automatically start. If it does not, click the “Start” button and select the “Control Panel” option. Click “Appearance and Personalization” and select “Taskbar and Start Menu.” Choose the “Start Menu” tab and click the “Customize” button. Scroll down until you find “Run Command” and check the box next to it. Click “OK” and then click “OK” again. Click the “Start” button again and select the “Run” option that now appears on the “Start” menu. Type “D:SETUP” (where “D:” is your computer’s CD-ROM drive) and click “OK.”
When the installation program launches, choose your language and select to “Install mobile PhoneTools.” Click “Next” when the “Welcome” window appears. Read over the license agreement and click “Yes” to agree to the terms listed. Enter in the information asked for when the “User Information” window appears and click the “Next” button. Choose the “Complete” install option from the “Setup Type” window and click “Next.” When the “Start Copying Files” window appears, click “Next” to continue installing the software.
A window prompting you for online registration automatically opens. Click the “OK” option and follow the on-screen instructions to register your product online. You can also click “Register later…” if you do not wish to register your product yet.
A message appears stating that the installation is complete. Click “Finish” and the installation program closes.
Connecting the Phone to the PC

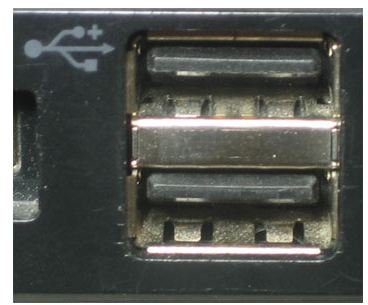
Open the Mobile PhoneTools software and select the “USB Cable” option from the “Welcome to the Phone Setup wizard” window. Click the “Next” button. Turn your RAZR on (if it is not already on) and plug one end of the USB cord that came with the phone into its USB port and the other end into your computer’s USB port. A progress bar indicates how far along the setup for the connection is. When the progress bar is full, click “Next” to complete the connection.
Syncing the Phone to the PC
Turn both your RAZR phone and PC on and connect them with the USB cord if you have not already done so. Launch the Mobile PhoneTools software and click the “Synchronize” button found on the function panel. From the options that appear, select “I would like to launch the sync wizard.”
Select “Backup Phone Data” and click “Next.” When the “Select data source” window appears, look through the “Contacts” and “Calendar/Tasks” scrolling lists and choose which data to sync. Click “Next” when you have chosen all the options you want. The “Sync Options” window appears and gives you the options of syncing your “Contacts,” “Calendars” and “Tasks.” Select one and a new folder appears.
To sync your contacts, select “Contacts.” You then have the option of syncing all your contacts or just a few. To sync all of them, select “Synchronize all your contacts.” If you only want to sync specific ones, select “Synchronize selected contacts” and choose which contacts to synchronize. Click the “OK” button.
Click “Calendar” to sync your RAZR’s calendar. From the options that appear, select “Synchronize all your events” to sync everything in your calendar or “Synchronize only” to select specific dates. If you selected “Synchronize only,” use the pop-up menus that appear to choose which dates to sync.
If you wish to sync your tasks, click the “Tasks” option. Again you have the options to “Synchronize all tasks” to sync all your tasks or “Synchronize only” to sync specific tasks. Use the pop-up menus that appear when selecting “Synchronize only” to choose which tasks to sync.
Whichever of the three options you choose, click “Next” when you are done. Click “Finish” and the “Synchronization” dialog box appears. From this dialogue box you can review the items you have chosen to sync. Once you are done reviewing them, click “Synchronize.” Watch the “Status” field to monitor the progress of the synchronization and click “Summarize” when it is done to see detailed results. Click the “Close” button to finalize the synchronization.
References
- Motorola.com - RAZR V3c Manual - https://www.motorola.com/mdirect/manuals/V3c_9496A74O.pdf
- Motorola.com - mobile PhoneTools User Guide - https://www.motorola.com/mdirect/manuals/mpt_complete.pdf
- windows.microsoft.com - What happened to the Run command? - https://windows.microsoft.com/en-US/windows7/What-happened-to-the-Run-command
- mobile PhoneTools image courtesy of amazon.com
- mobile PhoneTools screen image courtesy of 100celulares.blogspot.com
- USB port image courtesy of ladyada.net


