We take a look at the iPhone’s HDR photo capabilities and how to use them. Learn how the iPhone can be a great tool for HDR photography. Find out what features you will be able to use and how to utilize them with these tips and trick.
HDR Popularity
HDR is a popular new term in digital photography these days, but many consumers are still confused as to what it means. HDR stands for high dynamic range photography, which is where two images are combined that have different levels of light and composting them together to have a larger range of light and dark. The iPhone OS 4.1 has now allowed for iPhone HDR photography, which shows Apple’s commitment to the capabilities of the iPhone camera. This iPhone HDR feature is really only allowed on the iPhone 4 right now and not the iPhone 3GS , and should be standard on the iPhone 5 and all future models. Here are a few tips for using this new iPhone HDR photo feature.
Using the iPhone’s HDR
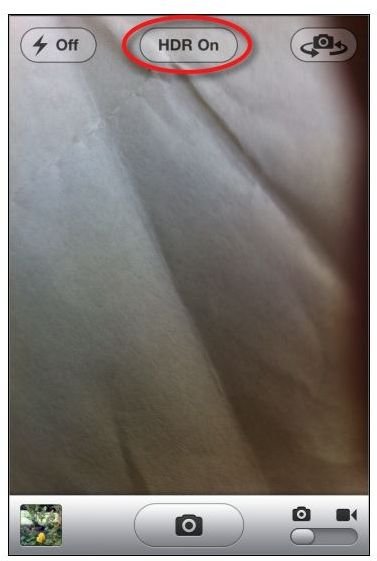
For those that have been using the iPhone’s camera , you will find that the option for the iPhone’s HDR is built right
into the iPhone’s camera interface. In the middle of the iPhone camera display there is an iPhone HDR On / Off button. The iPhone’s HDR feature essentially takes three different exposures that use different exposure settings and then combines them automatically for and HDR image. There will be an underexposure, a regular exposure, and an overexposure taken with the iPhone’s camera, they will then be combined into the final HDR image. If you have selected the iPhone’s HDR to the On setting then it will automatically do this, and then place the regular exposure and the iPhone’s HDR image into your Photo Album. Taking a HDR photo will take a little bit more time to process, but this is still easier than the normal process for creating HDR photography. What the iPhone’s HDR capability is going to be really great for is when there is a lot of variance in the light of an image where you would need different exposure settings on different areas of the image.
Realism
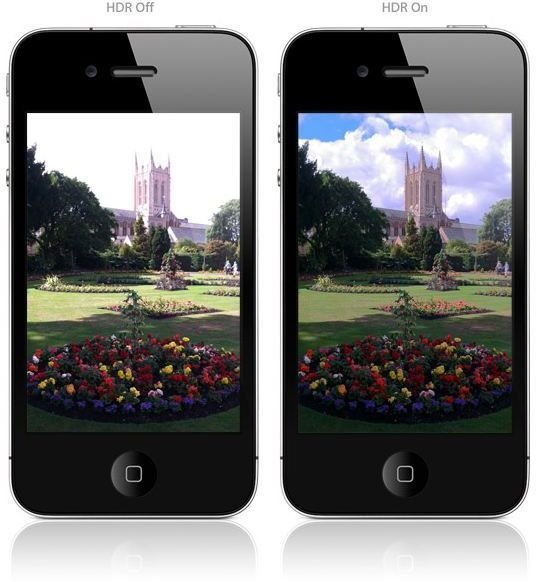
The idea behind HDR photography was to capture images that were more similar to the way the human eye sees, which is with a wider range from light to dark. To do this with the iPhone’s HDR photograph you will need to focus in on images that do have a variance in the amount of light between them, but are not so dramatic that they appear fundamentally different. If they do, then you are going to produce an iPhone HDR image that would not appear entirely natural in the appearance of an image, so if you are looking for realism in your iPhone HDR photography you should try to limit the range of difference between the utilized photos.
Saving Photos

When you are taking HDR photos with the iPhone you are going to notice that the default setting is to save both the

original base photos as well as the HDR photo that is created. This will be fine for most people as there is no reason to get rid of your regular photos if you do not have to, but this will also create dual files in your iPhone and will eventually limit your storage space. This can be turned off easily in the standard iPhone Photo settings , where you can find in the iPhone Settings right above Store and below iPod. There you can turn the “Keep Normal Photo” button to the Off position, which will stop the saving of both the standard exposure and the HDR photo.


