Need to know how to get your Facebook fix on your iPhone 4? This article will show you how to install Facebook on your iPhone, and give you some other helpful advice on using Facebook on your iPhone.
Before you can use Facebook on your iPhone 4, you first have to get it set up on your device. Fortunately, this is very easy to do. Here’s how to set up an iPhone 4 for Facebook.
Select the Apple App Store on the main screen of your iPhone 4.
Select the Search button (magnifying glass) at the bottom of the App Store window. Type Facebook in the search window and select Search. Select Facebook when it appears.
Press the Free button, and then install, at the top of the screen. Facebook will immediately begin installing on your iPhone 4. This can take a few minutes. When it is completed, there will be a Facebook icon on the main iPhone 4 screen.
How to Copy Contacts
The more time you spend on Facebook the larger your contact list becomes. You can merge this list with your iPhone 4 so you can have the contact list in one spot, so you will not have to log into your Facebook account to get the information. Fortunately, there is an easy method that allows you to copy your contact information from Facebook to your iPhone.
Press the Facebook application icon on your iPhone dashboard, and then press the Friends button.
Select the Sync option in the upper right-hand corner. Turn the Sync option on by sliding your finger to the right in the Syncing section. This option is what enables you to add your contact list to your iPhone.
Press the I Agree button once you’ve read the Facebook notice.
Press Contacts from your iPhone dashboard. You will see that you can now view your Facebook contacts.
How to Access Chat
There is a Facebook Chat app that you can use to chat with the people in your contact list in Facebook.
Tap the App Store on the iPhone main screen. Tap the Search button at the bottom of the screen and type Facebook Chat.
Tap the app when it appears on the screen. This app is completely free. Tap the Install button, and then enter your iTunes account username and password. Allow the app to finish downloading. This will only take a few minutes.
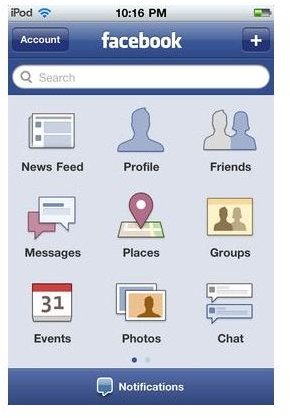
Tap the Facebook icon on the iPhone home screen to open Facebook. Click the Chat menu option to use Facebook Chat.
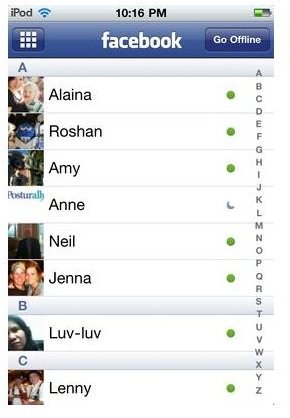
Use your fingers and swipe downward or upward to go through the list of contacts. To select a contact to chat with, tap their name. If a user has a green dot next to their name, they are currently online either on a computer or mobile device. If a contact has a half-moon icon next to their name, this user is idle.
An instant message (IM) window opens when you tap a contact’s name, addressed to them.
Enter your chat message and then click Send.
Return to your Facebook chat contacts by tapping the Chat button in the upper left-hand corner of the screen. Your buddy list returns and you can then send other people chat messages.
If you want to turn off Facebook Chat follow these instructions:
Open your Facebook Chat contact list from your iPhone. Click the Go Offline button in the upper right-hand corner of the screen. To go back online, simply tap the Go Online button
Send Photos to Facebook From iPhone
You can also send photos straight from your iPhone to your Facebook wall. These photos will also be stored in your Mobile user albums in Facebook. To send photos to Facebook from your iPhone follow the steps below:
Tap the Facebook icon on the iPhone’s main screen to open Facebook. Tap the camera icon located at the top right corner of the screen.
You will be asked to either take a photo to upload, or choose an existing photo already stored on your device.
If you select Choose Existing Photo, you will be taken to the stored photos on your iPhone where you can choose a photo to upload to Facebook. When you select a photo, you can write a caption if you want, then tap the Upload button. The photo will then be posted to your Facebook wall. It will also be automatically added to your Mobile Uploads album on the Facebook Photos tab.
If you choose to take a photo now to upload, the camera function on the iPhone will be enabled and allow you to take a photo. Once you take the photo, tap the Use Photo button. Once you tap the Use Photo button, follow the steps above to send the photo to Facebook.
Hopefully you have learned how to set up iPhone 4 for Facebook, and can now enjoy Facebook while on the go.
References
- Facebook, https://www.facebook.com/help/?page=18834
- Author’s own experience.
- Screenshots by author.


