Excite email used to offer email access on iPhone for their gold subscribers. Now that the company has been taken over by BlueTie, the tutorial has been modified for a BlueTie account.
Although, Excite mail is no different than any other mail service like Gmail, Yahoo Mail, etc. you may still be amazed by the features and tools provided by the new Excite e-mail. In this article, I will guide you on how to configure Excite mail on your iPhone 2G, iPhone 3G, iPhone 3GS or iPhone 4 .
Note: A reader has informed us that Excite Gold Mail is no longer being offered. It appears that the company has been bought by BlueTie. The following instructions have been modified to set up your BlueTie account on your iPhone.
Guide to Setting up BlueTie Mail on iPhone
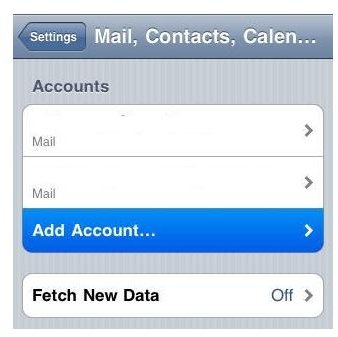
Step 1: Make sure to connect your iPhone to the Internet. Tap the Settings icon present on your iPhone Springboard to launch the Settings window.
Now, scroll down to select “Mail, Contacts, Calendars.”
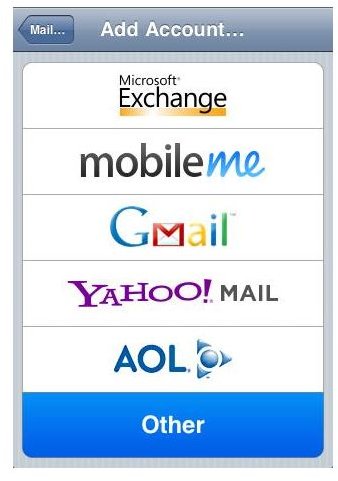
Step 2: In the “Mail, Contacts, Calendars” window, tap on Add Account… In the Add Account window, tap on Other.
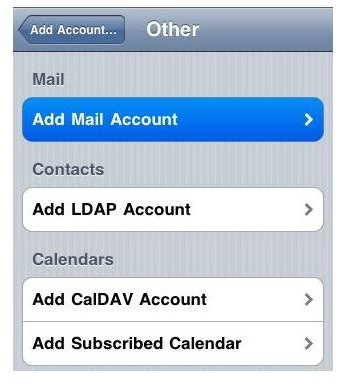
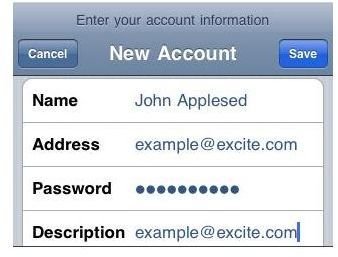
Step 3: Now, on the “Other” window tap on Add Mail Account. On the next window, you will be asked to enter your BlueTie mail account details like name, address, password and description.
After you have entered the above details, click on the “Save” button located on the top-right corner of the screen.
Step 4: After you tap the Save button, you will be taken to the ‘New Account’ window where you need to add incoming and outgoing mail server settings for your mail account.

Tap on POP and under Incoming Mail Server settings, provide the following information:
Host Name: Type the host name: pop.bluetie.com
User Name: Type your email address here.
Password: Type your BlueTie mail password.
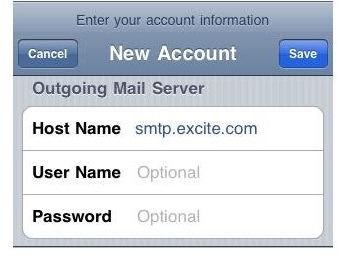
Similarly, you need to add the Outgoing Mail Server settings as follows.
Host Name: Type the host name as smtp.bluetie.com
User Name: This is an optional field and may be left as it is.
Password: This is an optional field and may be left as it is.
Step 5: After you have provided all the details mentioned above, tap on the Save button located on the top-right corner of the screen. After you tap on the Save button, you should notice a message on the top that reads, “Verifying POP Account Information…”.
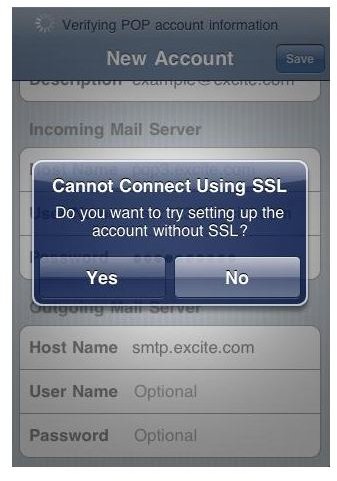
If your iPhone is not connected to the Internet, you will see an alert that says, “Do you want to connect without SSL?” Even after this, if an Internet connection is not detected on your iPhone, you may receive an error that says, “Cannot verify the account information.”
After the account has been successfully verified, you may use your BlueTie email account on your iPhone. That’s all there is to setting it up!
Images Credit: iPhone screenshots provided by author.


