In this article I will show you how to create a new UI element using the predefined Android elements we have available. After that, we will add new attributes to this element so we can improve our widget functionality.
Introduction
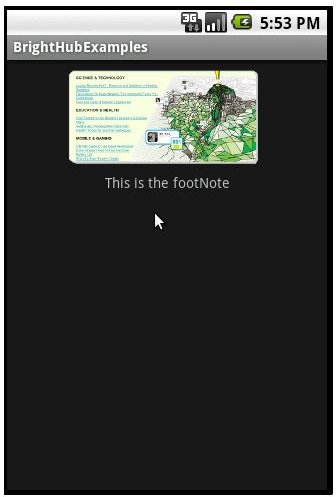
Sometimes, when we are coding our Android application UI, we realize that we can create more complex elements, nor just a image here, or some text there. What if we could create a single UI element that is an image and has text as a footnote? And if we go a bit further… what if we add the following functionality to the image, when you long click on it, a short message appears on the screen. And all this in a single UI element. Lets start!
Creating a new UI element
We need to code a little bit to achieve our goal, but at the end, it will have been worth the effort, because you can re-use this new element in your application.
First of all, let’s create the base layout of our new element. In this example I’m going to create a complex UI element with an ImageView and a TextView as a footnote. So this is the code:
<RelativeLayout xmlns:android=“https://schemas.android.com/apk/res/android"
android:layout_width=“wrap_content” android:layout_height=“wrap_content”>
<ImageView android:layout_width=“wrap_content”
android:layout_height=“wrap_content” android:id=”@+id/image"
android:layout_centerHorizontal=“true”>
<TextView android:layout_width=“fill_parent”
android:layout_height=“wrap_content” android:id="@+id/footnote"
android:text=“None Footnote” android:gravity=“center”
android:layout_below="@+id/image">
I have created a bright_image.xml file inside the /layout folder. As you can see in the xml, it’s just an image above some text. That simple.
Now, let’s work on the Android code part. I have created a class called BrightHubImage.java that extends LinearLayout and it has the following constructors:
public class BrightHubImage extends LinearLayout{
public BrightHubImage(Context context) {
super(context);
LayoutInflater inflater = (LayoutInflater)context.getSystemService(Context.LAYOUT_INFLATER_SERVICE);
inflater.inflate(R.layout.bright_image,this);
}
public BrightHubImage(Context context, AttributeSet attrs) {
super(context, attrs);
LayoutInflater inflater = (LayoutInflater)context.getSystemService(Context.LAYOUT_INFLATER_SERVICE);
inflater.inflate(R.layout.bright_image,this);
}
}
We have to take care of both constructors, the first one is used when we haven’t added new attributes to our element, and the second one is used when we add new attributes to our UI element. We are going to focus on the second constructor. You will see why in the following paragraphs.
What is that inflate thing? It’s like saying “We are going to get the content of the bright_image.xml layout file, and we are going to add it to this layout class” so we have a Layout class called BrightHubImage with the layout brigh_image I have created in the very first moment.
Now, how do we use this new element we have created? Here it is: this is the main.xml file,
<LinearLayout xmlns:android=“https://schemas.android.com/apk/res/android"
xmlns:bright=“https://schemas.android.com/apk/res/com.bright.hub"
android:layout_width=“fill_parent” android:layout_height=“fill_parent”>
<com.bright.hub.custom.BrightHubImage
android:layout_width=“fill_parent” android:layout_height=“fill_parent”>
</com.bright.hub.custom.BrightHubImage>
As you can see, here there is a couple of new things:
xmlns:bright=“https://schemas.android.com/apk/res/com.bright.hub"
and the
<com.bright.hub.custom.BrightHubImage
With the xmlns line, we are adding the com.bright.hub package to our namespaces so Android can recognise UI elements we create in our packages. (you can see your package name in the Android Manifest).
The com.bright.hub.custom.BrightHubImage is our element. We have to place the full path of our custom layout so Android parser finds it.
So, we have here the basics to create a custom UI element! Now let’s continue with this example adding new attributes to our BrightHubImage element.
Adding new attributes
We are going to add 3 new attributes to our BrightHubImage element:
- A string attribute with the text that is going to be placed in the footnote: footnote_string
- A string attribute with the text to appear in a toast when a long click is done: message_string
- And a drawable with the image that is going to be shown: brigh_image
For the purpose of adding new attributes, we have to create a file in the /values folder called “attrs.xml”. This file will contain the following code, according to the attribute described above:
We have declared the bright_image as an integer because it is going to be the id reference in the R.java class. Remember that all the resources are identified as integer.
Now, in the main.xml code, we are going to put these attributes in our custom element:
<com.bright.hub.custom.BrightHubImage
android:layout_width=“fill_parent” android:layout_height=“fill_parent”
bright:message_string=“This will be shown in a toast”
bright:footnote_string=“This is the footNote”
bright:bright_image="@drawable/bright_hub_image”>
</com.bright.hub.custom.BrightHubImage>
Remember that we used the xmlns:bright namespaces at the top of the xml file, now we are referencing those namespaces with “bright:message_string”. These are our attributes, not Android ones.
The attributes are defined, but what do we do with them? Where do we use them? Let’s go back to the BrightHubImage.java file in our Android code: The following lines are going to be the most important parts of the code to make this work, don’t worry because the full source code is available and you can check how it’s done more clearly.
One of the functionalities we wanted was:
- When you do a long click on the image, a toast message should appear.
So, in your LinearLayout we implement the onLongClickListener:
public class BrightHubImage extends LinearLayout implements OnLongClickListener
This will force us to create the method..
@Override
public boolean onLongClick(View arg0) {
return false;
}
I’m going to add the following objects, we will need them in the code:
private CharSequence toastMessage;
private CharSequence footNoteMessage;
private Drawable image;
private Context cxt;
private TextView footNoteText;
private ImageView brightImage;
We are going to focus in the attributes constructor (the one with the AttributeSet attrs input), here we will add the following code lines:
this.setOnLongClickListener(this);
cxt = context;
Setting ourselves as listeners of the incoming long-click events and the context from our application.
footNoteText = (TextView) findViewById(R.id.footnote);
brightImage = (ImageView) findViewById(R.id.image);
initializing the elements inside the BrightHubImage. We need them because we are going to change their inner attributes.
TypedArray styleAttributes = context.obtainStyledAttributes(attrs, R.styleable.BrighHubImage);
toastMessage = styleAttributes.getString(R.styleable.BrighHubImage_message_string);
image = styleAttributes.getDrawable(R.styleable.BrighHubImage_bright_image);
footNoteMessage = styleAttributes.getString(R.styleable.BrighHubImage_footnote_string);
And with these lines of code, we obtain the attributes from our custom element and store them in the object I created above.
Now, in the toastMessage object we have the string from the:
bright:message_string=“This will be shown in a toast”
in the image object we have the drawable from
bright:bright_image="@drawable/bright_hub_image” (the bright_hub_image was added by me to the drawables image, you can use the image you want)
and in the footNoteMessage object we have the string from
bright:footnote_string=“This is the footNote”
Well, let’s place these values in the right elements:
The image object will be the background of our inner “brightImage” ImageView and the footNotemessage will be the text of our inner “footNoteText” TextView from our bright_image.xml element.
footNoteText.setText(footNoteMessage);
brightImage.setBackgroundDrawable(image);
The last line of code will be placed inside the OnLongClick:
Toast.makeText(cxt, toastMessage, Toast.LENGTH_LONG).show();
we show a toast with the text form the bright:message_string attribute when we do a long click.
Full source code
You will find the full source code of this functionality here .


