Android camera users have a wealth of cool photography apps at their finger tips - Time-Lapse - Lite can be used to capture fantastic time-lapse clips from nature scenes to bustling cities!
The Magic of Time-Lapse Photography
From city scenes to close-ups of plants or clocks, time-lapse photography regularly appears on television and in movies, most commonly as an establishing shot.
Traditionally, a time-lapse camera would be a movie camera set up to record based on a predetermined interval, such as capturing one frame per minute. Given that the eye sees 28 frames of still images per second as a moving picture, 28 frames would offer 1 second of motion.
The results of time-lapse photography are stunning, and are often seen as shots of the clouds moving across the sky, or flowers opening, moving and closing as the time passes.
Using Time-Lapse Lite, you can turn your Android camera into a mobile time-lapse studio!
Install Time-Lapse Lite for Android
Offering a resolution of 176x144 to 2048x1536 with playback rate up to 30 fps (if the full, non-Lite version is purchased for $2.49), Time-Lapse Lite for Android can be quickly downloaded and installed from the Market (you can also find it on AppBrain.com ).
Once installed, your app is ready to capture any subject over a specified period of time. The results of any time-lapse capture can be stunning, and help us to see the world in an entirely different light; as such, a suitable mobile phone tripod will come in extremely useful for lining up the initial image.
Choosing a Subject
Depending on your location, your subject might be obvious or a complete mystery.
For instance, if you live near a beach, you might setup your Android camera to capture the motion of the tide; if you live somewhere with a beautiful, regularly clear night sky, you might position your phone to capture the motion of the heavens as our planet spins through space.
Or you might choose something closer to home – a new flower or plant bought for the house, or perhaps an interesting scene of people moving to and fro, such as in a shopping mall or exhibition center. Framing your subject is also important, so take a few moments to consider how the finished scene will look.
I recently captured a time-lapse scene on my Android camera of some work colleagues - you can see the results on YouTube .
Using Time-Lapse - Lite with Your Android Camera
With your subject chosen and your camera fixed to a tripod or securely positioned in some other way, you will be ready to start the time-lapse capture.
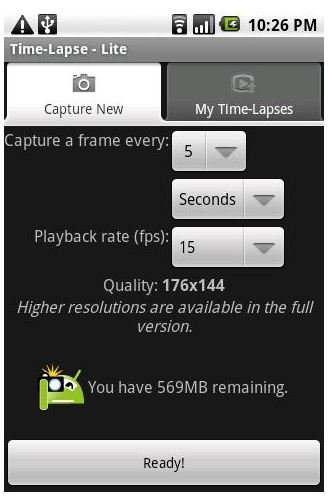
When you run Time-Lapse – Lite (or the full version) for the first time, you will be given a set of options to choose from, allowing you to determine the resolution, capture rate and playback rate. To begin with, I would recommend sticking with the defaults, even if you have experience with time-lapse photography as the results from a mobile digital camera may be quite different to those you have experienced with other devices.
Via the Ready button, you can setup your shot by positioning your camera precisely in relation to the subject. Finally, press Start – the camera will continue to capture images based on the capture rate (the default is every 5 seconds) until you press the Stop button.
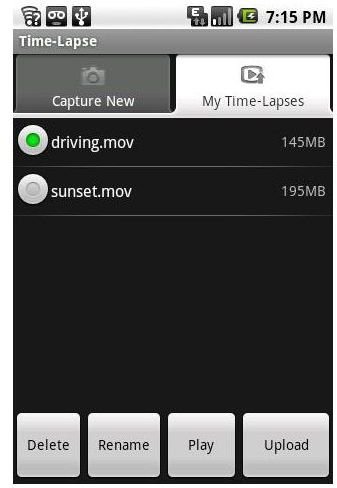
And that’s it! You should find your capture in the My Time-Lapses list, where you can choose to Play it back to view on your phone, or Upload to YouTube!


