Do you want to know how your application is used by people? What buttons are pressed most to improve usability? Using Google Analytics Library will help you find out these things and more!
Google Analytics Android Library is really useful if you want to improve your application usability. I have been working on a complex application for some time, an application with more than 50 activities, and thousands of events. With the Analytics library we can discover:
-How often users go in to a certain page.
-How many clicks there are on a certain button.
This way, you can improve the most-visited-pages or change the user interface to make other less-visited-pages more attractive. Just like in a web page!
First of all we need the Google Analytics library for Android. We can find this file from the following link:
Google Analitycs SDK for Android download link
If we decompress the downloaded file, we will find 3 files and a folder in it. In the folder, you can find an example of how to use this library. The .jar file is the one we are going to add to our Android project.
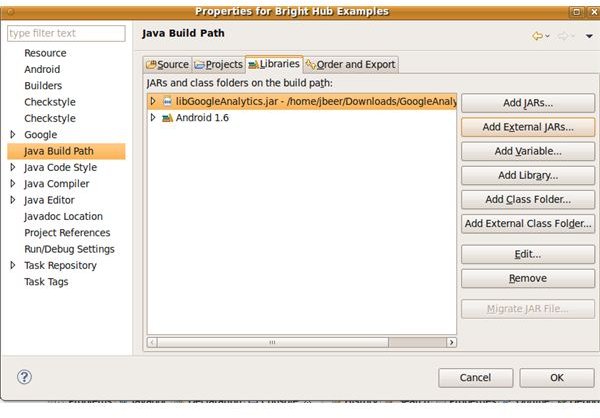
So, in Eclipse, we click on the Properties of our project (Right click on the project name, then select “Properties”), and then click on the “Java Build Path” label. Here you have to click on the tab called “Libraries”.
This is the place to add external libraries to your Android project. Now click on “Add External JAR”, search for the libGoogleAnalytics.jar we have decompressed before and select it.
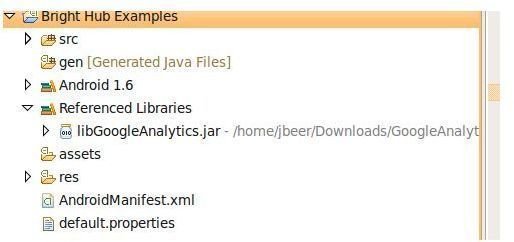
Now, the project folder should look like this:
This is on the phone side. To make this work, we need to create a Google Analytics account , place a fake URL in the account, something like “https://brighthubexample.android.mobile.com ”, once you have it, you will receive a unique ID, something like UA-12345678-1. We will use this ID when coding the functionality in our application.
Using the library in your Android application can not be more easy. First of all, you will need to create an instance of the Google Analytics tracker:
exampleTracker = GoogleAnalyticsTracker.getInstance();
where “exampleTracker” is an object from the class GoogleAnalyticsTracker:
private GoogleAnalyticsTracker exampleTracker;
and we have to import
import com.google.android.apps.analytics.GoogleAnalyticsTracker;
Well, once we have instantiated the analytics tracker, lets initialize it with the ID we received when we created the analytics account. We can initialize it in two ways:
exampleTracker.start(“UA-12345678-1”, this);
and
exampleTracker.start(“UA-12345678-1”, 50, this);
Remember - UA-12345678-1 → fake code, you have to place your own.
The first line of code is like “Ok, initialize the tracker and I will dispatch the info I gather manually… by code” and the second code is like “I will start the tracker but in 50 seconds I will dispatch the info I have gathered”.
Use whatever you need.
Recommendation! - If you are going to use the tracker all over your application, you should consider creating it as a static object, so you can access it from every class.
How do we use the tracker? Here are the two examples of use:
exampleTracker.trackPageView("/AnalyticsExample");
exampleTracker.trackEvent(“Clicks”, // Category
“On Image”, // Action
“Some image in my App”, // Label
1); // Value
The first code tracks a “Page View”. You can place the tracker at the beginning of your activities, you can know how many times users have gone through that page. Try to put the most specific label on that tracker, in my case I have put “AnalyticsExample”, because that’s the name of my activity.
The second code tracks events. “Clicked on this image/button/spinner…”, “Errors occurred” “Times ‘home-key’ is pressed”. The inputs values of these methods are ways to identify the event. You can create your own “convention”.
Finally, if we have not started the tracker using the timer, we need to dispatch the data:
exampleTracker.dispatch();
Google Analytics library internally stores the information in a database, when you dispatch the info, the data from this store-place will be sent to Google Analytics servers. You will have to wait 24 hours to see results, so don’t be impatient!
One more last thing we have to do is add the following permissions to the Android Manifest of your application:
If we don’t add them, the library won’t connect to the internet and no data will be sent.
The code of the Activity I have used in this example is here . This is JUST THE MAIN ACTIVITY, the full project code is irrelevant to explain the example (less the Manifest file, but it’s not hard to understand).


