In this how-to-guide for Google Android we will learn how to create a simple calculator application using knowledge obtained from my past Google Android Programming How-To-Guide Articles.
Calculator UI
First of all, we are going to design the UI in XML. We can do it “by hand”, without any external help, or we can use DroidDraw .
This time, we are going to use DroidDraw, this way we can see how the XML is going to be built. In future applications we can create the UI writing by ourselves if we feel capable of it.
Let’s start by drawing our Calculator. It is going to be a simple one, so the basic operations will be fine.
First of all, we are going to use for the Layout an “AbsoluteLayout” (We can change it in the slider above the mobile-screen panel). We use this Layout because with it we can place each object in an absolute position on the screen, this will be more easy and useful in this first application.
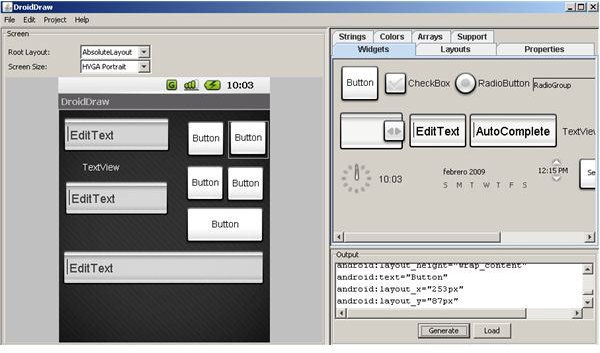
Next, we are going to place the operation buttons. Drag the “Button” Widget from the right panel and drop it in the left panel. We repeat this as many times as we need, in this case I’m going to use 5 buttons, one for each basic operation (“+”, “-“, “x”, “/”) and another for the “solution” (“=”).
Once this is done, let’s place the elements that are going to hold our numbers. This widget is an “EditText”. Drag it from the right screen and drop it in the left one. We are going to drag three “EditText”. I’m going to place a “TextView” between two of the “EditText”, just for “Learning” purpose. We can now see what this element is for.
This is how the screen would look:
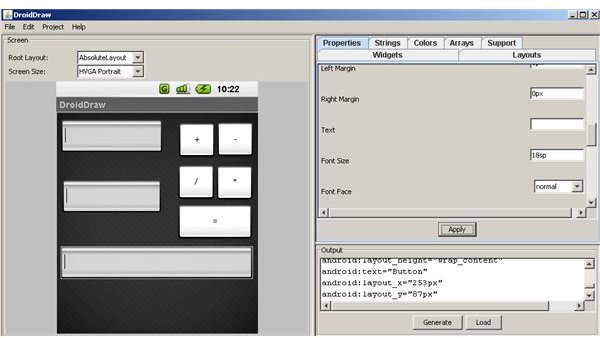
Now, let’s put the correct values to the widgets. For that, we click on the “Properties” tab on the right panel. And for each widget we set the following values:
“Id” -> We have to assign a unique value to this property. This has to be something easy to remember and identify because we are going to use it in the Java code, so “@+id/widget34” is not very useful. The “@” indicates that the XML parser should parse and expand the rest of the ID string and identify it as an ID resource. The “+” means that this is a new resource name that must be created and added to our resources in the R.java file. So, we are going to put more adequate names to our widgets.
“@+id/plusbutton” for example could be one valid name for the “+” button. We set the others Widgets “ID” properties in the same way. Use something easily identifiable.
Other Property we must change is the one with the “Text” label. Here we have to put the value of the text that its going to be inside the (in this case) buttons. In the Plus Button lets put a “+”, in the minus one a “-“and so on. The EditTexts and TextView “Text” property is going to be empty.
The final screen would look like this:
If we want, we can set the size of the elements changing the “width” and “height” Properties. Play with this to see the effect in the screen panel.
Once we have the elements the way we like them, we can generate the XML code of this UI by just pressing the “Generate” button in the “Output” panel. At this point the XML code will be shown. We can now copy this code and use it in our project…
We’ll cover the next steps in the next article.
Follow up
If you want to know when new articles are released, subscribe yourself to the Google Android RSS Otherwise, you can follow my research, articles and work in my professional twitter: jbeerdev
This post is part of the series: How to- Develop Applications on Android: Simple Applications
In this 5-articles series we will see how to create simple applications, using the tools and knowledge we have acquiredfrom others articles.


