If there is something that almost all Android applications have in common it is the preferences screen. Here you can change the settings of the application. This article will explain how to create these kinds of screens and how to handle the preferences through the application.
Creating a preferences screen in your application like the ones you can find in your Android OS, or in most applications, is really easy. Android provides us with a very powerful system to create these kinds of screens with almost no effort. If you already know how to create standard screens, this is not more difficult. Let’s go deeper.
Preferences screen using XML
How is your preference screen going to look? What elements do we need? The first step is designing the screen, and we are going to use XML for that. I will give you useful pieces of code so you can build your own preferences screen according to your needs.
In a common Android screen we can find “LinearLayouts” or “RelativeLayouts” as elements containers. Here, looking at the preferences screen, we will find two kinds of containers:
PreferenceScreen and the PreferenceCategory
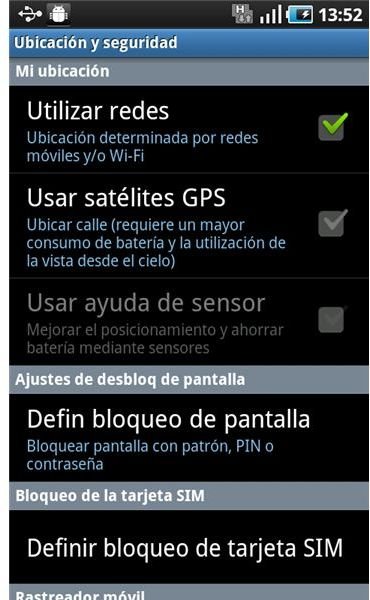
The PreferenceScreen tag is the parent container, for every different screen we will have one of these containers. On the other hand, the PreferenceCategory tag is used to create divisions in the screen by category, for example. Here in the following image you can see the divisions I was talking about:
Every gray row is a different category you can define using the PreferenceCategory tag:
<PreferenceCategory android:title=“First category”>
… put whatever preference element here.
What about the inside elements? Here are some examples:
If you want to add a checkbox in your preference screen, like this one:

The code you need to add to the XML is the following:
<CheckBoxPreference android:title=“Checkbox”
android:defaultValue=“false” android:summary=“This can be true or false”
android:key=“checkboxPref” />
Here we can see the most useful tags in a preference element:
- android:title → Obviously, this text gives the title to the preferences.
- android:defaultValue → This is the default value of the current preference, in this case it is false because we are in a true/false value preference.
- android:summary → This text gives the user a little more information about the preference.
- android:key → Very important tag, this is the identifier value of the current preference. Using this key we will be able to work with the preference within the application in our Android code.
Let’s see some more preferences elements:
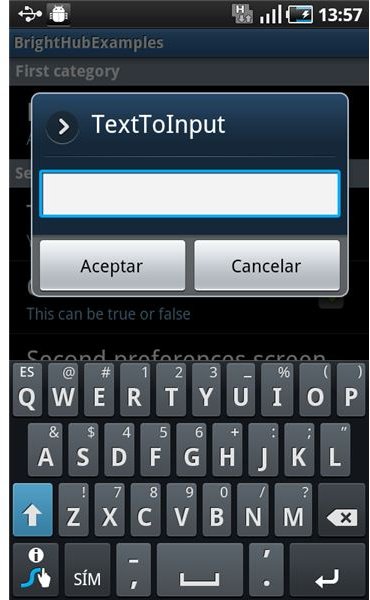
This is an editable preference, you can store here any text value you want.
<EditTextPreference
android:summary=“You can input text here” android:defaultValue=“Empty”
android:title=“TextToInput” android:key=“editTextPref” />
Again, here we find the same tags as above.
The list preference like the following one:
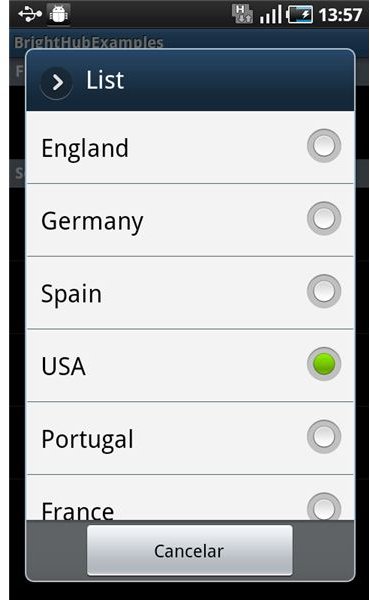
is coded as follows:
<ListPreference android:title=“List”
android:summary=“Array preferences selection” android:key=“listPref”
android:defaultValue=“USA”
android:entries="@array/user_country_labels"
android:entryValues="@array/user_country_labels" />
The list is filled with predefined arrays (created in arrays.xml).
A curious preference element, is the “Ring tone selector”:
<RingtonePreference android:name=“Ringtone”
android:summary=“Select a ringtone” android:title=“RingTones”
android:key=“ringtonePref” />
This code will allow a user to select a ringtone from the available tones in the phone and then stores it in that preference value.
Creating new preference screens
Creating separate preferences screens inside the parent one is possible too:
<PreferenceScreen xmlns:android=“https://schemas.android.com/apk/res/android">
<PreferenceScreen android:key=“SecondPrefScreen”
android:title=“Second preferences screen”>
…PrefernceElements
This way we have a second and separate preference screen inside the root one. This can be helpful when we want to separate the preferences even more than using categories. Think about the Android OS preference screen, it is a great preference application, with lots of different sections, flows and branches, if you have a big application, this can be useful.
Binding preferences screen with an Activity
Once we have our preference user interface created, we need to bind it to an Activity to make it work. For this purpose we need to create a class that extends from PreferenceActivity
public class PreferencesActivity extends PreferenceActivity
and in the “OnCreate” method, we add the following line:
addPreferencesFromResource(R.layout.preference_screen);
where “preference_screen” is the file name.xml of the user interface we created in the first instance. That’s it, you have your preference XML code binded to your activity.
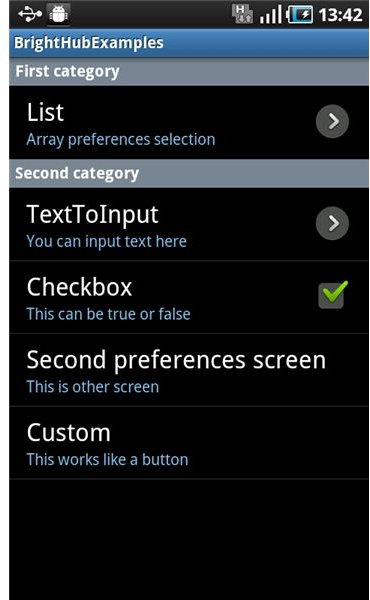
If you run your application it should look like the following:
HINT! - Remember to add the Activity to the AndroidManifest.
And… what about using these preferences in our application? All the values we have set in the preferences screen are persistents, this means that they are stored inside the phone memory and are not erased until you remove your application. When you select “wifi on” in your device, the Wi-Fi is still on, even if you restart the phone, isn’t it?
Getting the application preferences is as simple as:
SharedPreferences prefs = PreferenceManager.getDefaultSharedPreferences(getBaseContext());
String listPreference = prefs.getString(“listPref”, “USA”);
String editTextPreference = prefs.getString(“editTextPref”,“Empty”);
creating a “sharedPreferences” object and getting the different preferences using its unique key (listPref, editTextPref….).
Easy and very useful.
You can find the full source code of this example inside the BrightHub Android Code Git Repository .
References
- Source: author’s own experience.
- Android developers web page, https://developer.android.com
- Screenshots by author.
This post is part of the series: Android Persistence
A serie of articles with code and examples of how to use persistence in your android application.


