So you want to have your visitors record their presence on your website but have no idea on how to write the HTML source for a guestbook? You need not worry: This tutorial will show you how to get your guestbook up and running in no time.
A guest book can be a great way for your website visitors to make a permanent impression on their presence on your website without being too intrusive. Before you start thinking about the HTML source for a guestbook, you need to decide how you want it to flow and how you want it look. In this case we will look at a guestbook that places a form for users to sign at the top. Below that there will then be a list of all the comments posted by the readers.
The HTML Source Code
The HTML source for our guestbook will consist of a web form and a list of DIV containers which will hold the display for the signed comments. The Part of the code that will handle the form is a simple as this.
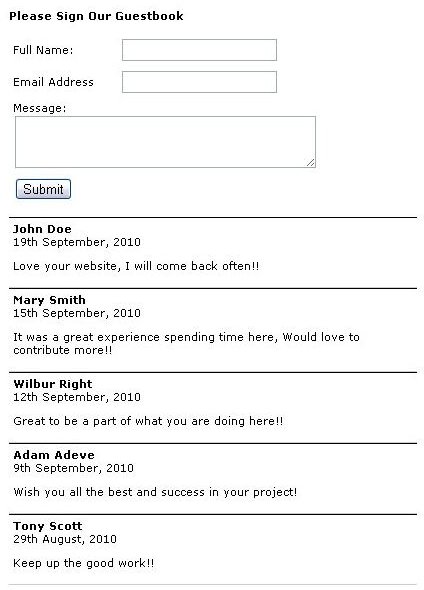
Please Sign Our Guestbook
Right below the form, we will place the comments for other users that have already signed the guestbook and that HTML that handles this looks somewhat like this.
19th September, 2010
Love your website, I will come back often!!
15th September, 2010
It was a great experience spending time here, Would love to contribute more!!
Wilbur Right
12th September, 2010
Great to be a part of what you are doing here!!
Adam Adeve
9th September, 2010
Wish you all the best and success in your project!
Tony Scott
29th August, 2010
Keep up the good work!!
The effects of placing these two pieces of HTML code on your Guestbook webpage would be as illustrated in the image shown above on the left.
Making It All Work
As is the custom with HTML, it is not too functional on its own as HTML was designed primarily as a way to handle displays of text and images. To solve this problem, we need to implement some server-side code to process the data collected by the guestbook form. This server-side code could be in any one of a number of programming languages such as PHP, ASP .NET, JSP, or Ruby. Since programming in these languages is beyond the scope of this article, I’m going to use generic, “pseudo” code to represent the server side code and give you an idea of how it might look.
connect to database
if(form submitted){
insert data into database()
}
read all guestbook entries from database and order by date descending
while(database entries exist){
// display entires in this format
print: “
$date$
$message$
}
close connection to database
The pseudo code above simply makes a connection to the database where the data is stored. It then checks to see if the guestbook form has been submitted. If it has, it then enters the data into the database.
The next thing the pseudo code does is read all the guestbook entries from the database and display them to the user right under the web form giving the result as seen in the image above.
Conclusion
There you have it. The HTML source for a guestbook does not get any simpler than that. Guestbooks are one of the easiest and most basic dynamic pages you will ever implement on your website. Of course the guestbook can be styled further and more complex modes of operation and data validation can and should be used to suite the flow of your website. Whichever way you choose to implement the guestbook, the basics as described in the pseudo code remain the same.
You can find other articles on how to add a guestbook to your site using dreamwaver here and more tips on diving into web development .


