
Tired of that boring solid color background in Dreamweaver? Looking for something a little less boring? This Dreamweaver tutorial on background images will teach you three different ways to insert images as backgrounds.
Version of Dreamweaver Used in this Tutorial
Dreamweaver has been known for streamlining simple processes like adding images, changing font face and color, and changing the way links work. However, Dreamweaver also has streamlined the process of adding background images. In this tutorial, I’ll be using Adobe Dreamweaver CS5 , but this will work the same for older versions of Adobe Dreamweaver.
Image Compatability & Seamless Tiling

Make sure that you have a background image that is saved as a JPEG or GIF or PNG. When using PNG images, browsers such as Internet Explorer occasionally have a hard time displaying them, so if you are worried about 100% compatibility, use a GIF or JPEG. If you are going to tile the image, you need to make sure that it will tile seamlessly. When an image tiles seamlessly, you cannot tell where one part of the image begins and the next part ends. Here I am using a 14px by 14px carbon fiber texture.
Opening the Appearance Section of the Page Properties Menu
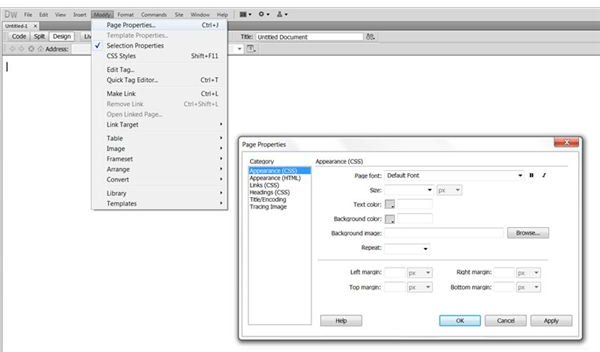
Open Dreamweaver and either create a new HTML page, or open an existing HTML page that you would like to add a background image to. In the menu bar, click on “Modify” and then select “Page Properties”. This will open a menu in the center of your screen. In the side menu, select “Appearance (CSS)”.
Click any image for a larger view.
Inserting your Background Image
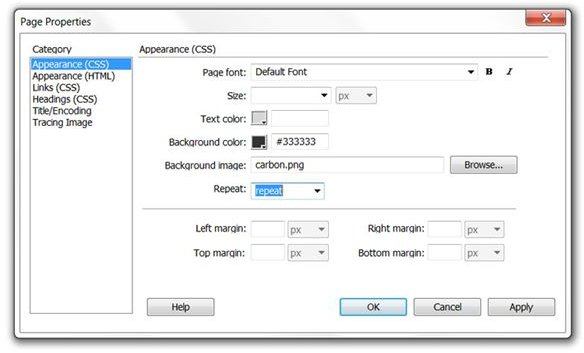
Click “Browse” next to the box that says “Background Image”. Locate your desired background file and double click it. If you wish to also have a solid color background which will show up while your background image loads, you can enter the hexadecimal code (or find it in the included color picker) into the “Background” box above the “Background Image” box. If you are tiling the image, select “repeat” in the “Repeat” box. When you are finished, click OK.
Previewing Your Page
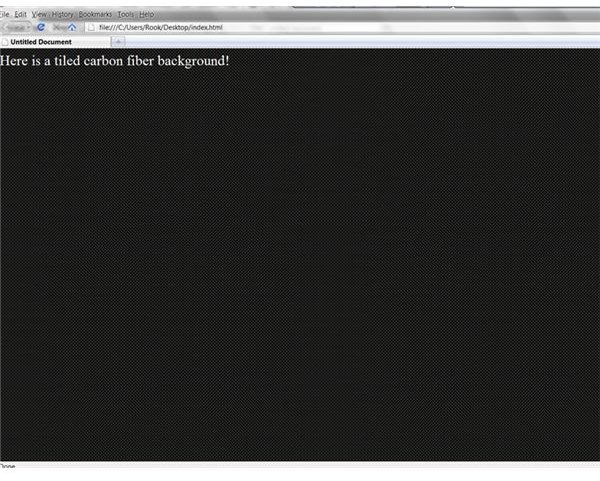
If you want to preview how your page will look in your browser, save your file, and after you are done go into “File” and select “Preview in Browser”. From the drop down tag, look for the browser you would like to preview your page in. Select it. You should now see how your page looks in your favorite browser!
Tiling Backgrounds on Horizontal or Vertical axis
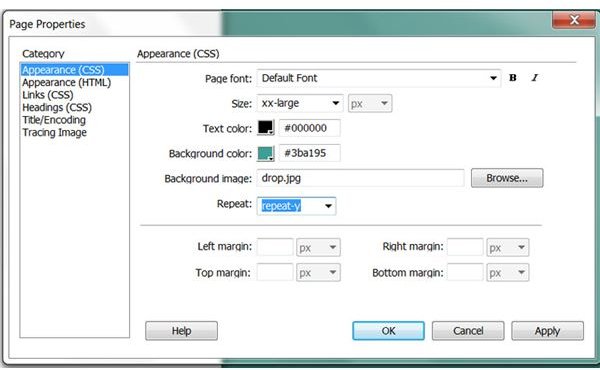
Sometimes, you may want to tile your background only horizontally or vertically. In these cases, you will select an additional option in the modify “Appearance (CSS)” screen. Here, I am using an image that is 1024px by 1px to create a simple three column layout. Like before, you want to open the Modify Page Properties Menu, and make sure you select “Appearance (CSS).” Locate and insert your file, set a background color if wished, and in the box where it says “Repeat” select “repeat-y.” This will cause your image to repeat only on the Y - or vertical - axis. If you wish for it to repeat horizontally, simply select “repeat-x”.
Preview Your Axis-Tiled Background
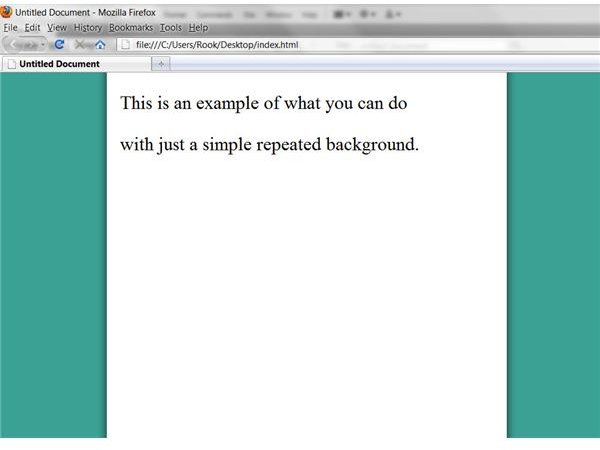
Just as before, save your file and select the “Preview in Browser.” This will show you what other users are going to see when they view your website. As you can see, we are left with a clean and simple three column background that tiles seamlessly, and because of its size it loads very quickly.
Adding Background Images Directly with HTML
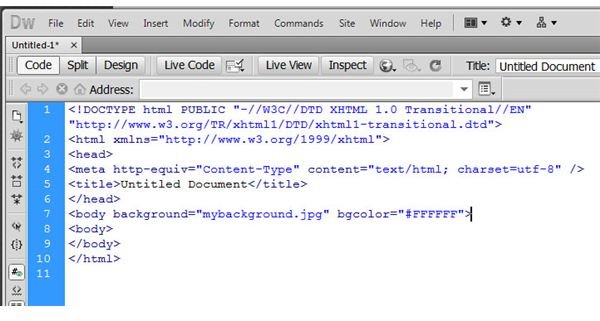
Adding a background image in simple HTML is also an option. To do this, simply open the code tab of Dreamweaver and enter the following line of code after the tag:
If you’re looking for both a colored background and a background images, allowing you to display a colored background while your background image loads, simply open the code tab again, and enter the following line after the tag:
Just be sure to change the #FFFFFF with the hexadecimal color code you would like to use.


