As a kid, you may remember reading books that required you to choose all the actions a hero takes or playing a click-adventure game on a computer. By setting up a format that works similar to a basic website, you can create a very simple game that your players can navigate and hopefully win!
Come up with a basic storyline
You might want to think about the basic points before you begin creating your story. What kind of setting are you planning? Maybe the dark woods, a spooky haunted house, or an abandoned carnival would suit your tastes. Pick something that provides a little bit of mystery and provides downfalls for your heroes. Plan out the objective. Do you need to find the villain and defeat him? Do you simply need to escape? Maybe you need to rescue a fair maiden in the castle! Make sure you only have one or two ways to beat the game - you don’t want it to be too easy after all!
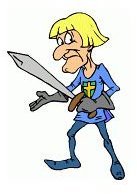
Image Credit: Hasslefree Clip Art
Provide images if you want
Providing images will give a nice visual flare to your game, as well as provide your reader with more insight as to what is happening. You can find free images on the Internet to help tell your story, or illustrate your own and use those. Remember that there have been very popular text-based games that used absolutely no images, which forced the player to imagine what was going on, just like a really good book. If you do not want to use images, be prepared to provide a little extra detail while you are writing to draw your player in.
Choose your program to create in
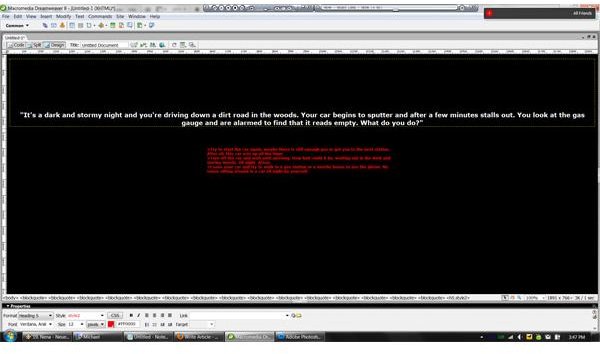
You can use any HTML editing program you would like to create this scenario, including Notepad. I’ll be using Macromedia Dreamweaver 8, because it’s what I have handy. Any HTML editor with a WYSIWYG editor is very useful, as it prevents you from having to hand-code lengthy parts of the game. If you’re not sure where to find an HTML editor, take a look at this list of web development programs .
Set up your color scheme
Picking out a color scheme can help set a mood. Sure, you can leave it as a default color scheme, but why not take a few moments to create a simple and attractive scheme. Once you come up with your color scheme, save your file as template.htm, which will allow you to simply open this page every time you need to create a new page or choice for your game, and you won’t have to worry about recreating the CSS and HTML that goes along with it. If you’re not sure what kind of color scheme you would like, try using a web color picker to find a pleasing theme.
Click any image in this article for a larger view.
Start your storyline
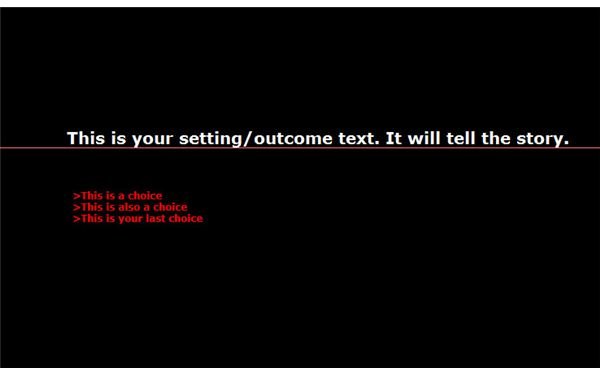
On your first page, set the mood with a little bit of text in the center of the page. Add an image above it to illustrate what is going on if you like. Your first page might read something like this:
“It’s a dark and stormy night and you’re driving down a dirt road in the woods. Your car begins to sputter and after a few minutes stalls out. You look at the gas gauge and are alarmed to find that it reads empty. What do you do?”
Using just a few sentences paints a vivid picture for your player. This is crucial to your story. Pay attention to mood and theme and try to keep them consistent through the story. Now, below the option, give your player a few choices like so:
>Try to start the car again, maybe there is still enough gas to get you to the next station. After all, this car acts up all the time!
>Turn off the car and wait until morning. How bad could it be, waiting out in the dark and stormy woods. All night. Alone.
>Leave your car and try to walk to a gas station or a nearby house to use the phone. No sense sitting around in a car all night by yourself.
Feel free to add in a personal note after each choice, allowing the player to get a sense of their hero’s personality and have a chance to add some great humor or drama elements. Try to keep the number of choices your hero can make anywhere from two to four. Too many choices makes the game unnecessarily long, and too few removes the challenge of the game and doesn’t give it a chance to progress.
Fill in the choices with outcome pages

After you complete your first page, save it under a unique name (such as 01.htm or car01.htm). Now open your template and begin writing a new page for what happens after each one of your choices. We’ll call these “outcome pages” and you will have one per choice. What happens if your hero decides to stay in the car? That page might read as this:
You sit in the car and listen as the rain begins to let up. You roll down your window for some fresh air and you can hear footsteps somewhere off in the distance. What do you do?
>Stay quiet and wait. Who knows who could be walking along this road in the middle of a night like this!
>Flag down the stranger, maybe they can help you get your car running again.
>Blast the horn to scare whatever it is off. It’s probably just a deer, right?
Continue doing this for every choice you have. Sometimes you may want to loop from one choice to another already existing outcome page. Example: Providing your hero with the option to leave a room in a haunted mansion to go back into the room he was in before provides a way to “escape” if they don’t like any of the options on that page. Be sure that you do provide downfalls for your hero, such as getting hopelessly lost or falling prey to the villain’s traps. Don’t forget to add in a winning ending or two!
Link your choices to their outcomes
Go back to your finished pages and make sure you link your choices to their outcome pages. Double check them to make sure that they are correct. After all, you don’t want them to link to the wrong outcome!
Organization will set you free
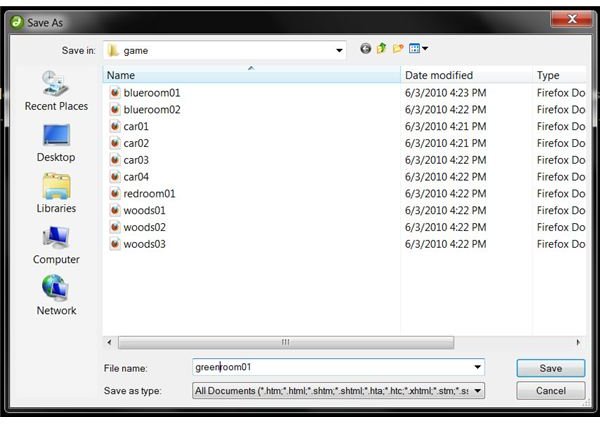
The hardest part about writing a game like this is keeping track of what outcome pages correspond with what choices. It is easiest if you name your pages based on certain things in the scene. If your hero is in a car, car01.htm works great. If your hero is in the woods, woods01.htm is good. For individual rooms, you can name the rooms by their color or intended purpose, such as redroom01.htm or bathroom01.htm. This does, however, give the clever reader a sneak peek into what comes next. If you want to keep them completely in the dark, you can use a series of numbers or letters to name your pages, such as a1.htm or 01.htm - just make sure you triple-check all your choices and outcome pages to avoid any mistakes.
Sharing your game
Sharing your game is incredibly easy. The fastest and easiest way to share your games with people is to place all of your pages into a folder, and upload them to the Internet somewhere. If you aren’t ready to put your creation on the Internet and just want to share it with a select few, you can zip your game folder and send it via email or IM client. If you want, you can leave your game folder unzipped and burn the files to a CD or place them on a flash drive for quick and easy sharing.


