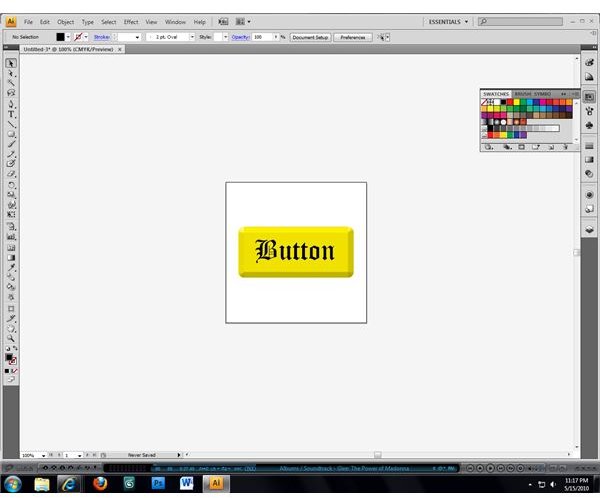
Creating beveled buttons in Illustrator is easy thanks to the program’s built-in 3D rendering options. Instead of having to match highlight and shadow colors to create a realistic bevel effect you can make beveled buttons in a matter of minutes by using the render function.
Beveled Buttons
Whether you’re creating buttons for a website or making button graphics for other projects, adding a bevel to the buttons gives them a classic “button” look and makes them stand out from their surroundings. While some people will create a bevel effect in button graphics by hand, Adobe Illustrator features a built-in bevel feature which automatically creates the bevel you want using 3D rendering. The bevel feature makes it easy to create beveled buttons in Illustrator, giving you a chance to instantly preview the effect and make any changes that you might need before you finalize it.
Click any image in this article for a larger view.
Creating a Button
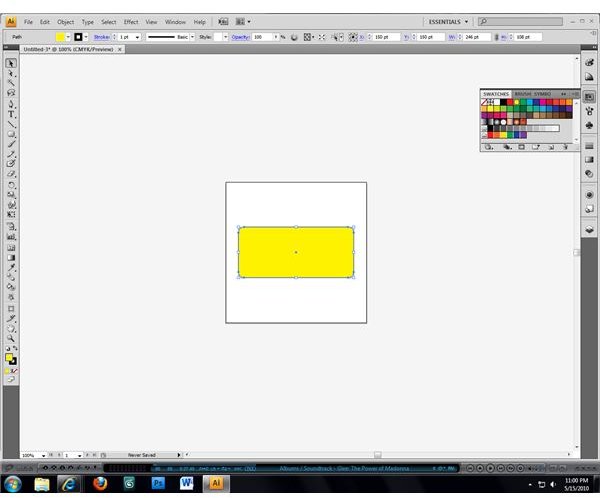
The first step in making beveled buttons in Illustrator is to create the basic shape for your button. The majority of buttons that you will encounter on the web or in programs are either rectangles or rounded rectangles, though you can create buttons using other shapes as well. Use the shape tools in Illustrator to make your basic button shape, selecting a color swatch to fill it in with the core color that you want to use for the button. Shading will be added to the button automatically when Illustrator creates the bevel so you don’t need to worry about choosing highlight or shadow colors.
Adding a Bevel
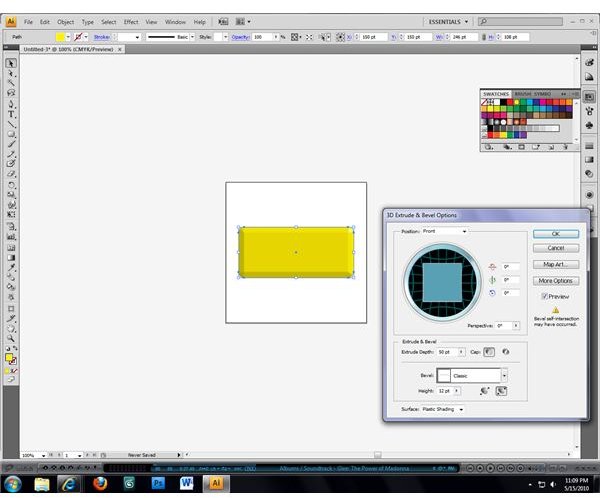
Open the “Effect” menu, then choose “3D” from the list of Illustrator effects. When the menu containing Illustrator’s 3D effects opens, select the “Extrude & Bevel…” listing to open the “3D Extrude & Bevel Options” window. Change the “Position” listing to “Front” and select a bevel type from the “Bevel” drop-down menu near the bottom of the window. Make sure that the “Preview” option is checked so that you can see your changes as you make them, then begin adjusting the height of the bevel until it looks like you want it to. Depending on the size of your button you may receive a warning about self-intersection, but this will not interfere with the creation of your beveled button.
Finishing Touches
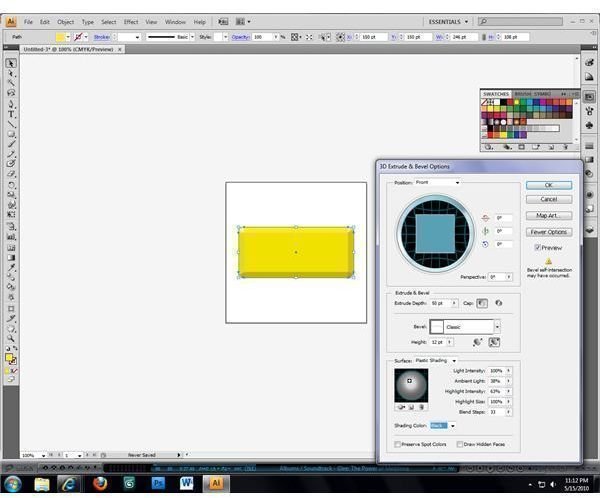
Click the “More Options” button on the right side of the window to adjust the direction and amount of light that is used to highlight your button. Once you have your beveled button looking exactly like you want it to, click the “OK” button and the changes you have made will actually be applied to the shape you created. Use the text tool to create the text that you want to appear on your button, or simply save the blank button for later use as a template for buttons that will feature different text.