Roll over text is an easy way to create an instant, situation-specific effect for your website visitors. Learn how to make roll over text in Dreamweaver the easy way. For the most part, creating roll over text, roll over images, and even roll over flash objects simply requires editing fields.
Rollover Text in Dreamweaver
Rollover text or images are used for instant feedback of events. For instance, when someone mouses over a button, it might change color, change text, or even change the way images switch between themselves.
There are various ways in which rollover text/images can be created:
- Using JavaScript
- Using CSS
- Using a Flash Object
The basic concept of creating roll over text in Dreamweaver involves associating a mouse over and mouse out with a text or image and using a callback function to load or unload the image. I’ll walk you through the entire process in the following sections.
Step by Step Tutorial to Create Roll Over Text in Dreamweaver
- Prerequisites: Two images that have some text on them.
- In this example, I have created two simple images using MS Paint. Both of them have the text “Rollover Text” written on them. One of them uses a black font and the other uses a red font. When done, the font color of the text should change whenever someone “rolls over” the text with the cursor.
- Open up Dreamweaver. I am using Dreamweaver CS4.
- Click on HTML
- Once the new HTML page is open, find the Insert item on the menu-bar.
- Now go to Insert –> Image Objects –> Rollover Image.

Step 2
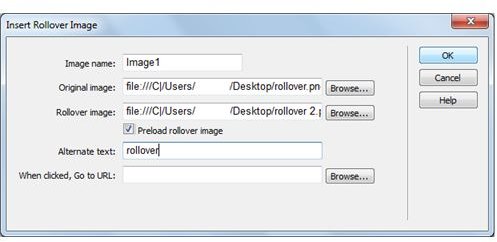
- Now a child-window will open.
- It contains various fields. Fill them accordingly. The image name can be changed.
- Browse for the original image, which is the image you want the user to see when the web-page loads. Browse for the optional image, which is the image the user will see when he mouses over the image.
- Fill in the alternate text. It can be any text that you want the user to see when there is an error in loading the picture. You can also add a link for the user to go to if the image or text is clicked.
- Once they are all filled, click OK and one more sub-window will appear. You can click OK after reading the message.
Step 3
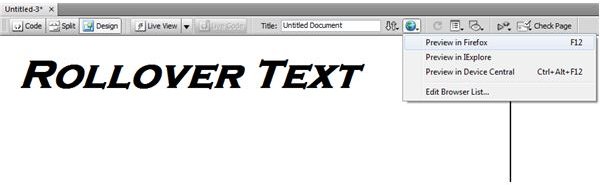
Now the basic roll over text is all done and the final preview can be seen in the Dreamweaver window. To get the result, press F12 to view in Firefox (or you can choose the browser of your choice as shown in the image below).
Images and Flash Objects
Roll over text in Dreamweaver can be created by using a couple of simple steps, as noted above. The process mainly involves using an image.
There is also one more way to create roll over text, by using Flash objects. To use them, just follow these steps:
- Insert –> Media –> Flash Text
- Fill in the required fields and click OK.
Now we have our rollover text using Dreamweaver in a few simple steps. That’s how easy it is. Give it a try!


