Adding an image or photo to your web page and want to wrap text around the object in a certain way? Read on to learn how to accomplish this with HTML tags.
Overview
HyperText Markup Language (HTML) is the most basic type of code used in designing, formatting and organizing web pages that are published on the World Wide Web. Text wrapping refers to how an object is wrapped within the text or the text around an object. In simple terms, it refers to the specific location or alignment for an image or other object that is placed within a paragraph. Objects can be aligned horizontally to the left or to the right with specific codes. These codes are attributes of HTML tags, and we’ll show how to use these attributes and tags to wrap text around an object.
Advantages of Text Wrapping Using HTML
If you already have an HTML editor like Dreamweaver or Microsoft Office Frontpage, you may be wondering why you should learn about HTML tags. With an HTML editor, you can generally wrap text easily by inserting an image into your workspace or dragging the image to your desired location without touching HTML codes. Well, HTML today is not only used in making a web page, but it is also useful when specifying the format for your messages in various blogs, social networking sites and e-mail. Some forums and blogs allow HTML encoding for a more organized post. This way, you can add an image to your post with a fixed location by adding HTML tags, and you can be sure that your message won’t be altered due to the set default format from different computers or browsers.
Using Notepad
If you are planning to make a blog post or embed a message in a section of your web page, you can create it directly using HTML and just delete if you are not satisfied. You may also use any HTML editor available on your computer, but for a more generic tool, I’ll be using Notepad. If the icon for Notepad is not available on your desktop, you can locate it from your “Start Menu.” Go to “Accessories” and click the Notepad icon.
Wrapping Text with HTML
- Let’s begin by opening Notepad.
- Look for the image you want to insert within your text.
- If you are using an image from your computer, make sure to upload it later to a public file storage location so that it will be accessible when published online.
- If you select an image from the Internet or from your online public storage, make sure that the URL is absolute – this means that it should end in .jpg, .gif, .bmp or some other image format supported by the blog or web site.
- Type in
, then follow this with your text. An actual example is shown below
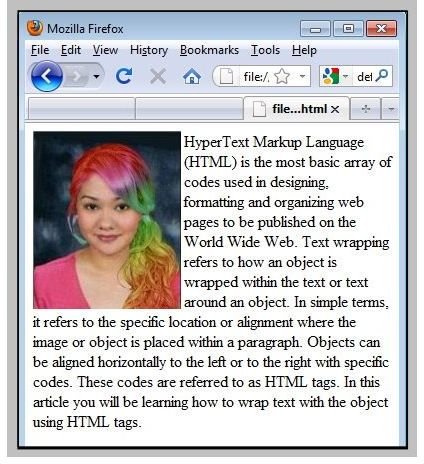
Align Left
 Sample text goes here.
- Save your work by pressing Ctrl S. Write your file name – it should end in “.html” as “sample.html.”
- To preview your work, open your Internet browser and open the file by pressing Ctrl O and locating.
- Locate and select your saved file, and it will automatically appear in your browser.
Right Alignment
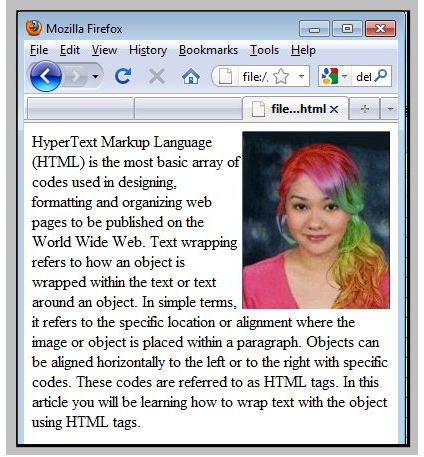
- To align the image to the right, simply change the align=“left” to align=“right” and follow the same procedure.
- You can simply copy the HTML code written in your Notepad and paste it to your blog, forum or webtool that supports HTML.
So quick, simple and you’re done! You may also want to learn how to create HTML email .


