There’s no need to pay someone else to design your website’s banner when you can do it yourself fairly easily. We’ll walk through the basic steps of doing so and show how to reference it in HTML. Also, we’ll take a look at how other people can use this banner to link to your site from theirs.
Get Their Attention
When creating a new website, one of the first things you need to do is design a banner. The banner will sit at the top of each page of your website so it can be easily identified. You may also want to create some banners which will allow other websites to link to you. In this guide, we’ll run through the process of how to make an HTML banner with Photoshop. Then we’ll show you how to reference it on the pages of your website. Finally, we’ll show you how to create code that would allow another website to link to yours using your banner.
Banner Sizes
Banners come in all shapes and sizes, but there are certain dimensions which are popularly used. Since people view websites at different resolutions and use different web browsers, you can’t be sure exactly how your web pages will appear to all users so it is a good idea not to make your banner too big. We’ll start off with a banner intended to be displayed at the top of each web page of your website and we’ll make it 480 x 60 pixels.
Using Photoshop
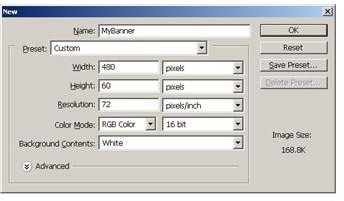
We’ll make a very simple banner to start with. Begin by starting up Photoshop and then select: File – New
This will bring up a box like the one shown here. You can name the file, select the dimensions and choose a background color for your banner. Once you are ready, click Ok. (Click any image for a larger view.)
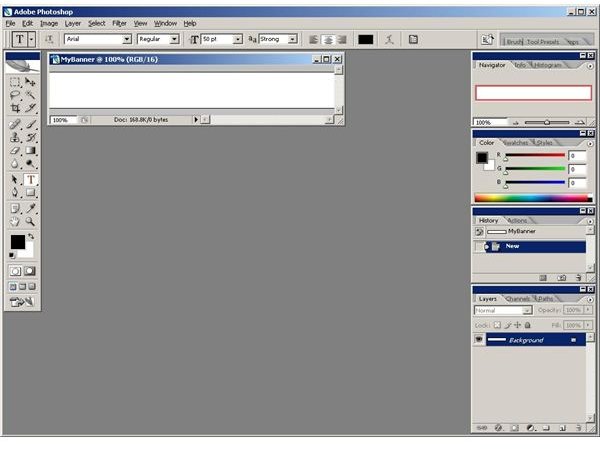
Now we want to write some text to appear on the banner and display the name of your website. Select the Text Tool as shown in the screenshot below.
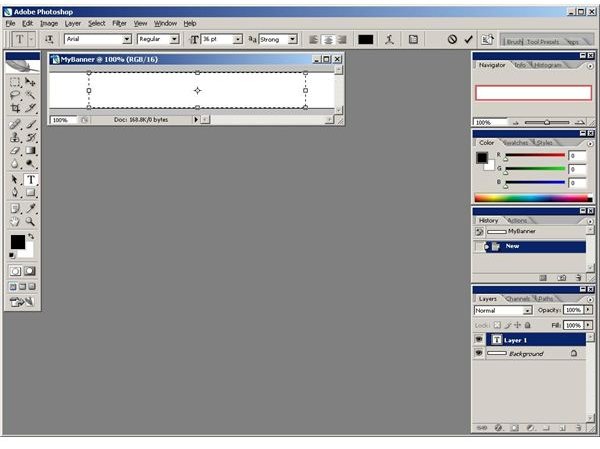
The next thing is to select the area to write the text in. Left click on your banner and hold the left mouse button down as you drag to create a box. It should look like the screenshot below.

Before you begin to write text you can select the size, the font type and the text color using the toolbar at the top. You can see here we have chosen the Arial font in Regular style. We have made the text size 36 pt, chosen to make the lettering strong and it will be aligned in the center. The black box you see at the top right denotes the text color and you can click on this to change it.
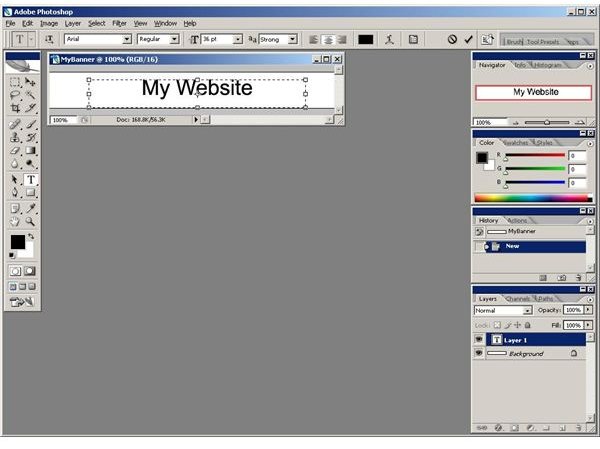
You can write the text in and review before saving so it is easy to make changes. If you decide you want the text bigger or want to change the color you can do so. You can also write the text and then drag the boxes that denote your text area to position it where you want it. As you can see in the screenshot below, the box has been dragged down so the text appears in the middle of the banner.
Once you are satisfied with the banner, click the Tick at the top right to accept. Now you want to save the banner so go to: File – Save. You can now see how the banner will look and adjust the quality or the file type if you desire. Once you are happy with it, click the Save button at the top right and choose a location. You’ve created a banner.

Referencing Your Banner in HTML
In order to reference your banner so that it appears on your web pages, you’ll need to add some HTML code.
If you’re already familiar with working in HTML, then you’ll simply save the banner in your images folder in the root directory of your website. If it was named MyBanner.jpg, then you would add the following line into your HTML file wherever you want the banner to appear:

Since we know the exact size of the banner you could also add the dimensions like this:
It is also a good idea to add an alt tag which provides text instead of the banner, if for some reason the banner cannot be displayed. You would do that like this:
<img src=“images/MyBanner.jpg” width=”480” height=”60” alt=”My Website”>
Allow Other Websites to Use Your Banner to Link to You
In general it is best to create custom banners for other websites to use for linking purposes. The smallest size used for this purpose is generally 88 x 31 pixels, but you can make the banner whatever size you want. Just bear in mind, the better it fits with their website, the more likely they will use it. So don’t make it too big.
Repeat the process for how to make an HTML banner with Photoshop which we have already been through, but this time make the dimensions 88 x 31 pixels. Once you have your banner to use for linking purposes, you should place it in the root directory of your website (not the images folder). If the banner is called mylinkbanner.jpg and the website is called mywebsite.com then the code would look like this:
![]()
You could then make this code available on your website or send it out in a newsletter so people can copy and paste it into their websites and link to you with ease. If you want to know more about the basic process of creating links then check out Saving Links in HTML Files .
There you have it. You now know how to make an HTML banner with Photoshop. If anything was unclear or you want to ask a question then feel free to post in the comments section.
References
- Author’s own experience.
- Screenshots taken by author in Photoshop.


