The Spry Repeat List widget displays data from a Spry Data Set. Using the CSS and Javascript files, you can control and change both the styling through CSS and the functionality through Javascript coding. Data lists can display in ordered or unordered format as well as definition or drop-down lists.
Since the desired end result will hold a data set, first you must create the data set, which can be either in HTML or XML format. If you do not already have one, download an XML sample developed by Adobe and available under a Creative Commons license.
Create a Place for the Data Set
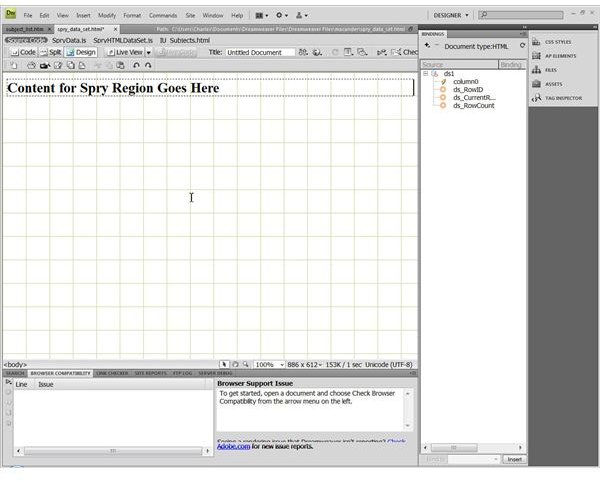
A web page that will display data lists starts with a Spry region. Insert this by opening a page that will hold the information or create a new one. For this example, open Dreamweaver CS4 and create a new HTML page. Put the cursor where you want the region, which will hold the Spry Repeat List and data, to appear. Follow the prompts to select a DIV or SPAN action and the type of region. Use the simple “Region” type for this example. This is a section of the page surrounding the data. A detail region refers back to another spry master table. This action will create a placeholder for the data set. The page should look like the associated image at this point.
Insert the Spry Repeat List Widget
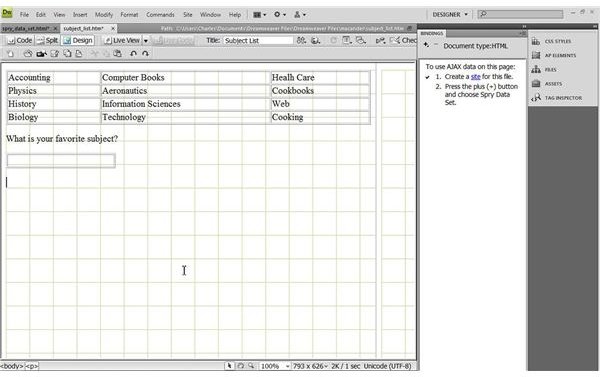
Click the cursor at the front of the placeholder inserted from the above step. Click “Insert,” “Spry Repeat List.” In the Popup select a container tag matching of the type of list desired: An unordered list, an ordered list, a definition list, or a drop-down list. The Spry Data Set information should already be filled in with the pre-selected data set, which will be named ds1 unless you changed it during the original creation of the data set. This example uses an unordered list. Select the data display column here as well specifying the separators as DIV or SPAN. Click “OK.” When populated with the data set, which will be the next step in the wizard and then loaded into a live view, your screen should look similar to this image. By adding options for user input of additional information, you can create on the spot changes in the data elements depending on what the user does.
Modify the Design by Customizing the Style
Open the folder containing the CSS file for this Spry element. You can find this in the “Spry Assets” folder in your site directory. Make style changes as you wish using the various settings of the CSS rules for this widget. Open the SpryHTMLDataSet.js or SpryXML.js file depending on your type of data set to see the many hundreds or even thousands of lines of Javascript controlling functionality. You may need to make these files writable if you intend to tinker with them. These files may be in the Spry Assets top-level folder or in the sub-folder named “includes.”


