Do you want to personalize the header of your WordPress Theme? This tutorial will show you how. A theme is provided for you to download, so that we can walk through it together.
Customizing a WordPress Header
You will find that there are different ways to personalize a WordPress theme. This tutorial will focus on personalizing the header of a WordPress theme. You will need to download the following theme below. You will also need to have some type of graphics program like Fireworks, Photoshop, Illustrator, or something along those lines. The theme below is the theme that we are going to use for this tutorial. You can delete it as soon as you finish. Using this theme as an example will show you how to personalize other headers.
Greenlog WordPress Theme Download
Unzipping the Greenlog WordPress Theme
After you have downloaded the theme, you will need to unzip. Double click it and follow the steps to unzip it. Once you unzip it, the folder with the Greenlog theme should open. If it does not open, go to where you unzipped it and open it.
Locating the Header of the Theme
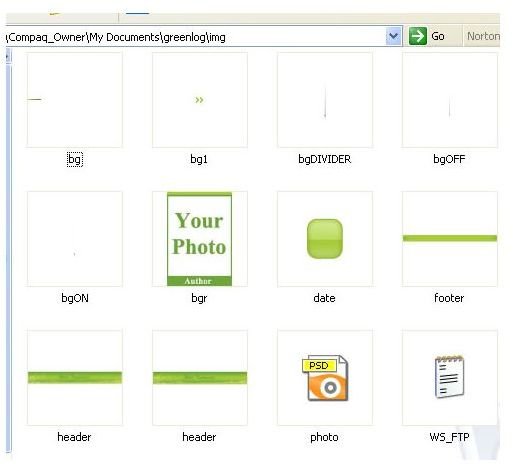
Now you will need to locate the header of the Greenlog theme. The header is located in the images folder. After you have opened the Greenlog folder, you will see the img folder. Double click the img folder. After opening your img folder, you should be seeing the window below.
Opening the Header of the Greenlog Theme
Now you will need to open the graphics program that you want to use to personalize the header. Once the graphic program is open, click File > Open. When the box opens, locate the greenlog folder and open the img folder. In the img folder you will see the header file. Click the header file and click the Open button on the box. You should now have the following image opened in your graphics program.

You can use your text tool and type the name of your blog and slogan on the header. Then you can change the text style, effect, and whatever else you want to do to the header. You can do anything you want to the header. Once you have it like you want it, then you will need to export it.
Exporting and Uploading the Header
To export the header, click File > Export and save the header as the same name. If you do not have an export option, click File > Save. You will be asked if you want to overwrite the header file that is in the folder. Click yes to overwrite it. You will need to overwrite it in order to create your new header.
Now you will need to upload the header to your WordPress site. You can upload it through your C-Panel or using a file manager. However you upload files, just upload the header file. Go to your WordPress site and refresh it. Your new header should appear.
Changing the header is the first way you can personalize a WordPress Theme. You can also personalize the theme by changing the background, the color of the text, the buttons, and more.


