
Looking to create your own PayPal buttons? WYSIWYG Web Builder has a built in section just for creating PayPal buttons. In this tutorial, I will show you how to use it.
In WYSIWYG Web Builder you can create your own Paypal buttons for your website. You can create Paypal Donate buttons, Paypal Subscription buttons, Paypal Add to Cart buttons, Paypal Buy Now buttons, and Paypal View Cart buttons. You can choose from different button styles. You will need to setup your information and get the links that you need from Paypal in order to link these buttons. In this tutorial I will show you how to create the Paypal buttons. I will show you how to choose the different types of buttons but then the other options will vary depending on the button you choose.
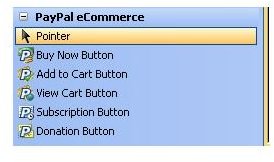
Open a new page to work on or open the page that you want to add the buttons to. Then look for the Paypal eCommerce panel. This should be the last panel on the left of your window. In this panel you will see the different button options that you have. Click a button that you want to use. Draw the button on your page. Then right click on the button and click Properties. That will open the Properties panel for the button.
General Tab for the Paypal Button
Let’s take a look at the General tab. In the top part of the box you will see the different buttons that you can choose from. The number of buttons that you will have will depend on the button that you created. The Buy Now Paypal button has about 8 buttons that you can choose from. Tick the field beside the button that you want to use. You will also need to enter your Paypal Account Name in the top field.
Other Tabs for the Paypal Button
The other tabs are going to differ depending on the button that you chose. The buttons that have the Details tab is where you enter a description for the item. Some of the buttons have a Shipping tab. In this tab you will need to enter the shipping information. And so on with the other tabs. Most of the tabs are pretty self explanatory. You will also need to create the links that you are going to need from Paypal to activate the button or buttons.
You can move the buttons to where you want them by clicking the button and dragging it to where you want it. To preview your button in a web browser, save the page and click File > Preview in Browser > and select the browser that you wish to preview it in.
This post is part of the series: WYSIWYG Web Builder
WYSIWYG Web Builder is a program for designing websites. In this series you will learn how to use Web Builder and how to create the different things in Web Builder.
- How to Create Status Messages in WYSIWYG Web Builder
- Add a Photo Slideshow to Your Website Using WYSIWYG Web Builder
- Add Free Java Clocks to a Website
- How to Use the Free Rollover Buttons in WYSIWYG Web Builder
- Creating a Marquee for Your Website With WYSIWYG Web Builder
- WYSIWYG Web Builder: Creating your Own Paypal Buttons for your Website
- How to Create a Glass Button Menu in WYSIWYG Web Builder


