As we continue along with our series on developing games in Silverlight, we take a look at how to incorporate keyboard input and start coding the basic elements of the game.
In the last article we created some base code to draw objects to the screen. In this article we will expand on that code to create the beginnings of a game. In order to do that we need to create a few new game elements like enemies, the player, some weapons and background objects, and then have them move around the screen.
Before we delve into defining the new elements that will be displayed in the game, we first need to create a new class. In the last article we created an AnimatedGameObject class. This was a little like learning how to run before we could walk because quite a few objects will not be animated. So we need to create a new class called GameObject that sits beneath the AnimatedGameObject class.
Silverlight C# Source Code for GameObject.cs
Silverlight C# Source Code for AnimatedGameObject.cs
As you can see all we have done is taken the basics of the AnimatedGameObject and put them into the GameObject, leaving only the actual animation code in AnimatedGameObject. We have also had to add a ZLayer property to the GameObject. This property defines the order that the objects are drawn in, which in turn defines which objects appear to be beneath the others. You will note that inside the startupGameObject function we use LayoutRoot.Children.Insert instead of LayoutRoot.Children.Add to place the rectangles into the parent canvas in the correct order.
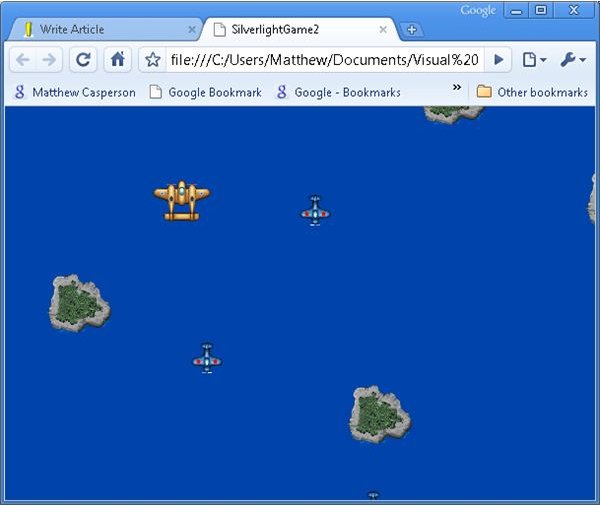
Now that we have the ability to create and order static and animated game elements we will create 4 new classes: Player, Enemy, Weapon and BackgroundGameObject.
The Enemy, Weapon and BackgroundGameObject classes are all pretty much the same at this point. They extend either GameObject or AnimatedGameObject (depending on whether or not they need to be animated), and then move in a straight line across the screen. All 3 classes make a call to the offscreenCheck function defined in the GameObject class, which will clip their display rectangle (so it doesn’t get drawn off the canvas area) and then shutdown the object when it is completely off the screen.
Silverlight C# Source Code for Enemy.cs
Silverlight C# Source Code for Weapon.cs
Silverlight C# Source Code for BackgroundGameObject.cs
The objects themselves are created through a ResourcePool. The purpose of the resource pool is to allow the objects to be reused rather than creating new objects all the time and forcing the garbage collector to clean them up. The concept of a resource pool is explained in more detail at https://www.brighthub.com/internet/web-development/articles/11015.aspx?p=2 .
Silverlight C# Source Code for ResourcePool.cs
The player is only a slight devaition from the code used with the previous 3 classes. It’s movement is defined via input from the keyboard (courtesy of a handy little class called KeyHandler which you can find at https://www.bluerosegames.com/silverlight-games-101/ ), and it’s position is bound by the edges of the screen.
Silverlight C# Source Code for Player.cs
Finally we make a few changes to the ApplicationManager to allow it to periodically create some Enemies and BackgroundGameObjects.
[Silverlight C# Source Code for AppliationManager.cs](https://silverlight.sourceforge.net/2 _ AppliationManager_cs.html)
Our game is starting to take shape with some user interaction and the beginings of the gameplay. Check out the online demo , and download the source code from the Sourceforge SVN repository , or download an archive containing all the source code here .
Back to Silverlight Game Programming Tutorials
Moving Forward
This post is part of the series: Silverlight game development
A tutorial series showing you how to create a 2D game with Silverlight 2.


