
This tutorial will show you step by step how to create a rose gradient menu in Adobe Illustrator CS3.
This menu was one of the hardest menus to name. I have created a lot of menus and never had this much of a problem coming up with a name. The menu is very pretty. It has a fanned drop shadow behind it and curly lines on the front. The menu itself has a graphic style applied to it with a gradient. This menu is hard to put into words, so, take a look at the finished image of the menu. In this tutorial I will show you how to create the Rose Gradient Menu using Adobe Illustrator CS3.
Drawing the Rectangle and Applying the Style
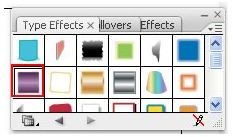
Select the rectangle tool and draw a rectangle for your menu. Open your Type Effects box by clicking Window > Graphic Style Libraries > Type Effects. When the box opens, look for the Jiggle effect. Click the rectangle to select it and then click Jiggle to apply the effect. Your menu should now look like this.

Adding the Curly Lines to the Menu
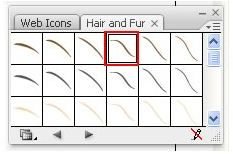
This part is kind of tricky but I will try to explain it the best I can. Let’s start by opening the Hair and Fur Symbol box. Go to the top of your window and click Window > Symbol Libraries > Hair and Fur. When the box opens, look for the Brown Hair 4 symbol. Drag the symbol to the menu. Grab the corner of the box and drag it outward to make it larger.
Next, you will need to break the link to the symbol so that we can edit the line. Right click on the line and click Break Link to Symbol. Double click the color fill box in the toolbar and change the color to # DAC5D7. Click OK to apply it. Now we will need to duplicate the line that you just created. Click the line and press CTRL C on your keyboard. Then press CTRL V to paste it.
The line that you just created needs to be flipped. Click the line and then right click on it. Click Transform > Reflect in the drop down menu. When the box opens, click Vertical and OK. Now you will need to place the two lines together to form the top part of the menu. Please see the image below.

To get the bottom lines, I simply selected the two top lines, copied them and then pasted them. Drag the pasted lines to the bottom of the menu. Select both of the bottom lines and right click on them. Click Transform > Reflect in the menu. Then click Horizontal and OK. Your menu should look like the one below.

Your lines should look like they are coming from the sides of your menu. You may need to adjust the size to make them look like that. See the below image to see what I am talking about.
Adding the Bullets to the Menu
Now you will need to add the bullets to the menu. Grab your circle tool from the toolbar. Hold the shift key down and draw a small circle. Change the color of the circle to # DAC5D7. Duplicate as many circles as you need.
Adding a Drop Shadow
The last step is adding the drop shadow to the lines and circles. Select all of the lines and circles. Go to the top of your window and click Effects > Stylize > Drop Shadow. Leave the default settings as they are and click OK.
Your menu is now finished. You can start adding your text to the menu.
This post is part of the series: Adobe Illustrator CS3 Menus
In this series, you will learn how to create different types of menus in Adobe Illustrator CS3.
- Adobe Illustrator CS3 Menu: Rose Gradient Drop Shadow Menu
- Adobe Illustrator CS3 Menus: Mirror Menu
- Adobe Illustrator CS3 Menus: Sapphire Beveled Arch Menu
- Adobe Illustrator CS3 Menus: Black and Gray Scribble Arrows Menu
- Create a Gold and Purple Floral Border Menu in Illustrator
- Adobe Illustrator CS3 Menu: Blue Gradient Snowflakes Menu


