This tutorial will show you how to create a Flash program that will load and display a 3D model in a web page using Papervision 3D and Flex.
Despite some noble attempts the web remains a very two dimensional medium. VRML came and went without making much of an impact, and while Java does give you the ability to do some 3D rendering on a web page Java 3D engines like JMonkey don’t recommend trying to create an applet (https://www.jmonkeyengine.com/wiki/doku.php?id=writing_a_jme_applet&s[]=applet ). Flash does give you an alternative though. With the performance improvements introduced with Flash Player 9 and 10, and an Actionscript 3D engine, rendering a simple 3D scene in a web page is quite easy.
There are a number of freely available Flash/Flex 3D engines to choose from. Some of the major ones are:
- Away3D - https://away3d.com/
- Papervision 3D - https://blog.papervision3d.org/
- Alternative Platform - https://blog.alternativaplatform.com/en/
- Sandy 3D - https://www.flashsandy.org/blog/
In this tutorial I will show you how to render a 3D model via the Flash Player in a web page using Flex and the Papervision 3D engine. Like all Flex applications we start with the MXML file.
Click here to see the Actionscript source code for Papervision1.mxml
As you can see the code here is very simple. We define an application, add an EngineManager child element, and call the startup function of the EngineManager in the creationComplete function (which we have attached to the Applications creationComplete event). The EngineManager class is responsible for initializing the Papervision 3D engine. It’s here that we create the various elements that allow us to render a 3D scene using the Papervision 3D engine.
Click here to see the Actionscript source code for EngineManager.as
The EngineManager extends the UIComponent class, which is the base class for all visual components. Essentially this means we can add the EngineManager as a child of the Application object, and also add children to it. If you are using Flex Builder you will see that the EngineManager class becomes a custom component that you can drag and drop onto the designer.
The EngineManager holds and initializes 4 basic Papervision 3D objects: a Viewport3D, BasicRenderEngine, Scene3D and Camera3D. These 4 objects represent the minimum Papervision 3D object required to render a 3D scene to the screen. We also create a new MeshObject object in the startup function. The MeshObject class and the resources held in the ResourceManager class will be explained later. The EngineManager also holds an ArrayCollection if BaseObjects, which serve as the base for all objects that exist in the 3D world.
Click here to see the Actionscript source code for BaseObject.as
The BaseObject class doesn’t actually do a great deal. All it does is register itself with the EngineManager in the startupBaseObject function, and remove itself in the shutdown function. It also holds an empty function called enterFrame which extending classes are expected to override. It’s inside this enterFrame function that extending classes will update themselves.
MeshObject is one such extending class. It extends BaseObject to provide the necessary resources to hold and manipulate a 3D object.
Click here to see the Actionscript source code for MeshObject.as
Again this is a very simple class. The one property, model, is used to hold a Papervision 3D model, which we initialize in the startupMeshObject function. It’s also in this function that we add the model to the Papervision scene. The shutdown function removes the model from the scene and sets the property to null. The enterFrame function has been overridden to rotate the model by a small amount every frame.
The model is loaded from a Collada file. Collada is an open 3D definition format designed to be a common ground amongst 3D applications (https://www.khronos.org/collada/ ). Collada is based on an XML format, which makes it easy to work with.
Papervision can parse a Collada file either from a separate file, or from an ActionScript XML object. I have generally found it easier to embed the assets for an application in the final SWF file (it means the end product is one file as opposed to a SWF file with many accompanying asset files) using the Embed keyword. Unfortunately while Flex offers a very simple way of embedding images, animations and sounds, you can’t use the Embed keyword directly with an XML file. When embedding an unrecognised format Flex exposes the embedded class as a ByteArray object. Fortunately we can work around this limitation and convert the ByteArray into an XML object. This allows us to embed the Collada XML model definition in the final SWF file using the Embed keyword, and then convert the resulting ByteArray into an XML object which is supplied to the Collada constructor.
The ResourceManager class is used to hold the embedded classes, and also the objects that use the embedded classes to expose the data they contain in a format that is useable by Papervision.
Click here to see the Actionscript source code for ResourceManager.as
As you can see we have embedded two resources: the fighter1.dae file (which is the Collada XML mesh file) and the sf-02.jpg file (which will be the texture). The texture has been embedded because the Papervision Collada parser will try to load the textures from a separate file unless you supply the textures directly. The two embedded classes are paired up with two properties: Fighter1XML and SF02_Tex. Fighter1XML is an Actionscript XML object, and has been created via an anonymous function that instantiates a new instance of the Fighter1 class and then loads that object into an XML object. It’s a little messy, but does the job. SF02_Tex is an instance of the MovieMaterial class. The MovieMaterial class is a Papervision material class that takes a DisplayObject in its constructor – exactly the class that the embedded sf-02.jpg file results in.
The end result is that we embed two files inside the final SWF file, and then create two new objects that convert these embedded files into objects that can be used directly by Papervision. This alleviates the need to distribute multiple files when publishing you 3D flash program. We make use of these resources in the startup function of the EngineManager class (that was mentioned earlier) when we create a new MeshObject object.
A model can reference many separate materials to texture itself. When parsing the Collada mesh file Papervision will, by default, try and load these textures individually from external graphics files. We want to avoid this behaviour because we want to create one single self contained SWF file. By creating a MaterialsList and supplying it to the Collada constructor we can override this default behaviour and get Papervision to texture the model from our embedded resources. As you can see we take the MovieMaterial class we created in the ResourceManager (SF02_Tex) and assign it to a new MaterialsList collection, which in turn is passed to the Collada constructor.
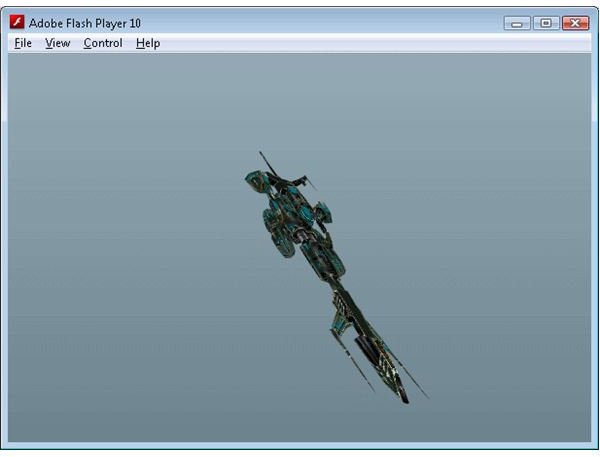
The end result of all this code is a self contained SWF that displays and rotates a textured 3D model inside a web page.
Download the source code from here , and see the resulting 3D Flash program here .
Images
Related Article
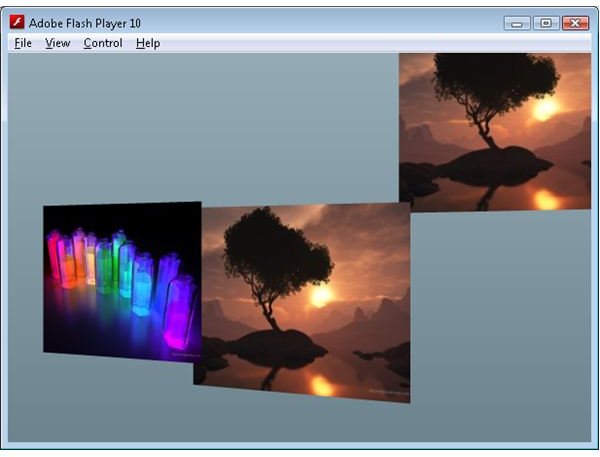
Five3D Programming Tutorial - Photo Slide
See how to create a simple 3D photo album with Five3D.
This post is part of the series: Papervision 3D Flash programming tutorial
A series of articles that show you how to use the Papervision 3D engine to create Flash 3D effects in your web pages.
- Papervision 3D Programming Tutorial - Loading and Displaying a 3D Model
- Working With Particle Systems in Papervision 3D
- Papervision 3D Programming Tutorial - Modify Textures At Runtime
- Using WOW Physics With Papervision 3D
- Shading in Papervision 3D
- Creating Effects With Papervision 3D
- Animated Textures in Papervision 3D


