Add a stylish cloud label to your blog using Google Blogger widgets - then style the cloud using some great Blogger template code!
Widgets for Blogger Blogs
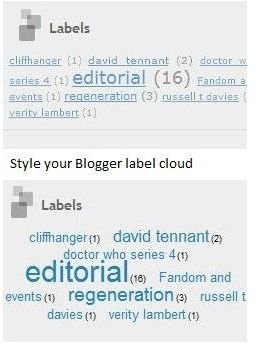
A nice tag cloud is a common feature of many blogs, and cleverly represents to your readers what the most popular tags are by displaying them in by size; the bigger the tag, the more popular the topic.
You may already know that Google Blogger has its own label cloud widget – “labels” are Blogger-ese for “tags” – and this can easily be setup to give the same effect as a tag cloud.
Even better than this, you can even reconfigure display options for the standard Blogger label cloud widget to appear even more visibly attractive!
Setting Up Your Blogger Label Cloud Widget
To add the widget to your bog, you must first login to your Dashboard. Once this has loaded up, go to the Design section for the appropriate blog.
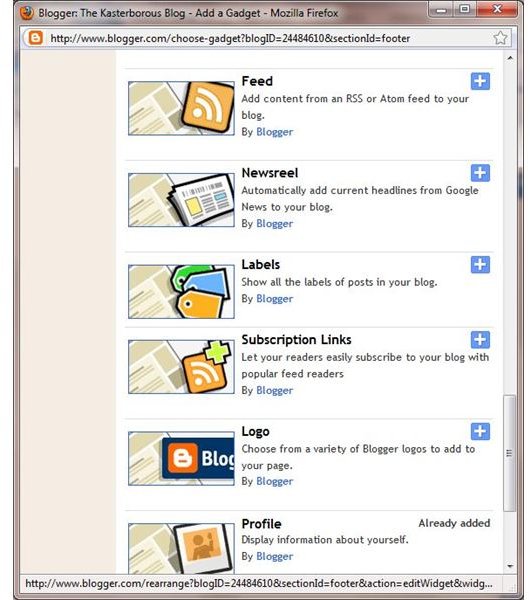
Here, go to the Page Elements tab and click on the Add a Gadget link that you might find either at the foot of the template or on the side bar. In the Add a Gadget window, scroll through the list of options until you come to the Labels option, and click the + sign to add it.
You will then see a new page of configuration options. Here you can give your labels a title, choose between all labels or a selection, and sort them alphabetically, by frequency or display as a list or cloud. Make your options as per your preference, but don’t forget to set the Cloud option!
Click Save to add the label cloud widget. On the Page Elements tab, you will be able to move the widget around, depending on the template you are using (for instance, some of these might not be suitable for adding or styling widgets). Use the Preview option to see how it might look, and when you’re happy with the widget, click on the Save button to update your blog.
Configuring the Blogger Label Cloud Widget
Although the widget was introduced at the request of many Blogger users, it isn’t the most visually attractive example of a tag cloud. Luckily some Blogger experts have come up with a way of tweaking the label cloud in the Blogger template in order to improve its looks.
If you’re using a standard Blogger template, in the Design section of your Dashboard go to Edit HTML and use your browser search function to find the code:
<b:widget id=‘Label1’ locked=‘false’ title=‘Labels’ type=‘Label’/>
The full line may differ, so you might opt to search only on the first 10 characters.
(Alternatively, you might prefer to copy the template code from the Edit HTML page and paste it into your own text editor to save a copy before proceeding. Blogger should be able to restore a working version if your run into difficulties, but this isn’t a guarantee).
Next, go to www.bloggerplugins.org to find the full replacement code, and paste this in.
Repeat the procedure by finding
]]></b:skin>
…and again replacing it with the appropriate code from the www.bloggerplugins.org website.
Finally, save your changes – if successful, you will find that the Blogger label cloud widget has drastically improved its looks!


