Web servers sniff user agents and often send you a different page depending on your user agent. You can change the user agent in Firefox to see web pages you wouldn’t normally, such as the version of a page for the iPhone or Googlebot. Or, use an extension or just Firefox’s advanced settings.
About User Agent Strings
Web browsers like Mozilla Firefox, use user agent strings to identify themselves to web servers. User agent strings identify the browser and the type of device it’s running on, such as Firefox on a Windows machine or Safari on an iPhone. You can change Firefox’s default user agent string to a custom one, which often lets you see versions of web pages designed for other browsers, such as a page designed for the iPhone, for example.
Mozilla Firefox has a built-in configuration setting in its advanced “about:config” configuration page as well as a popular, easy-to-use extension that provides a menu where you can easily switch between user agent strings. If you want to learn the steps for changing the user agent in Firefox, you can change your user agent string or opt for the extension.
User Agent Switcher Extension
You can download and install the free User Agent Switcher extension for Firefox from Mozilla’s official add-ons website here . Click the “Add to Firefox” button on the web page, click “Allow” on the information bar at the top of the web page and click “Install” in the dialog box that appears. Click “Restart Firefox” when prompted; Firefox requires a restart after installing or uninstalling extensions.
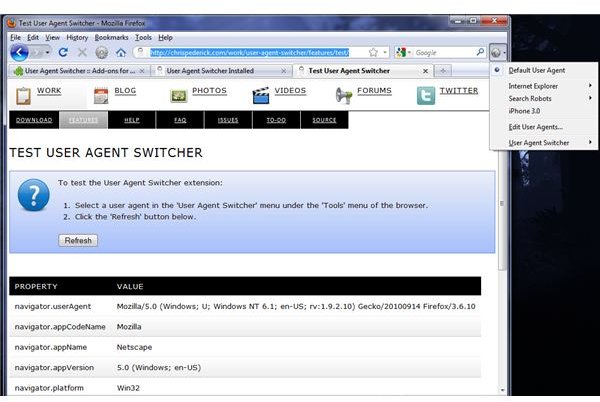
Once the extension is installed, you can change the user agent in Firefox by clicking “Tools,” “Default User Agent” and clicking a user agent in the list. You can also add a button to your toolbar that switches between user agents by right-clicking the toolbar, clicking “Customize” and dragging and dropping the “User Agent Switcher” button onto your toolbar.
The User Agent Switcher extension menu includes commonly-used user agent strings by default such as Internet Explorer 6, 7 and 8, the iPhone, and bots such as Googlebot . You can add your own custom user agents if you need them by clicking “Edit User Agents” in the menu.
Test your user agent settings by visiting the official User Agent Switcher extension test page .
Using About:Config

The about:config page is a hidden configuration web page in Firefox and exposes advanced configuration settings. Be careful when using this or you could change settings that aren’t meant to be changed.
Open about:config by typing “about:config” into the Firefox address bar and pressing “Enter.” Click “I’ll Be Careful, I Promise!” in the warning screen that appears.
Add the user agent override preference by right-clicking in the list of preferences, clicking “New” and clicking “String.” Type “general.useragent.override” into the “New String Value” dialog box that appears and press “Enter.” Type or copy and paste the desired new user agent string into the “Enter String Value” box. These are all the steps you need to know if you’re changing user agents in Firefox.
Screenshots courtesy of Chris Hoffman:


