Google Earth is an extremely powerful utility, which offers the chance to travel the world in the blink of an eye. Google has made various aspects of the Google Earth API available, including the ability to make enhanced snapshots using “screen overlays”…
What are Google Earth Screen Overlays?
Using Google Earth screen overlays you can decorate, customize or annotate any portion of landscape visible using the Google Earth system – pretty much anywhere in the world, or beyond!
For instance, to frame a view of your local beach, you would line up the image, take a grab of that image to correctly identify a suitable key colour, and use an image editing program to pick a transparent colour, before proceeding to utilise a script in .KML format to unify your Google Earth view with a screen overlay.
It is a slightly complicated system for beginners to pick up, however. With this in mind, Google has provided great web-based access to the Google Earth API, allowing potential users to practice with their own images.
Using the Google Code Playground
Google Code Playground offers access to a range of APIs (application programming interface – a way for websites and other tools to interact with one another), allowing developers and would-be developers direct access into a sandboxed version of the code. The result of this has been a vast array of superb apps built around Google technology.
To access Google Code Playground, go to code.google.com/apis/ajax/playground , where you will find a wealth of APIs to play with. Among these are Google Maps, YouTube and many more.
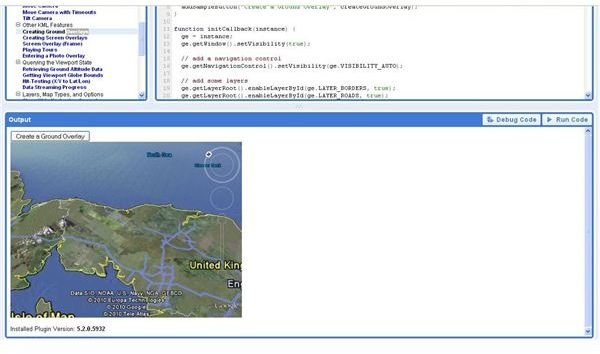
The API for Google Earth Screen Overlays can be found by expanding the section titled Earth; under Other KML Features, you will find a selection of options:
- Creating Ground Overlays
- Creating Screen Overlays
- Screen Overlay (Frame)
- Playing Tours
- Entering a Photo Overlay
Choose Creating Screen Overlays to display the code and preview.
In the right pane, the code will load; meanwhile in the lower pane, the result of any changes to the code will be displayed.
Using Screen Overlays in the Google Code Playground
Playing with the Google Earth Screen Overlay in the code playground is – as with any API - the best way to get to grips with it.
For instance, you could alter the following entry:
// add some layers ge.getLayerRoot().enableLayerById(ge.LAYER_BORDERS, true); ge.getLayerRoot().enableLayerById(ge.LAYER_ROADS, true);
By changing the LAYER_ROADS value from true to false. If you then click on Run Code, and zoom in to a place where you would normally expect to find major roads signposted, you’ll find that this layer has been deactivated.
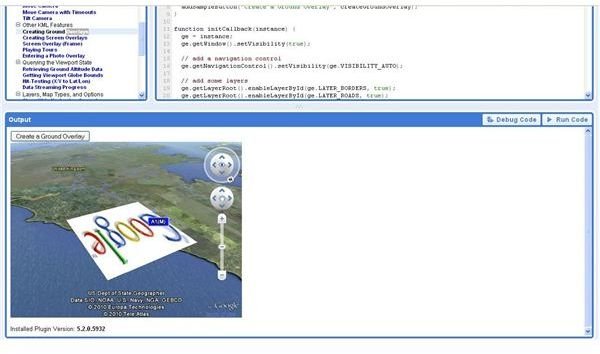
Similarly, you can change the createScreenOverlay function value to display a different image than the default Google logo when the Create a Screen Overlay button is pressed.
Once you’re happy with the result, it’s time to play around with some of the other options – Entering a Photo Overlay is particularly impressive. Before long you should be pretty confident and create your own images for use with Google Earth screen overlays!


