Another neat feature of Google Notebook is it allows you to share notes and clips with other people, via email, which allows you and your colleagues or friends to collaborate on a document. Also it allows you to publish a note as a web page so everyone can view it!
How to Share Documents with Google Notebook
One of the more clever and fun ways to use Google Notebook is the ability to share notes and documents over the web. It is easy to invite colleagues to collaborate on a project, or to share a list or photo with friends and family. This can be far more efficient than attacking a document to an email, waiting for someone else to edit it, then waiting for them to send it back. Two or more parties can work on a document at the same time using this feature within Google Notebook.
There are two ways to share a document. One is to invite others by email to collaborate on the document. Using this option, everyone you invite can edit the document. The other way is to publish it as a web page. You can invite people to view this web page, and it has its own web address, just like any other website.
Use the Sharing Feature
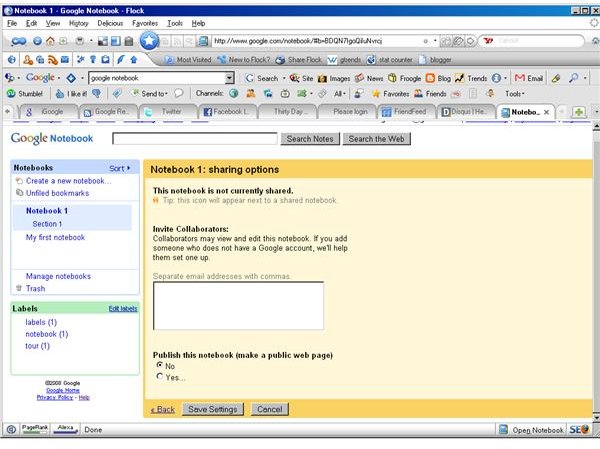
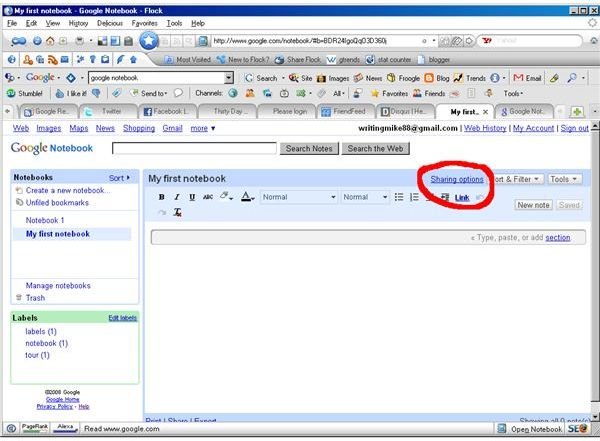
To access the sharing feature, locate the “Sharing options” link towards the upper right of your notebook, right next to the sort and filter tab. Make sure you have the note you want to share up before clicking this link, as it will share whichever the current active note is. Once you have the note to be shared up, click on the “Sharing options” link.
You’ll see a yellow bordered screen come up with various options in it. The first option is to invite people to work on a document. This is done in the section that says “Invite collaborators”. Simply enter the email addresses of people you want to receive the document into the white box and click “save settings”. Next, a box will pop up allowing you to enter an email note for the recipients, useful for describing what it is you are sending, and/or why. Once the message is entered, click “Ok” and your message is sent!
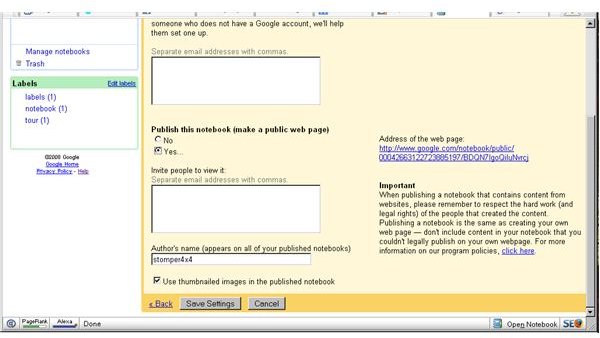
The second option is to publish a document as a web page. This is a very neat option for allowing others to view your document, but not edit it. To do this, start the same way as we did before. Click the “Sharing options” link, and the yellow page will come up again. This time, go towards the bottom and find where it says “Publish this notebook (make a public web page)”. Click on the box that says “Yes”. A new box will open up underneath this, and this is where you enter in the email addresses of those you wish to view your document. (Important note here: Any email addresses in the top box WILL still go out as collaborators, addresses in the bottom box will go out as a web page, so be cautious here.) Just like before, once the box is filled out with the desired email recipients, click “save settings”, fill out the message in the pop-up box, and click “Ok”, and that’s it!
There is one more thing worth mentioning. Notice, to the right of the white boxes, it gives you the web address to where your document will be published. You might want to save this if you might need it to share with friends besides using email addresses. For instance, you can paste that address in a note to Myspace or Facebook friends.
Give this a try sometime, next time you want to share a cool photo or note with someone. I think you’ll find it quick and easy.
Images