Sometimes it’s useful to create more than one calendar to record appointments and activities. Creating multiple calendars allows you to track your personal and business tasks, and appointments for yourself or several family members, without having a cluttered, impossible to read mess. Google Calendar allows you to create and color code as many calendars as you need, and gives you the option to view only one, or them all, at one time.
Create Multiple Calendars
In life, we often wear many different hats. And each time we switch to a new hat, we have a whole different schedule to follow. For example, if you’re the owner of a silk floral design business, the leader of the local chapter of Women in Business, and a mom, you’ve probably got three different calendars to keep all of your appointments.
The problem with having different appointments for each hat you’re wearing is that often you end up with a cluttered mess and can’t remember what you were supposed to do when. Google Calendar can help with that.
Using Google Calendar, you can create multiple calendars and then have all of your appointments shown on one calendar. What’s more, you can color code each different calendar wo you know at a glance what hat you should be wearing for any given appointment.
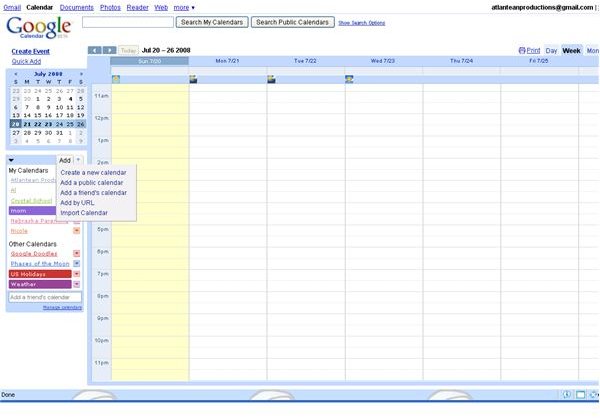
To create multiple Google calendars: 1. Log into your Google Calendar account 2. On the left side of the window you will see a box, called My Calendars, which lists all your calendars by name. This box is directly under the monthly calendar. In the top border of the My Calendars box, find the word Add and click on it. A drop down menu will appear. 3. Click Create new calendar from the drop down menu.
4. You will be given a form in which to enter information about your new calendar.
Calendar Name - Give the calendar a descriptive name that you will immediately recognize, such as, Work, High School, or the name of a family member.
Description - Enter a short description of the calendar. This is optional.
Location - Enter your city or zip code. This allows other people to find events on your calendar if it is set to public. There is no effect on a private calendar. This is optional.
Calendar Time Zone - First, select your country from the drop down menu. Next, select your time zone from the drop down menu.
Time zone selection is not optional. Google Calendar uses this information to send your reminders.
Make this calendar public - Click the box to share your calendar on the ’net. Keep in mind that if you select this option any and every Google Calendar user may view your calendar.
Share with specific people - If you’d like to share this calendar with specific Google Calendar users, enter the person’s email address in the text box, and select their user permissions from the drop down menu. Click “Add Person”
5. Click Create Calendar at the bottom for the screen. 6. Your new calendar will appear in the “My Calendars” box. The Google Calendar will auto-select a color, but you can change that by clicking on the small arrow to the right of the calendar name and clicking on the color you prefer.
Images