No matter what you’re marketing, having a good mailing list is vital to your campaign. Mailing lists allow you to track who, what, and response for just about an purpose. Google Docs makes it easy to keep your mailing lists up to date
Basic Mailing List
Creating a basic mailing list is easy.
Log into your Google Docs account. Open a new Spreadsheet, select Save, and give your list a name.
Decide on the data you’d like to include in your mailing list. The specific information you record depends on the type of mailing list you’re making. For example, if you need a list to track cold calling contacts for your business you need to store different information than if this is a list for tracking current customers for a customer appreciation promotion.
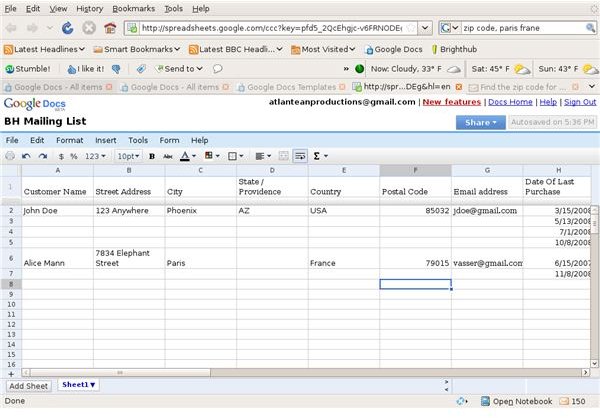
Enter column headings into the spreadsheet. For the example, we’ll build a list for a preferred customer promotion.
Share the new mailing list with your entire sale processing staff. Ask staff to enter customer information for each sale they process. Remember, this is a spreadsheet, not a database. If the same customer orders from different departments, you need to enter each sale separately, and completely.
Input Data
It’s easy to import existing data from another application. Google Docs supports file formats used by all of the major spreadsheet programs.
From the tool menu, select File - > Import.
Use the Browse button to locate the desired file on your hard drive or network.
The file will be imported automatically. Click Open Now to open the file in your Google Docs Spreadsheet.
Streamline Data Entry
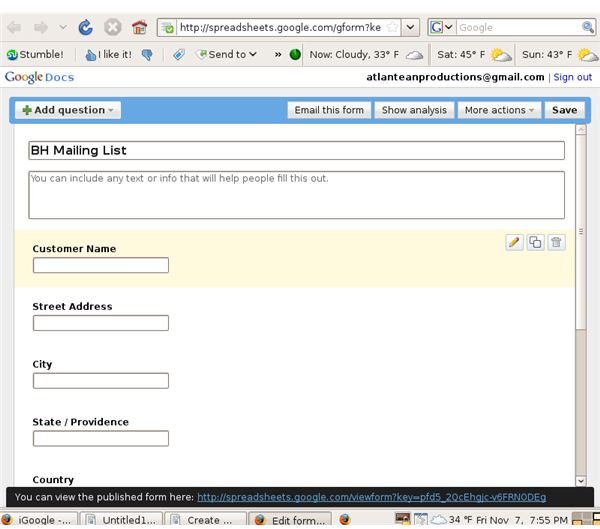
If you don’t want your processing people entering data directly into your spreadsheets, consider using the Forms feature to create an easy user interface
In the tool menu, select Form - > Create a Form. A form will be created with each column header as a question field. At the bottom of the field, you’ll see a link. This is the web address where your form is stored on the internet. Give this URL to your processing staff so they can access the form to input data.
Sort Data
In order to properly manage your promotions, you need to sort information by Country, City, Date of Last Purchase and Department.
This is easy with Google Docs. In the spreadsheet, click on the column heading by which you want to sort.
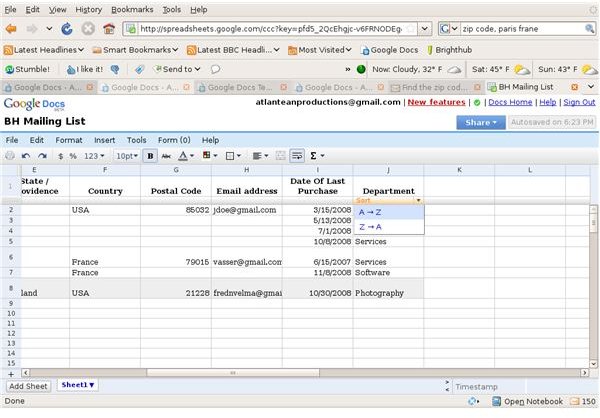
Mouse over the solid dividing line which separates the headers from the data. When you do this, the bar will highlight and you’ll see the word
sort and two sorting options. Select the option you want, and your data will realign itself based on your selection. Depending on the size of your spreadsheet, this may take a few minutes.
Another way to sort data is to use the Add Sheet function. Consider putting each department or country on it’s own Sheet.
The next step is to export information so you can create email mailing lists, or mailing labels for physical mailing campaigns. We’ll cover this in the next article.
This post is part of the series: Using Google Docs to Create, Maintain, and Use Mailing Lists
In this series, you’ll learn how to create, maintain, share, import data, and export mailing lists for any use. Whether you need a customer list, cold call list, or a way to track your Christmas card list, Google Docs gives you a simple, effective solution.


