Rain garden plants are an easy and eco-friendly landscaping choice. Find out how to build a rain garden and the benefits of including one in your home.
Rain Gardens
Rain gardens are a growing trend in the effort to be green. However, some gardeners are wondering how to build a rain garden and what kinds of plants are best for rain gardens. By following some simple guidelines, this eco-friendly landscaping choice provides an opportunity to offset the influence of paved surfaces on storm run-off and improve water quality .
What Is a Rain Garden
Rain gardens are similar to regular flowerbeds except that they are designed to eliminate, or minimize, the amount of run-off created by rain. Since large portions of cities and suburbs are paved, the run-off created by a small rainstorm can be quite large. This run-off can carry a variety of pollutants into nearby waterways, polluting water sources with fertilizers and other chemicals.
In an attempt to increase the absorbency of the ground, rain gardens have been constructed. The flowers in the rain garden absorb the run-off and use it to produce beautiful flowers and plants. Since the plants are designed to be natural looking, they require little upkeep and minimal time commitment.
Building the Garden
To build a rain garden, you only need a few materials like a large shovel, a garden shovel, compost, and some native plants. Since a rain garden is not a heavily tended garden, it can be easy for even the novice gardener.
Select a Site
- Pick a site that gets full sun but also accumulates water after a storm. However, do not pick a site that is too near your foundation or septic field. Low-spots in the yard make a great location for rain gardens because they naturally accumulate run-off. Drain-off is important, so make sure to test your site. Dig a hole about one foot deep, fill it with water, and check it after twelve hours. If it completely drains, it is a suitable site for a rain garden.
Select the Size
- The size of your rain garden site depends on the surface area you are looking to offset. The ideal rain garden is equivalent to the paved surface area of your property plus some to account for the absorbency of the soil. There is no need to make your rain garden exceptionally large because any rain garden is better than none at all.
Breaking Ground
- Remove the grass, and turn up the soil about four to eight inches deep. To fertilize the soil, churn in compost. Rain gardens are usually designed with native species in mind. Depending on your geographic area, the plants, grasses, and flowers you choose will differ. Consult gardening manuals for species native to your area. Make sure to pick plants that can handle large amounts of water. Plant them in the soil/compost mixture.
Upkeep
- When you plant initially, you may need to water the plants to ensure the roots take hold in the soil. Once the plants are secure in the soil, they do not need much tending. Pull out weeds , and mow down any plants that die; they add fertilizer to the soil. Strive to keep your rain garden natural.
In the search for green living alternatives around the home, rain gardens present a unique opportunity. By reducing and repurposing the storm water run-off that can pollute waterways, you can beautify your home at little cost with a minimal effort.
References
- Rain Gardens of West Michigan - Home. Web. 19 Oct. 2010. https://www.raingardens.org/Index.php .
- Build and Maintain a Rain Garden. Web. 19 Oct. 2010. https://www.realestateproarticles.com/Art/18924/281/Build-and-Maintain-a-Rain-Garden-Basic-Tips-for-Greener-Homes.html .
Photo Credits
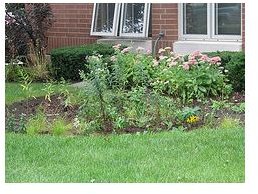
- “Oak Park Residence Rain Garden” by Center for Neighborhood Technology https://www.flickr.com/photos/centerforneighborhoodtechnology/4011182413/


