
What kinds of gifts do you plan to give this Christmas? Instead of laying out your money for items you buy at the store, make Christmas gifts instead. If you have a creative talent, such as cross stitch, small gifts that you make and give with love will be appreciated more than something you buy.
Christmas comes but one time a year. Almost as soon as the discarded gift wrap is thrown out, the tree is taken down and the ornaments put away, you may start thinking of gifts and how you’re going to afford them next Christmas. Rather than overextending yourself financially this year, put your creative skills to use instead and make the gifts you give.
What You Need to Know
Cross stitch is an easy craft to learn and pursue as you find new and interesting patterns. To make these two Christmas designs, you need to know how to find the center of the design area on the fabric, find the center of the stitched design, center two designs on two different areas of the fabric, make French knots, a Smyrna cross and backstitch on the design.
List of Supplies
Measuring tape
Aida fabric, 14 count, 8 inch by 8 inch square, white or cream
Sewing thread
Masking tape
Small embroidery hoop
Embroidery floss
√DMC 310
√DMC 347
√DMC White
√DMC Medium Green
√DMC 907
DMC 610
√DMC 307
√DMC 798
Tapestry needle
Craft scissors
Preparing the Project
Measure out a piece of Aida fabric 5 inches wide by 10 inches long. Fold the strip of fabric in half lengthwise and finger-press a crease into the fabric. Fold the strip in half widthwise and finger-press a crease in the fabric. Fold the top of the fabric toward the center fold and finger-press this fold line. This will be the center of the design area for the first Christmas motif. Do the same on the lower half of the fabric.
Take a length of sewing thread and a needle, then mark the centers of each design area with a short piece of thread. Place masking tape on all four edges of the fabric to prevent raveling. Place the fabric on top of the bottom part of the embroidery hoop, centering the top design area in the hoop. Place the top half of the hoop on and tighten it so the fabric is tight.
The following dierections talk you through sewing the design, as the original graph of the design is out of print.
Stitching the Designs
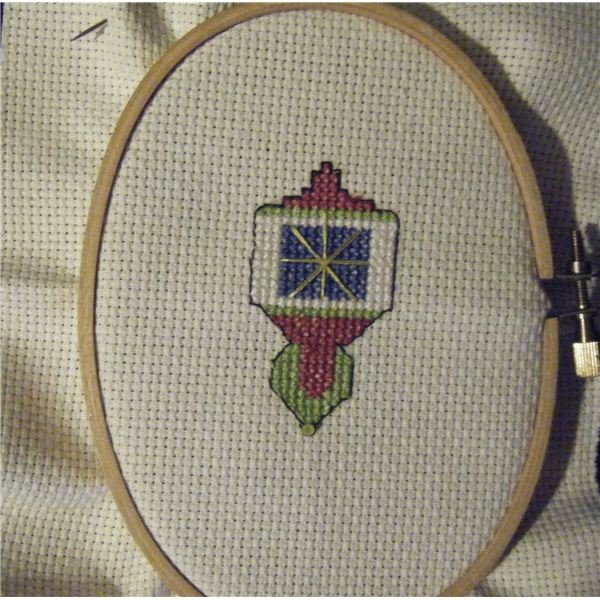
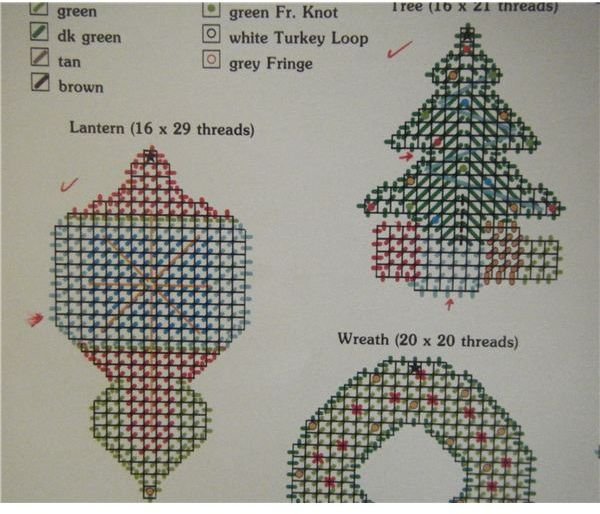
Thread the tapestry needle with two strands of DMC 907 embroidery floss–light green. Count down from the center of the top design area 14 squares and over one square to the left on the fabric. Beginning with the bottom of the pattern for the lantern, place the first stitch in the fabric. Follow the printed pattern, stitching light green cross stitches as shown. Stitch each half-stitch on the pattern as shown.
Remove the light green floss and thread the needle with two strands of DMC 347. Following the pattern, stitch the lower half of the lantern with the red floss, stitching full cross stitches and half stitches as the design indicates.
Remove the red floss and thread the needle with two strands of DMC 907 (light green) floss. Stitch one row of full cross stitches above the last row of red cross stitches. Include the two half stitches on either side of the lantern. Remove the light green floss and thread the needle with two strands of white floss. Following the printed pattern (the white is indicated by light blue symbols), stitch the outer three cross stitches on both sides of the lantern and one row of full cross stitches above the row of light green stitches. Stitch the two half stitches on both sides of the lantern. Cross stitch one full row of white cross stitches in the ninth row of white cross stitches–the white border stitches should total eight rows on both sides of the lantern. Stitch each half stitch on both sides of the lantern.
Remove the white floss and thread the needle with two strands of DMC 798 and cross stitch seven rows of full cross stitches in the center of the lantern. Remove the blue floss and thread the needle with two strands of DMC 907 and stitch one full row of cross stitches, including the two half stitches on either side of the lantern.
Remove the light green floss and thread the needle with two strands of DMC 347 and stitch each row as shown to the top of the lantern design. You should have four rows of red, with the longest row consisting of nine cross stitches. On the fourth row, end with three cross stitches. For rows two and three of this section, include the two half stitches on either side of the lantern Remove the red floss and thread the needle with two strands of DMC 307. Place one French knot at the bottom of the lantern immediately below the first two light green cross stitches. Stitch a Smyrna cross beginning in the center of the top row of light green stitches, extending down to the sixth row of red stitching in the lower half of the lantern, then across the blue stitches. Remove the yellow floss and thread the needle with one strand of black floss. Backstitch around the border of the design only.
Stitching the Next Design
Move the fabric in the embroidery hoop so the bottom design area is centered in the hoop. Beginning at the lower left design area of the Christmas tree, thread the needle with two strands of DMC 347 and stitch the first gift. Remove the red floss and thread the needle with two strands of DMC 798 and stitch the second gift. Remove the blue floss and thread the needle with DMC 307 and stitch the third gift. Remove the yellow floss and thread the needle with two strands of DMC 907 and stitch the fourth gift.
Remove the light green floss and thread the needle with two strands of medium green embroidery floss. Stitch the outer border of the Christmas tree, placing full and half stitches as indicated in the pattern. Thread two longer strands of medium green floss and, beginning on the lower portion of the tree, place Gobelin stitches, covering the open areas in the center of the tree. Stagger the beginnings and ends of each Gobelin stitch so the tree looks more natural.
Remove the medium green floss and thread the needle with DMC 347. Place each red French knot as indicated on the pattern. Remove the red floss and thread the needle with DMC 307. Place each yellow French knot as indicated. Remove the yellow floss and thread the needle with DMC 798. Place each blue French knot as indicated. Remove the blue floss and thread the needle with six strands of white floss. Stitch the garland on the tree as indicated on the pattern. Do not backstitch this design.
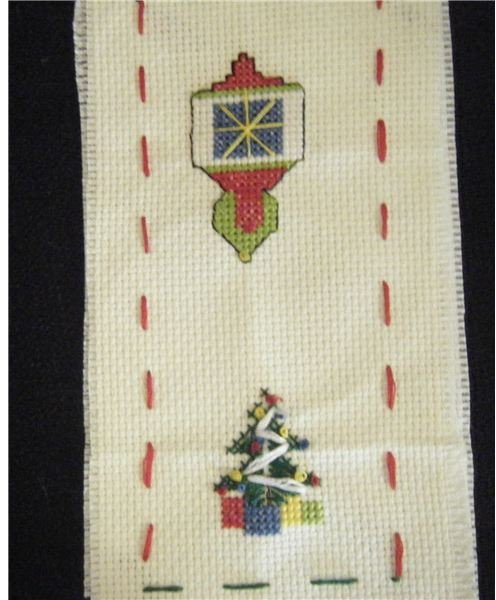
Remove the stitched fabric from the embroidery hoop and press it gently. To prevent the French knots from coming undone, carefully place a dot of clear nail polish on top of each knot. Cut a second piece of Aida fabric the same size as your stitched fabric. Place the stitched fabric on top of the blank fabric. Using six strands of medium green and red floss, stitch a row of red running stitches on two sides and a row of green running stitches on the top and bottom of the design. Do not knot the floss. Instead, catch the end of floss under several stitches. Using the tip of the needle and working one strand at a time, pull out several strands of fabric, creating a raveled edge on the top and bottom pieces of fabric.
Summary
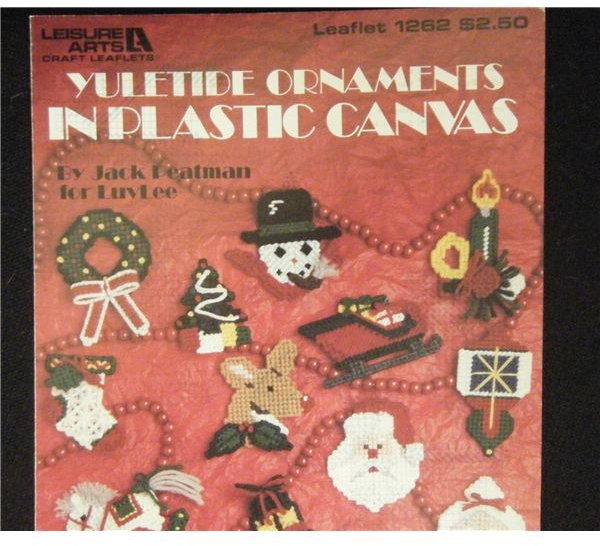
These two designs were modified from a leaflet of plastic canvas Christmas motifs. By working carefully, you can do the same.
References, Images and Credit
Leisure Arts Leaflet No. 1262, Yuletide Ornaments in Plastic Canvas, Leisure Arts, 1990
Source: Author’s own experience - the author has been cross stitching for more than 25 years.
Images provided by writer
Credit Genevieve Van Wyden


