Did you know fruits and vegetables conduct electricity? Try this simple experiment to create a potato battery.
The First Battery
The famous Italian scientist Luigi Galvani, while studying the anatomy of a frog, accidentally discovered that when the dissected frog’s muscles were touched with a charged (with static electricity) metal, it would agitate the frog and make its ligaments twitch. Another renowned Italian scientist Allesandro Volta was quick to understand the principle acting behind the above phenomena. He realized that there was something inside the frog’s flesh which reacted with electricity to produce the twitching effect. He was able to successfully reverse the process and, in fact, produce electricity.
It wasn’t hard for him to find out that the frog’s flesh, which acted like an electrolytic chemical when brought in contact with two different metals, could generate electricity. He further went on with his research and in 1800 made the first electricity producing battery using two dissimilar metals (zinc and silver) immersed in an electrolyte consisting of sulphuric acid.
His experiment may be understood as follows:
- The electrolyte sulphuric acid used is present as 2H+ and SO42-.
- The negatively charged sulphate ions (SO42- ) react with the zinc plate or electrode and the hydrogen ions react with the silver electrode producing a potential difference across them.
- When the two electrodes are connected externally, the circuit becomes completed to initiate the flow of electrons and constitutes the generation of electricity.
- Hydrogen gas is released during the process as a byproduct.
The following chemical reactions are involved in the process:
Zinc
Zn → Zn2+ + 2e-
Sulphuric acid
2H+ + 2e- → H2
From the above discussion, the idea becomes pretty simple to understand: by inserting two dissimilar metals into a chemical substance, electricity can be generated.
Electricity From Plants
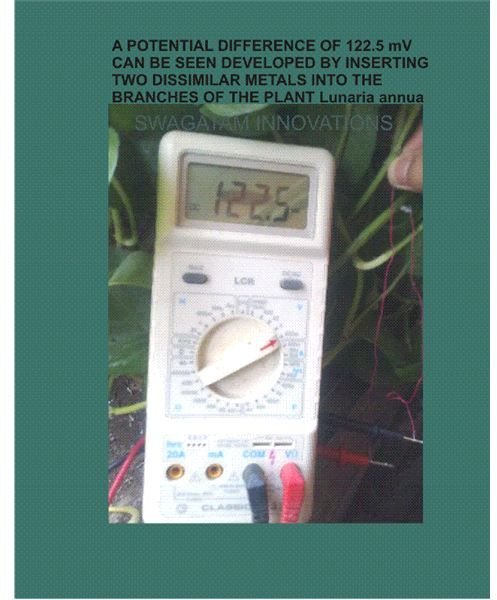
We know that plant and fruit cells internally are made up of various kinds of dissolved minerals in a liquid form constituting the cell sap. This cell sap is present inside all plants, vegetables and fruits, and is ideally suited to conduct electrons and also generate electricity (though quite feebly).
This cell sap may be effectively used as an electrolyte, and by introducing two dissimilar metals into its path, a chemical reaction as explained above can be initiated. Let’s try this out with a simple experiment.
You will need the following things for the experiment:
- A large size healthy and fresh potato
- A zinc plate (may be derived by stripping off the outer cover of a dead dry cell and cutting it into a thin small strip)
- A copper plate ( you may use a thick copper wire instead, retrieved from an old transformer or from some other source as desired. The more surface area it carries, the better.)
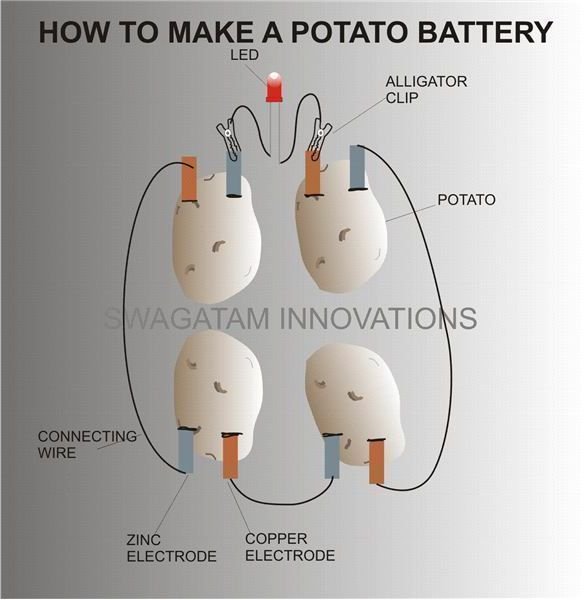
- A red LED and wire assembly (as shown in the diagram)
- A couple of alligator clips
Make an LED Light Up Through a Potato
The following steps will easily help you make a potato battery:
-
Begin by cleaning thoroughly the zinc and the copper metal. It is best done by scrubbing them with an emery paper. Make sure the metals are as clean as possible, free from any external enamel, oxidization or dust particles.
-
Carve out their other ends into pointed or sharp terminals (You may want to ask for an adult’s help with this).
Advertisement -
Now, holding the potato firmly into your left palm, cut through and dig into the pulp of the potato using the sharp ends of the metal so that they get fixed into the potato firmly. Make sure that the metals are separated by A sufficient distance so as to include maximum amount of pulp in between them.
-
Take a digital multimeter, set it to the millivolt range.
Advertisement -
Now connect the terminals of the digital multimeter across the copper and the zinc strip. You will be surprised to see a nice little potential difference of at least 0.4 volts developed across them. You won’t have enough power to light up the LED with just one potato because the minimum forward voltage of an LED (red) is around 1.5 volts.
-
The above criteria can be easily fixed by making 3 more such potato assemblies and then connecting them in series as shown in the diagram. Ultimately you should be left with a single free copper strip on the first potato and a single free zinc strip on the last potato.
Advertisement -
Once you have finished preparing four of the potato circuits, make an LED wire assembly by connecting (preferably by soldering) two pieces of short flexible wires to the LED terminals.
-
Also connect the alligator clips to the other free ends of the wire.
Advertisement -
Now simply attach the alligator clips (cathode to zinc, anode to copper) to the two free metal electrodes of the first and the last potato.
-
You should be immediately able to witness a nice glow on the LED. If possible take the whole assembly to some dark corner of your house to see the illumination more distinctly. This potato battery is primitive in its design and is able to produce just enough power to make the LED glow. You may try lemons in place of potatoes to get better results, since acidic electrolytes (lemon juice contains citric acid) are ideally suited to generate electricity in the above manner and produce more efficient results.
Advertisement
Hopefully the above experiment helped you understand how and why fruits and vegetables conduct electricity.