New to Microsoft Word and just can’t get a handle on the ribbon bar? Past user of WordPerfect yearning for “Reveal Codes” in Word? CrossEyes is a Word add-in that creates a reveal-codes-like area that shows document formatting tags that give access to settings dialogs. How does it work? Great!
This is a review of the CrossEyes add-in application for Microsoft Word. Similar to WordPerfect’s “Reveal Codes” interface, CrossEyes allows the user to visually identify and resolve document formatting problems. It also provides tags that link from the CrossEyes area directly to the related settings dialog in Word.
Let’s get it downloaded, installed, and try it out.
Installation (4 out of 5)
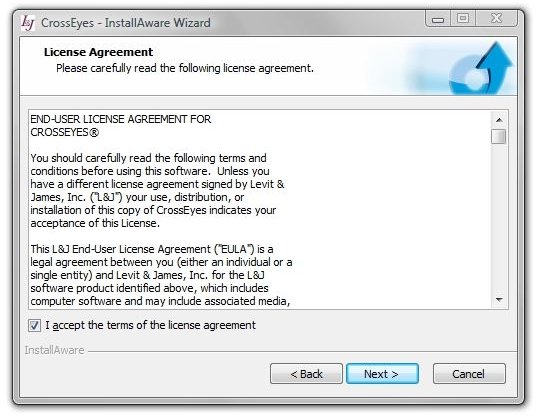
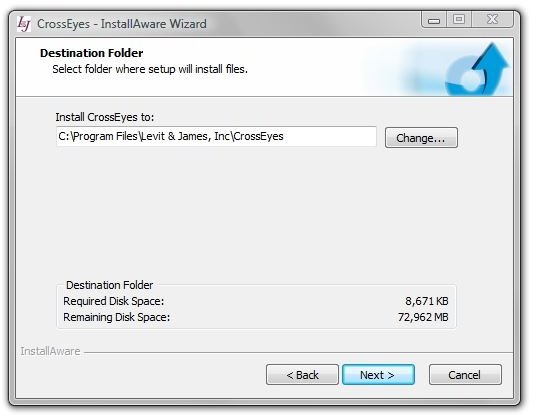
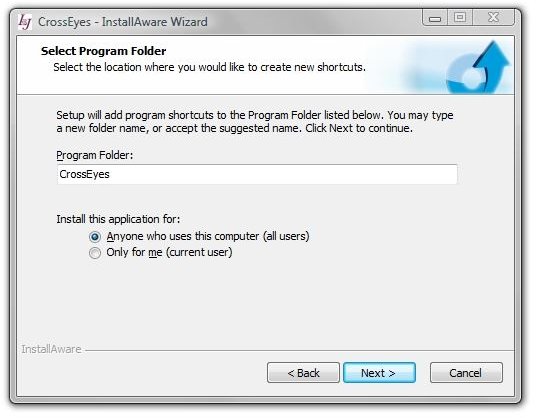
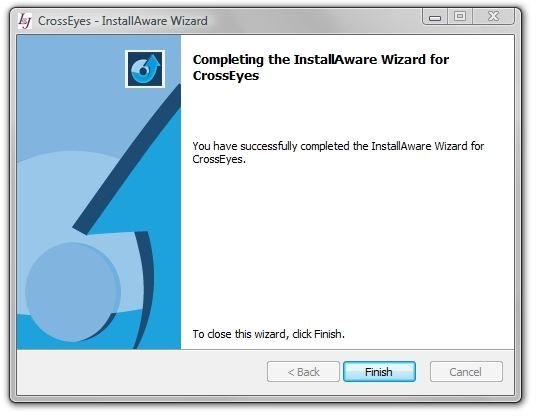
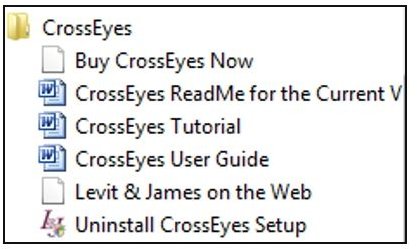
CrossEyes can be downloaded from Levit & James website and is now available free. It’s a very standard installation for a Windows application. It starts with the license agreement, program location, and program folder. Below are images from the install routine and a snapshot of CrossEye’s entries in the Vista Start menu. Note: Don’t have a copy of Word running during the installation. I accidentally did that and had to reinstall after the first run.
First Run and Setup (4 out of 5)
Here’s what Word looks like with CrossEyes running.
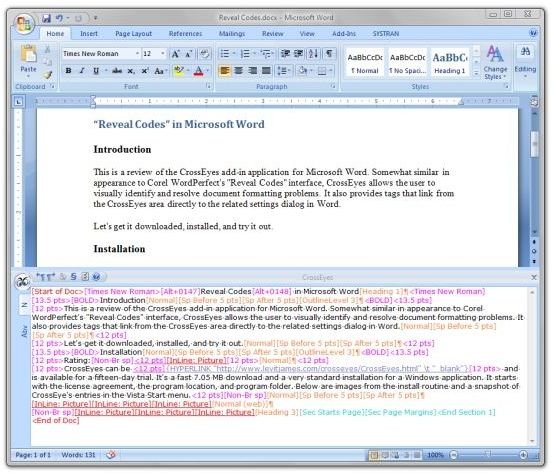
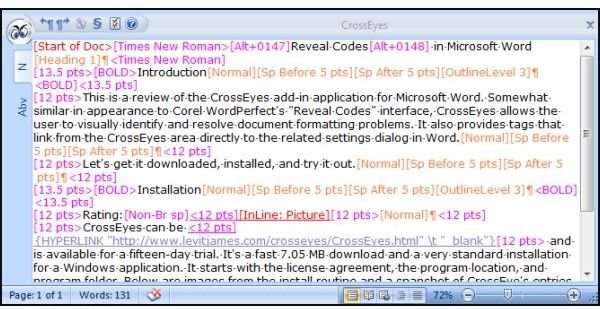
And here’s a closeup of the CrossEyes area.
And there’s nothing further to set up. CrossEyes opens in a lower pane of the active Word window when you select Add-ins → CrossEyes and it immediately shows the content of the visible part of the document. Colored tags and codes in the window show formatting applied to the text and other objects in the Word document.
Program Controls and Use (5 out of 5)
There’s a learning curve, but CrossEyes offers fine-grained control over what’s going on in your document. It can show you exactly where problems happen and provide a handy, fast link to the likely place to repair the problem. Navigation in the CrossEyes windows can be performed with the keyboard or mouse. Informative, color-coded tags show you information about the attributes applied to the parts of the document, including the name of the style and other attributes for the paragraph.
Navigation and Selection
The position of the text cursor in the CrossEyes window is also the position of the cursor in the main document window, and moving either one moves the corresponding cursor in the other window. Selecting text in one window also selects the same text in the other window.
The CrossEyes label at the top of the CrossEyes window is grayed out when the main Word window has the mouse and keyboard focus. ALT+K switches the CrossEyes pane on and off, and Ctrl-Tab toggles between the CrossEyes window and the document.
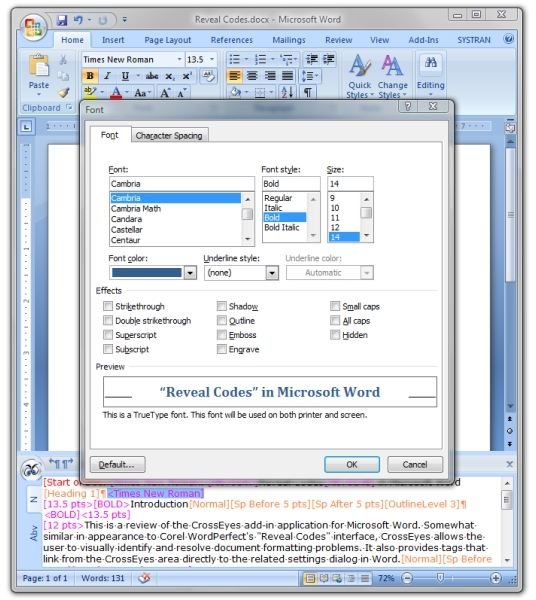
The left and right arrow keys move the cursor through the text and formatting codes in CrossEyes. Tab can be used to jump to the next code, and Shift-Tab jumps to the previous code. When the cursor lands on a formatting code, pressing Enter or double-clicking the code opens the associate settings dialog in Word. In the image below, the “Times New Roman” code was clicked and Windows responded with the Font settings page for the paragraph.
Several types of codes are available in CrossEyes. Each major type is color-coded and applies to some property within the document.
Character Property Codes, which default to a magenta color, appear in CrossEyes in the same position that they appear in the main text window. “Bold,” for example, shows up like this:
[Bold>This•is•some•bold•text.<Bold]
If one then selected “some” in the main window and clicked the “B” or bold icon, CrossEyes would show the effect like this:
[Bold>this•is•[Bold off>some<Bold off]•text.<Bold]
Paragraph Property Codes default to orange, and are usually shown at the end of a paragraph, just before the ¶ sign. That sign, by the way, is fast access to the Word Paragraph Properties dialog - just double-click it or press Enter.
Other Character Property Codes include hidden text, highlighted text, none-proofing text, temporary language change, and some common but non-text characters such as “emdash” and Tab.
Section Property Codes are shown in turquoise and denote characteristics such as section starts, section headers and footers, page numbering, and margin changes. A new document in Word has exactly one section. When one needs to change several attributes in the document at a single point, adding a section break is a logical way to do it. For instance, say that a temporary change in the margin settings and paragraph is needed for part of the document. You may have to visit several settings dialogs in Word to set up the changes - maybe paragraph and page settings, for example. CrossEyes shows all of the codes that make up the section properties in one place, at the end of the section. CrossEyes can also show section breaks of which the user is unaware. The § button, by the way, is a quick way to jump to the end of section properties.
Next: Table and Field Codes, Dealing with Bookmarks and Copy/Pasted Text, Documentation and Tech Support
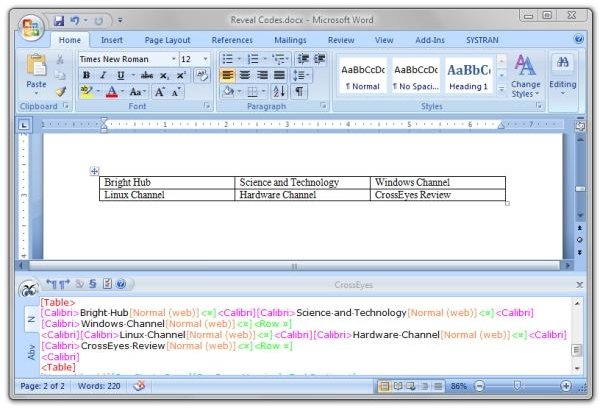
Table Cell Codes are shown in green, and they resemble, well, tables.
You have two options for how cells are labeled, and these are available by clicking on the Options (three checkmarks) icon or pressing Alt+0. The options are:
- Show Table Cell Addresses (Excel format, such as A1)
- RnCN Table Cell Addresses (Row/column format, such as RIC1)
- Show All Codes
CrossEyes can show you details about nested cells, too. This is very handy if you are working on a complex, old document with many revisions and additions. CrossEyes can help you tame cell nesting madness.
Field Codes in Word are used for objects such as symbols, page numbers, bullets, and equations. An example of a field code is CreateDate field found under Office → Prepare → Properties → Document Properties (droplist) → Advanced Properties. CrossEyes shows these in grey, and the user has some options in how they will be displayed. For example, if it’s a date field, Word will show the date in WYSIWYG and CrossEyes can show the field code for CreateDate, which is the function that put the date there. On the other hand, if you’ve set Word to display the type of field in the document text, CrossEyes will show the date. Another example is a link field, which can be used to insert data from a different document at a certain point, as one would need to do if importing a spreadsheet into a word processor document. In this case, CrossEyes by default shows the full path to the other document.
Access Field Code options by pressing Ctrl+O or clicking the Options (three checkmarks) icons. Here you can select whether you want CrossEyes to display Field Codes the same way Word does, or the opposite way.
Bookmarks
Bookmarks in Word are used to denote “a location or section of text that you name and identify for future reference.” (Word Help) They are set using Insert → Bookmark, and Word can be set to show bookmarks under Office → Word Options → Advanced → Show Bookmarks under “Show document content.”
In fact, Word can be set to show a lot of proofing marks on the WYSIWYG screen, and it can get quite untidy. Having tried it, I didn’t leave it selected long. It’s much better to let CrossEyes handle showing the formatting. This not only accommodates the “purity” of your WYSIWYG display, it also gives you quick access to formatting details and settings when you do need them. CrossEyes shows you exactly where the bookmarked range begins and ends.
Copy/Pasted Text
If you’ve ever had to copy text in from a web browser or another document or email, you know that it can be very unpredictable what you’ll end up with in your Word document. It can even be frustrating because you’ll have the sense that something is there causing the undesirable effect, but Word is not showing it to you. CrossEyes is of great assistance in a case like this because it shows all the codes, and it shows them exactly where they are in relation to the text.
Documentation and Tech Support (5 out of 5)
CrossEyes does extremely well in documentation. Both a User’s Guide and an excellent Tutorial are provided as Word .doc files. There’s also a detailed Windows Help file accessible by clicking the “?” icon in the CrossEyes pane, but it’s not quite current to the present version.
I had an opportunity to sample CrossEye’s tech support, which is a toll call away on the east cost. It was extremely pleasant and quick, even when I identified myself as a demo user. The problem was my fault entirely - I had had a document in Word open somewhere when I installed CrossEyes, and something just didn’t “jibe.” Uninstalling and reinstalling the application was the solution (I only had seven Word documents open when I called), and support stayed on the line to make sure it worked. Support does not get any better than this, thus they get the best rating Bright Hub can offer.
Next: Comparison with WordPerfect and Suitability to Purpose
Comparison with WordPerfect
In Corel WordPerfect, it’s possible to move the codes around in the Reveal Codes window. For example, if you “picked up” a Bold tag, you could reposition it in the Reveal Codes window to move the point (“insertion point”) where the bold text started or ended. One could also delete a tag and remove the effect of that tag on the text in the main window.
Word works differently from WordPerfect. Instead of having a flowing model like WordPerfect where attributes could be “moved” a short distance in the text or a long distance or even be inserted as new, attributes in Word are more or less fixed. Word applies formatting to groups only. Groups can consist of single words, sentences, paragraphs, the entire document, and, essentially, an entire group of documents (if all adhere to the same style and template). The codes shown in CrossEyes are (in most cases) access to the controls for the formatting in Word.
In WordPerfect, a single code in Reveal Codes, such as “JustifyCenter” can appear only once, and it will have an effect until some other code, such as “JustifyLeft” changes the justify attribute. The User’s Guide for CrossEyes points out that former WordPerfect users may not expect to find the paragraph attributes listed at the end of the paragraph, but this is a side-effect of Word’s treating the paragraph as a group. Because paragraph alignment is part of the paragraph’s style effects in Word, CrossEyes shows the name of the style (and any local user-entered variations in the style) in the code.
Note that there is the option of showing the paragraph properties at the beginning of the paragraph rather than at the end. Like the other settings, this can be accessed by pressing Ctrl+O or clicking the three checkmarks icon.
Suitablity to Purpose (5 out of 5)
While not a clone of WordPerfect’s Reveal Codes functionality, CrossEyes adds the ability to see what is going on in a Microsoft Word document. Besides giving you a new view of your work, it also provides fast access to settings that control formatting. CrossEyes is extremely attuned to how a Word document is constructed and reaches deep into the “plumbing.”
CrossEyes is at its best when you’re working on a collaborative document that you did not create. It plainly shows paragraph and section demarcation, even when they are not obvious in Word’s WYSIWYG display, and it can help to stamp out table nesting madness.
CrossEyes is also educational. It can teach you how Word works. A short time spent with the excellent tutorial will teach you about the traps that Word can hold for the uninitiated. CrossEyes should also be very handy for those who still haven’t come to grips with Word’s ribbon bar.
We were pleased with the functionality that CrossEyes added to Word, and plan to install it on our computers. Microsoft should license this application and include it with Word. It’s that useful.
References
CrossEyes download - CrossEyes 5
Images: Screenshots by author


