Can’t find your own network? Seeing nothing under the Network option in Explorer? This article takes a look at the problem and helps you fix it.
TCP/IP NETBIOS Service
If you successfully installed the network and still you get a message about a Windows 7 unidentified network, the first place to check is the Windows Services section. The message, however, may not always appear. In some cases, you just won’t be able to see the network under Network in Windows Explorer in Windows 7. If you are sure that all the connections are perfect, check the services section to see the status of TCP/IP NetBIOS service.
Note: We are talking about your own network in this article. Most of the times, Windows 7 picks up wireless signals from surrounding networks and shows them as Unidentified Networks in your list of Networks and Internet Connections. This article is not about those unidentified networks. I also recommend you NOT try to use those unidentified wireless networks on Windows 7 as they may not be safe.
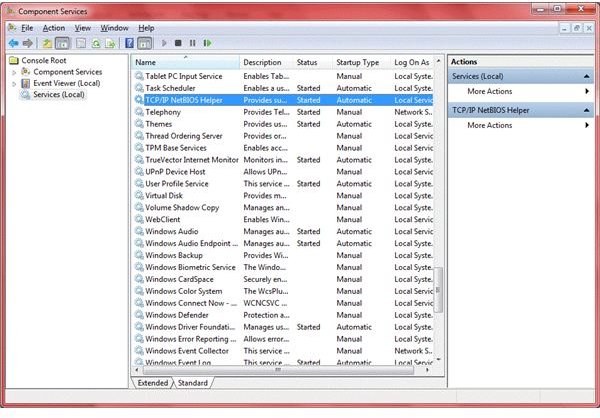
To check the status of TCP/IP NetBIOS service:
- Open the Control Panel and switch to Icon view.
- Double click on the Administrative Tool.
- In the window that appears, double click on the shortcut saying Services.
- Locate the service that says TCP/IP NetBIOS Helper and check if it is showing Started. If not, double click on the service and click on Start. Before closing the window, change the startup type of the service to Automatic.
- Reboot the computer and you should be able to see all the network components.
In case the TCP/IP NetBIOS helper is already running yet you get the message about a Windows 7 Unidentified Network or see nothing under Networks in Explorer, check out the next section of this article to help fix the problem.
Tip: Before trying the above, you can also disable the network and then enable it after some time to see if the problem is fixed.
Update The Device Drivers for Network Card

Sometimes, updating the device drivers for the network card helps in fixing the problem where Windows 7 says unidentified network. To update the device drivers of the network card, press Windows key + Break key. This will open up the Control Panel -> System window. Click on the option, Device Manager.
In the Device Manager, look for the option Network Adapter. Click on the plus (+) sign to expand it. Right click on the network card that you are using to connect the computer to the router, hub, or other computers and select Upgrade Driver. Make sure you are connected to the Internet so that Windows can find the relevant drivers. If Windows fails, you can manually visit the website of the vendor and download the updates.
Once you install the updates, reboot and see if the problem of Windows 7 unidentified network is fixed. If the problem persists, reset the TCP/IP stack as explained in the next section.
Fix Windows 7 Unidentified Network by Resetting TCP/IP
You can also fix the problem of a Windows 7 unidentified network by resetting the TCP/IP components. These components are installed when you install the operating system. Though you should never remove these, you can reset the settings for troubleshooting purposes. Please note that the reset will remove the TCP/IP values for the computer on network. You might want to note down these before proceeding further.
To reset the TCP/IP settings, you need to open the command prompt. Click on the Start menu and type CMD in the Run Dialog (Windows key + R) to open the command window. In the command window, type the following commands:
netsh int ip reset
Close the command prompt and reboot. This should fix the issue. If you still can’t see the network in Explorer or if you see a Windows 7 unidentified network message again, you need to consult a local technician who can come over and check the settings to fix the problem.
Tip: You may also check out the Windows 7 Network Troubleshooter before checking out with the local tech.


