We explain how to change Windows 7 settings so that it will display different languages.
How do I change computer language in Windows 7? If you installed Windows 7 in some local language and now wish to change it back to English or if you installed it in English and now wish to change to some local language, you can change it easily using the Control Panel. Before we go upon discussing how to change computer language in Windows 7, you should have multiple languages installed on the computer.
By default, Windows 7 comes with a wide range of regional languages. If the language you want is not present, you can also use your preferred language pack in Windows’ Multilingual User Interface by installing the language pack.
To check if your preferred language is present in Windows 7 , open Control Panel -> Region and Language. Click on the list labeled Format to see if your preferred language set is already installed.
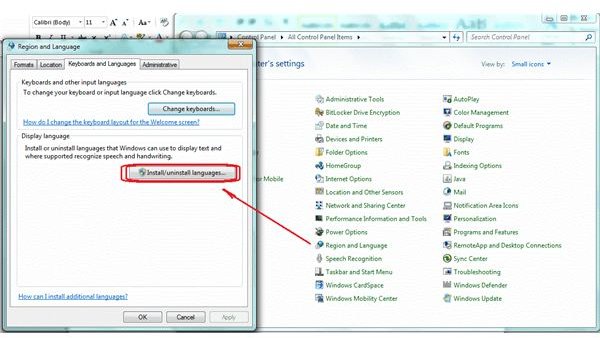
To install language packs in Windows 7, open the Control Panel and double click on Region and Language. In the dialog, select the Keyboards and Languages tab and click on the Install/Uninstall Language under Display Language (see image). This will open a wizard that helps you install the language you want. You can opt to use a disk or if you do not have any disk you can ask the wizard to search for the local regional language for you. Upon installation, the system will reboot.
The following section explains how to change computer language in Windows 7.
How to Change Computer Language in Windows 7
To change the display language in Windows 7, follow these steps:
1. Open Control Panel and click on Change Display Language link under Clock, Region and Language. Please note that the link is available only if your Control Panel is set to Category View. If it is not, click on the drop down list against View By and select Category View. If your Control Panel is set to icons, open Region and Language dialog.
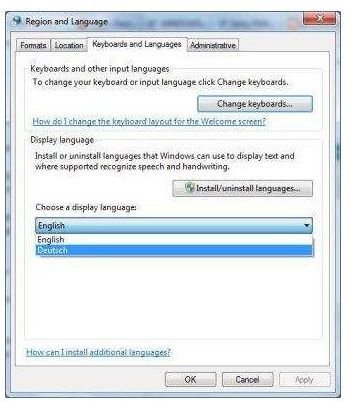
2. Select the Keyboards and Languages tab.
3. Click on the drop down list labeled Choose Display Language and select your preferred language. If the option is missing, you need to install additional language packs as mentioned in section one (see image below).
4. Click Apply
5. Reboot the computer to see the new language in Windows user interface.
This does not, however, change the language for other new users and for Welcome screen. To apply the language to new users and to the Welcome screen, do the following:
1. Open the Control Panel and open the Region and Language dialog again.
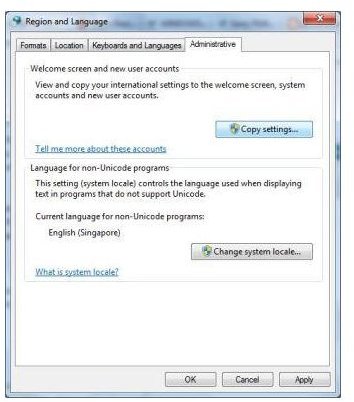
2. Select Administrative tab
3. Click on the Copy Settings button under Welcome Screen and New User Accounts (see image below)
4. In the dialog that appears, click to select Welcome Screen and System Accounts and New User Accounts
5. Click on Apply and close the window.
Restart the computer and see the changes.
This is the answer to how do I change computer language in Windows 7 for all users and for Welcome screen. If you have any questions, please feel free to contact me using comments section.


