Not everyone has a copy of Microsoft Word 2007, so it’s important to pick the right format to use when saving your documents. Here, we’ll show how to make a PDF document in Word to avoid conversion problems.
Advantages of PDF Format
With the multitude of word processors being used in the world today, trying to decide what format to use when distributing a document can cause huge headaches. Most of the “big name” word processors are compatible with one another, but that’s not necessarily much help if you’re trying to reach as wide as audience as possible. This audience may even include people that don’t have a word processor at all.
Another problem can arise if you are using a lot of images in your Word document. Even if another word processor is capable of handling text conversion of Microsoft Word files, it may have no idea what to do with all those additional pictures and drawings. One solution is to convert the Word document into PDF format.
Despite this compatibility issue, most people do have the capability of viewing PDF documents since Adobe’s free PDF reader comes bundled on almost every Windows system nowadays. Even if you don’t have a PDF reader installed, there are plenty of free ones, including Adobe Reader , available for download.
A great feature of Microsoft Word 2007 (and several other Microsoft Office 2007 products) is the ability to save documents as PDF files. This allows users to create a document in Word, convert it to PDF, and then distribute it without worrying if their audience has the necessary software to view the document.
Converting a Microsoft Word document doesn’t take a lot of effort, but you do need to make sure you have a special add-in that’s available from Microsoft. In the following steps, we’ll walk you through how to obtain that add-in and how to use it to create PDF Files in Microsoft Word.
How to Make PDF Files in Microsoft Word
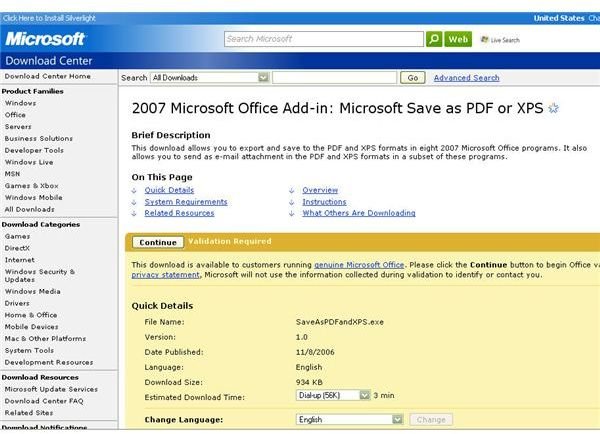
Before you can create PDF files in Microsoft Word, you’ll need to download the Microsoft Save as PDF or XPS add-in that’s available at the Microsoft Download Center. This 934 KB file is a free download that installs quickly and easily.
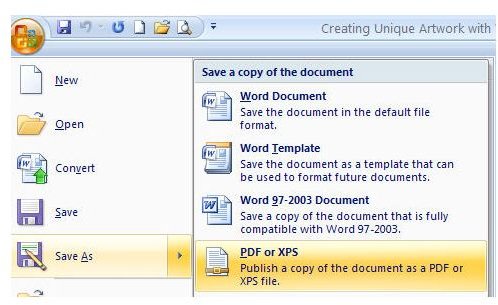
Once you’ve downloaded and installed the add-in, you can start creating PDF files right away. Create your document in Microsoft Word as you normally would. When you’re ready to save the file, click the Office button and choose the Save As option. With the add-in installed, you’ll see a new option to save your document as PDF or XPS as shown in the first screenshot below. Select this option and the Publish as PDF or XPS window will appear on your screen. Make sure to choose PDF as your Save As type. It’s also a good idea to give the file a new name so you can distinguish it easier from your original Word document file.
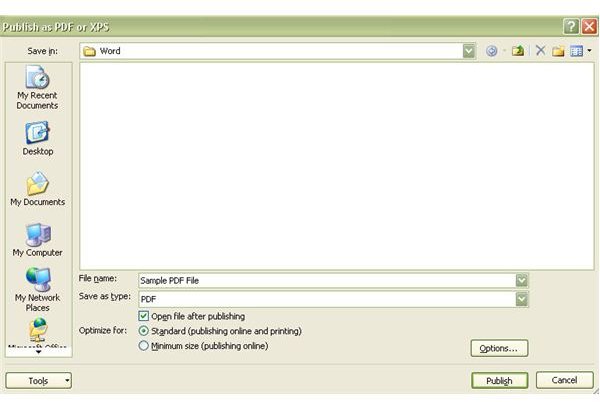
Click on Publish to save the PDF file. If you put a check mark next to the Open File after Publishing option, your saved file will open in your PDF reader. This will give you the opportunity to see how your document will appear to anyone viewing it as a PDF file. If you don’t like what you see, you can’t undo the action, but you can go back to your original Microsoft Word document, make changes, and then republish the PDF file.
For more tips and tricks, check out the other Microsoft Word tutorials and user guides at Bright Hub.


