Few users require a dedicated printer attached to every computer. That is where Windows printer sharing comes in. By using a network to share a printer between users, resources can be used more wisely. These tips make printer sharing in Windows 7 easier.
Windows 7 Printer Sharing
Being able to share printers connected to one computer with other computers over a network has been an important feature of Windows for many years. Unfortunately, sharing printers, especially over a home network, wasn’t always easy. With Windows 7, Microsoft has made sharing printers easier to setup and easier to manage as well.
The best tip for Windows 7 sharing of printers is to setup a HomeGroup which is a new Windows 7 feature for creating small home-based networks. Windows 7 printer sharing has been simplified, especially when taking advantage of the new HomeGroup network feature. Windows 7 computers who are members of the same HomeGroup will actually automatically detect when a new printer has been shared by a PC in the HomeGroup. A pop-up window informs the user that a new printer has been detected and asks if it should be setup automatically. Saying yes, means that the shared printer is connected to without any required user input.
How To Share A Printer in Windows 7
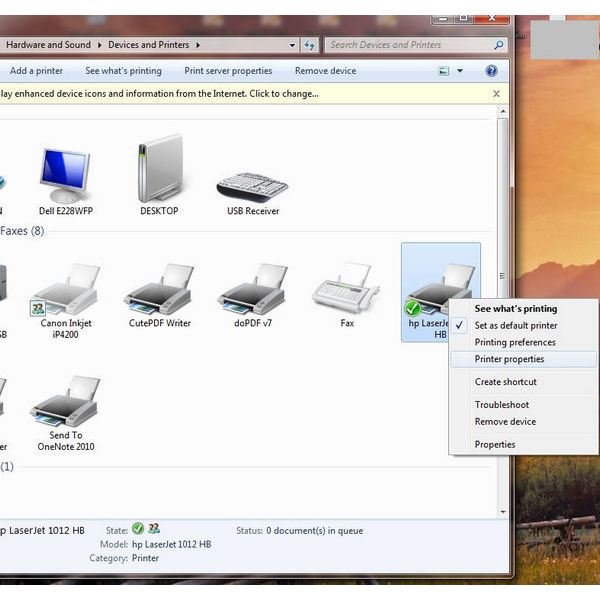
Sharing a printer under Windows 7 is a very simple process. Open the Devices and Printers control panel screen. By default, the Devices and Printers menu item is installed directly off of the start menu. However, if your Windows 7 installation does not have that menu item, it can be found in the main Control Panel screen.
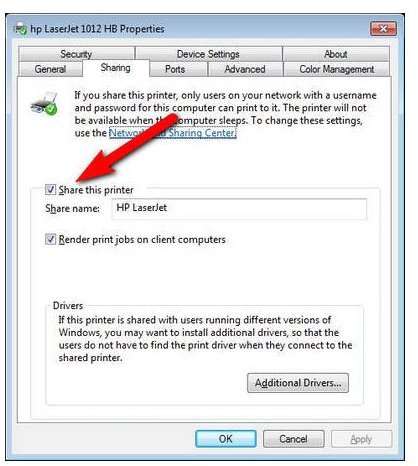
Select the printer you wish to share and right-click on it. This brings up the pop-up context menu. Select Printer Properties from the menu. Choose the Sharing tab inside the printer properties and check the box that says, “Share this printer”. Finally, choose a name by which to share the printer. Tip: This name does not have to match the local printer name or be related to the printer itself in any way. In other words, you can share a printer as “Copy Room Printer” or even “Big Color Printer Next To The Coffee Machine,” although the latter might be too long to be recommended.
Once shared in Windows 7, other Windows 7 computers in the same HomeGroup will detect the shared printer and attempt to connect automatically. These computers will download the driver from the host computer, so no additional software is needed.
Windows 7 Printer Sharing Tip: If a mixture of 32-bit Windows and 64-bit Windows computers are on the same network, the other Windows 7 printer drivers can be stored on the sharing PC for automatic download as well. Just click the Additional Drivers button to have the additional printer drivers copied to the host computer.
Share Printer in Windows 7 and Windows XP Mixed Network
Unfortunately, Windows XP computers cannot join a HomeGroup. That means that they will be unable to detect and connect to a new shared printer like Windows 7 PCs will be able to do. In this case, connecting to the new printer needs to be done manually using the Windows XP Add Printer utility
.Launch the Add Printer applet from inside of the Printers and Faxes control panel application in Windows XP. Choose to connect to a network printer. A useful printer sharing tip is to put both the Windows 7 computers and Windows XP computers in the same Workgroup. Although Windows 7’s HomeGroup feature is much more powerful, these computers can still talk to other PCs via a Workgroup. Having both computers in the same network can make finding the right computer and shared printer easier.
Either browse to the network computer with the shared printer, or input the name directly using the format \\computername\printername
Tip: Short, simple printer share names are easier to remember.
You may need to manually install the Windows XP printer driver on the computer making the connection. Also, you may need to adjust the security settings of the computer sharing the printer in order to allow a connection.
Once the printer has been connected, both Windows XP and Windows 7 will remember and automatically make the connection in the future allowing easy, continuous use of the shared printer.


