While installing Windows 7 people often face a problem where there are two entries in the Windows 7 boot manager. This creates confusion about which Windows 7 entry to select, otherwise your system will restart again.
Windows 7 Install Creates Two Boot Manager Items
People installing Windows 7 often end up with installation issues - such as a Windows Installation Error 0xC0000005 - and they have to restart the installation process over again. However, when they do install the Windows 7 correctly the second time, they end up with two entries for Windows 7 in the boot menu that appears at startup. This creates confusion for selecting the correct Windows 7 entry since both entries are similar. If you choose the wrong entry, it restarts the computer system. Here is a step by step guide to help you remove wrong Windows entries from Windows 7 boot manager.
If you are having trouble booting Windows 7 but do not have two boot menu entries, try booting into Windows 7 safe mode .
Windows 7 Boot Manager Remove instructions
If you have two similar Windows 7 entries on your computer system, then before you follow this step by step guide you need to be sure which is the wrong entry and which is the right entry. The order of the Windows 7 entries displayed at the boot time is same when displayed in Windows. So, you just have to remember, whether the top entry is correct or the bottom one.
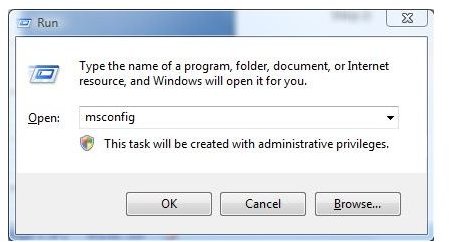
Step 1: Press Windows Key to open up Start Menu and then select Run. Alternatively, you can press the Windows + R key to open up the Run window. In the Run window, type “msconfig” without double quotes and press the Enter key.
System Configuration window will appear.
Step 2: In System Configuration window, select the Boot tab. There you will find the Windows 7 entries. Before following the Windows 7 boot manager remove instructions, you must have figured out the correct and the wrong Windows 7 entry. In the boot tab, select the wrong entry and press the Delete button to remove the wrong Windows 7 entry.
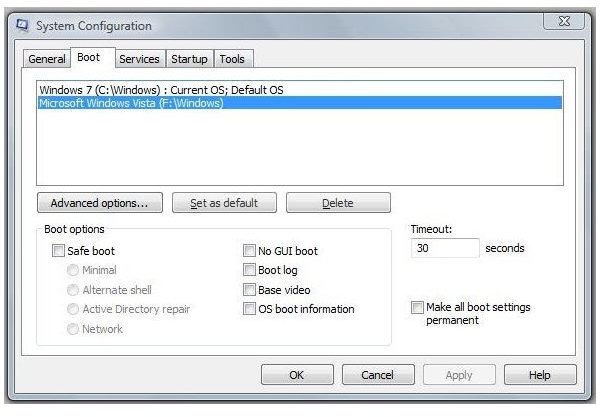
If you remove the working Windows 7 entry, then you will not be able to boot into Windows. So, make sure you remove the wrong entry only.
Finally, press the OK button to save the changes and restart your computer system.
NOTE: If the wrong entry is the default entry, then you need to change the default entry to the correct one. In order to change a default entry, follow the steps below.
Step 1: Right click on My Computer icon present on your desktop and from the pop-up menu select Properties. A System window will appear. In the System window, click Advanced System Settings link on the left. System Properties window will appear.
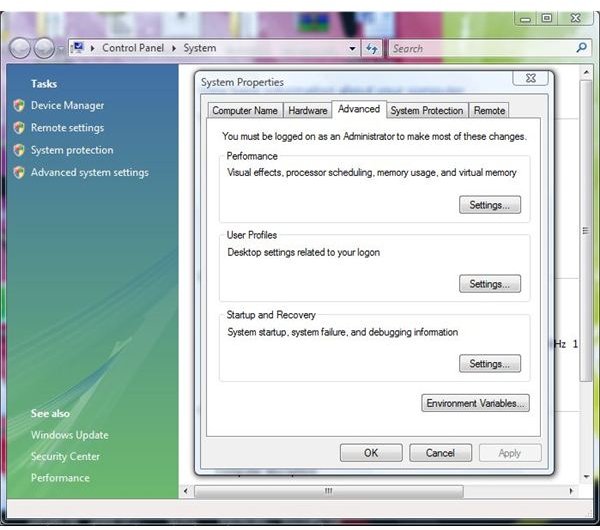
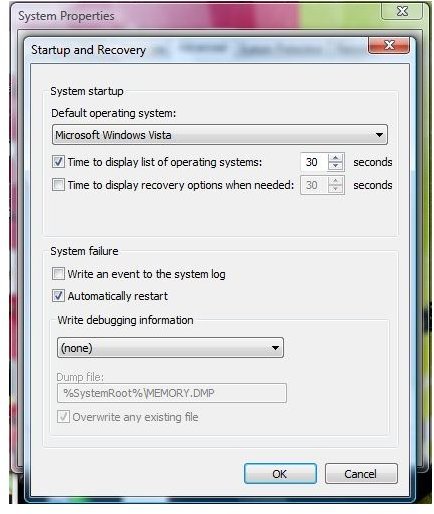
Step 2: In the System Properties window, click Advanced tab and from the Startup and Recovery section, click Settings button. A new Startup and Recovery window will appear. There you will find a drop down that holds the Windows 7 entries. Select your default and correct Windows 7 entry and press Ok button when done. Again press OK button and finally restart your computer.
You can now follow the Step 2 from the Windows 7 boot manager remove instructions.
References
- Windows Answers: Delete Windows 7 Boot Entry
- Images Credit: Windows 7 screenshots by Microsoft


