Windows 7 is the best operating system out there. However, if you still want to use Windows XP or Windows Vista, you can use them together. In this tutorial, I will explain how you can run Windows 7 and Windows XP / Vista together on the same computer.
Many people still like to hold on to the older versions of Windows like Windows XP or Vista even though they have upgraded to Windows 7. It is possible to dual boot Windows 7 and any other operating system (XP, Vista) together in a dual boot configuration, such that you can switch to either OS by just rebooting the system and selecting the OS you wish to boot into.
Dual Boot Windows XP
In this case, I assume that you already have Windows XP installed and want to install Windows 7 in a dual booting setup.
If you already have a free partition, you can do this easily, but if you don’t, we have to create a free partition first.
We can use any partition manager for this: My favorite would be PowerQuest Partition Magic but it’s a paid software program. So for partitioning, we will use the GParted partition manager which is a free application - the Gnome Partition Editor. It is usually used in Linux installation CDs.
We can Download GParted here: GParted Download
Just copy the Live CD image, and burn it to a CD.
Then restart your PC, select the CD drive as the booting device in the BIOS and boot from the GParted CD.
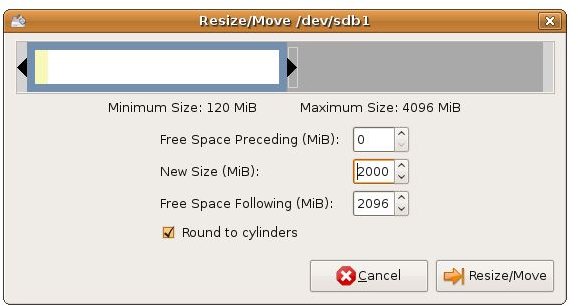
When the main interface of GParted loads, right-click on the Windows XP partition and select Resize / Move.
Use the slider to reduce the space in that partition by about 20-40 GB to accommodate Windows 7, click on the Resize/Move button and click Apply to execute the pending operations.
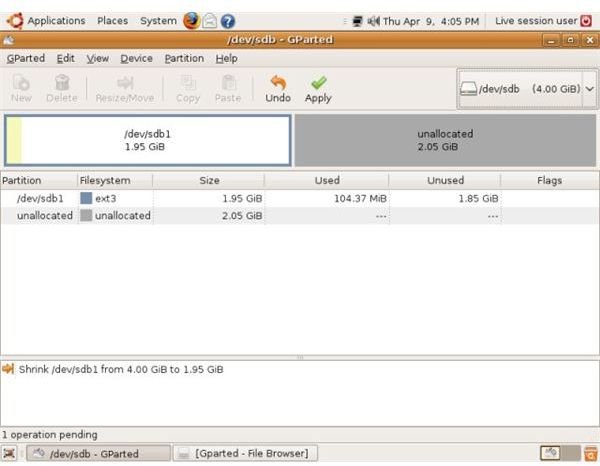
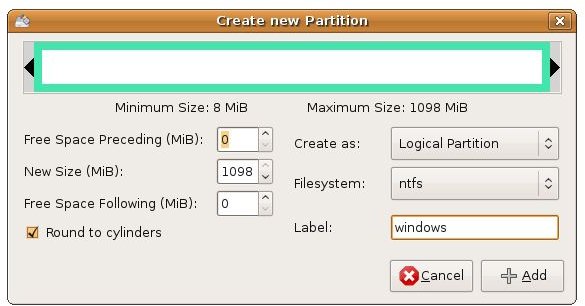
Now create a new partition in the newly free space. Select the unallocated space and create a New partition. Select the NTFS file system and enter the size of the partition. Click on Add and Apply the changes. You can also skip this part if you find it too complicated, and install Windows 7 directly in the unallocated space. It will format the partition automatically.
Now remove the GParted CD, insert the Windows 7 installation DVD and boot from it.
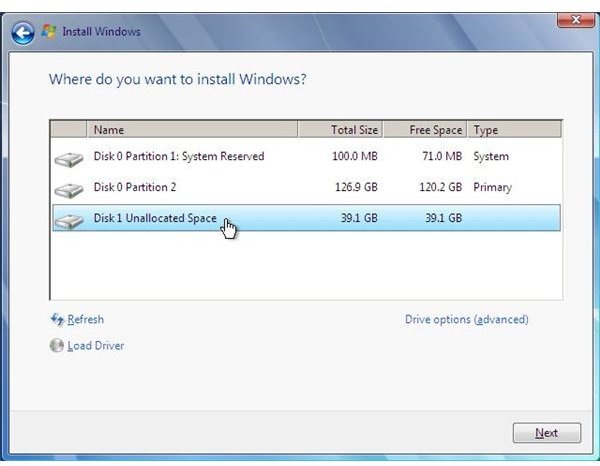
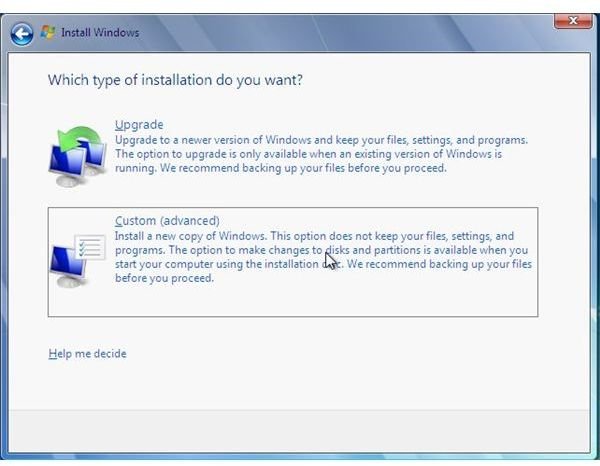
The installation process is pretty simple. Just make sure that when it prompts you to choose the type of installation, you select the Custom (Advanced) installation so that you can select the partition you install Windows 7 into.
Select either the unallocated space, or the NTFS partition if you created it, and click on Next. The Windows 7 installation will now proceed.
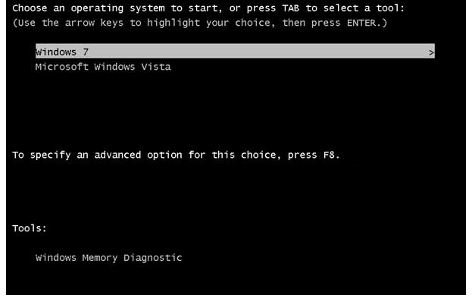
After the installation is complete, it will automatically install a boot loader which will allow you to choose whether to boot into the newly installed Windows 7 or to boot into the old OS (Windows XP).
Your Windows 7 - Windows XP dual boot setup is now complete
Note: Don’t consider the partition sizes in the screenshots. Your sizes will differ. The screenshots are just mock ones to help you understand the interface.
Windows 7 and Vista
The procedure to dual boot Windows 7 with Windows Vista is very similar to the procedure of dual booting Windows 7 with Windows XP.
I assume that you already have Windows Vista installed and want to install Windows 7 with it in a dual boot configuration.
Again, if you already have a free partition which can house Windows 7, you can skip to the Windows 7 installation part. Otherwise, you will first have to create a free partition.
You can use GParted again to do it. Boot from the GParted CD, click on the Windows Vista partition and select Resize / Move.
Use the slider to reduce the space in that partition by about 20-40 GB to install Windows 7, click on the Resize/Move button and click on Apply to execute the resize operation.
Now you can either keep this unallocated space as it is or create a new partition for Windows 7. If you keep the unallocated space, Windows 7 will automatically format it and create a partition.
To create a new partition in the newly free space, select the unallocated space and create a New NTFS partition of adequate size. Click on Add and Apply the changes.
Alternatively, if you don’t want to use GParted, you can also use the built in disk management tool in Windows Vista.
Just run diskmgmt.msc to enter Disk Management.
Select your partition and right-click on it. Select Shrink Volume. It will show you the amount of free space that you can shrink the partition by.

Enter the size of the new partition (unallocated space) to be created and click on Shrink.
Now, just reboot your PC, insert the Windows 7 DVD and boot from it. When it asks about the type of installation, select the Custom (Advanced) installation so that you can select the partition you install Windows 7 into.
Select either the unallocated space, or the NTFS partition if you created it, and click on Next. The Windows 7 installation will now proceed.
In a few minutes, after the installation is complete (Yes, Windows 7 takes much less time to install), it will automatically install a boot loader which will allow you to choose whether to boot into the newly installed Windows 7 or to boot into the old OS (Windows Vista).
After the process is complete, you can modify the boot loader details easily. Just run MSCONFIG and select the BOOT tab. You can select the timeout before the default choice is booted into, the default choice, etc.
You can also use third party software like EasyBCD to setup the Boot loader using a graphical interface, which is easier to use. It also offers many more advanced options.
References
- TechSpot: Dual Boot Windows 7 with XP/Vista in Three Easy Steps, http://www.techspot.com/guides/143-dual-boot-windows7
- NeoSmart Technologies: EasyBCD 2.1, http://neosmart.net/dl.php?id=1
- Screenshots provided by writer
- Gnome Partition Editor: Homepage, http://gparted.sourceforge.net


