
With Windows 7 connecting to WiFi is easier than it ever has been. In just a few simple steps you can connect to wireless networks at home, at the office, at school, or your local restaurant. Read about Windows 7 connecting to WiFi here.
Getting Started with Wireless.
In Windows 7
connecting to WiFi requires a computer with a functioning wireless networking card. You can check in Windows Device Manager to verify that your card is installed and configured. To do this, click the Windows Start button and type in “Device Manager” and then press the
When Device Manager starts, look for the “Network Adapters” line and expand it. You should see your wireless adapter listed here. Sometimes the line will say “WLAN” which stands for wireless LAN. The image below gives you an idea of what a functioning wireless networking card looks like. Keep in mind that this is just a sample: the wording for your device will likely be different.

If the line in Device Manager has a yellow exclamation point or a red “X” next to it, your card is not functioning properly, so you will need to take steps such as installing the driver or enabling the card in your user profile. Consult the user guide for your computer for more details.
In the case that you do not have a line under “Network Adapters” for a wireless card, you may not have a card installed in your computer, or it may be defective. Check your user guide and the invoice for your computer to make sure that it is supposed to have a wireless network card installed. If you do not have a wireless card installed in your computer, now is a good time to get one.
Finding a Wireless Network.
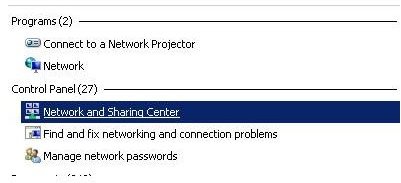
Hopefully you now have confirmed that you have a properly configured wireless adapter. With Windows 7 connecting to WifFi requires the presence of a wireless network. To see if a network is within range of your computer you can use a WiFi finder or just use Windows 7. In WIndows 7, click the “Start” button and then type “Network” into the search field. You will see options similar to the ones pictured below. Choose “Network and Sharing Center” by clicking on that line.
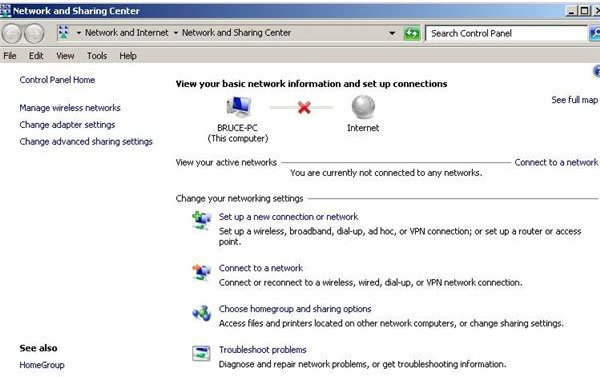
When the “Network and Sharing” window opens, you will see a number of options available to you. Click on the “Connect to a network” option.
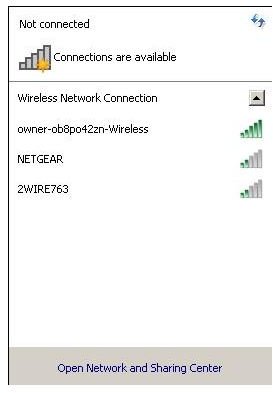
After clicking on “Connect to a network” you will see a panel open that displays the networks in your area that are in range of your computer. If there are no networks listed, that means either that no networks are visible or that no networks are in range.
Connecting to the Wireless Network
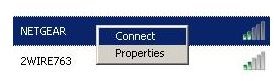
Once you have found wireless networks, using [Windows 7 connecting to WiFi](/tools/Connecting to WiFi with Windows 7) is easy. All you do is right click on the network to which you wish to connect and choose “Connect” from the context menu.
If the network has security enabled, you will likely be asked for the security key, especially if you have not connected to this network before. If you do not have the security key, you may not be authorized to access the network. If you are at work or school, you can ask for it. If you are accessing your wireless connection at home, you should know what the pass code is already. If you do not, follow the instructions that came with your wireless router to reset the code.


