Looking for information on Microsoft Office Document Imaging ocr text? Why buy expensive OCR software when you can perform OCR with Document Imaging for free? Using Document Imaging to perform OCR on a document or an image is very easy. Read on to find out how this is done …
When To Use Microsoft Office Document Imaging
Microsoft Office Document Imaging helps you to be more productive in your work. You can use Document Imaging when you want to:
- Perform optical character recognition on a scanned fax or document. After recognizing text, you can search for specific text and copy it to another program.
- Annotate a scanned fax or document and return it to the sender.
- Scan documents for archiving and recycle the hard copies.
- Send scanned documents to others as a fax or in email, as a text
- Perform optical character recognition on an image, containing text.
Using Document Imaging for OCR
There are many OCR software available in the market that come for a price but why pay any money when you can get it free in your MS Office CD/DVD.
Document Imaging comes bundled with MS Office and lets you perform OCR on images and scanned documents or faxes. The program does not generate quality text recognition results compared to non-free programs, as they would contain errors that can’t be corrected and many scrambled characters that correspond to the graphical symbols in the original image.
Though Document Imaging is not top-notch OCR software, it can be used as a basic OCR tool for non-business or non-professional purposes. To perform OCR with Document Imaging, here is the procedure that you will need to use :
Place your document that you want to scan in your scanner then launch Document Imaging. You will find it in Start Menu -> All programs -> Microsoft Office Tools.
If it’s not there, you need to install it from the Microsoft Office installation disc. Just run the Microsoft Office setup and choose Document Imaging from the shown options and follow the instructions on the screen to install the program on your computer.
After opening Document Imaging, follow the following simple steps to perform OCR on an image on your hard drive:
1. Go to the “File” menu and select “Open”.
2. In the new window that opens, browse the tiff image on your hard drive and then click “Open”
Note: If you do not have a tiff image but a jpeg instead, you can convert it to tiff so that Document Imaging can open it. There are various ways of converting a jpeg to tiff. The quickest way is to open your jpeg image with MS Paint and save it as tiff. Simple as that!
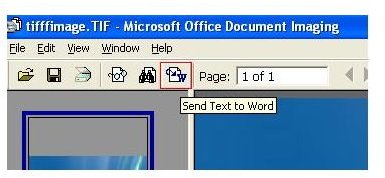
3. Once the tiff image is opened, it will show up in the Document Imaging window. Now click on the “Send Text to Word” button on the toolbar to start the OCR process.
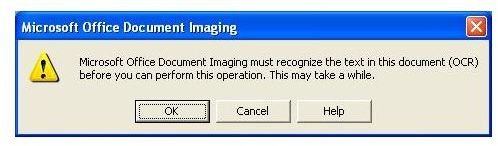
4. A small dialog box will pop up, stating that the OCR process may take a while to complete, click “OK” to proceed.
In a little moment, a new Word document will open containing the recognized text from your image.
-- Interested to know how to scan double sided pages with Document Imaging? See Scanning Double Sided Pages with Microsoft Office Document Imaging __.
-- Find out other free OCR software options in Free OCR Software


