In this article, I will explain how you can speed up your Windows 7 by applying some simple tweaks to your PC. After applying all the tweaks and tricks in this list, your Windows 7 PC should become blazing fast.
How To Speed Up Win 7
Windows 7 is a much faster, responsive operating system than Windows Vista or Windows XP. Over time, however, it can start slowing down because of extra software settings, hard drive clutter and more. There are some simple built-in tools you can use to clean up the system, and here are some of the most useful options.
1. Disable the Aero Theme in Windows 7
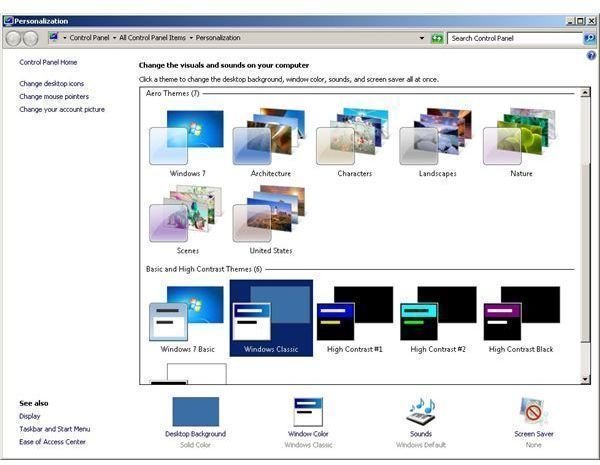
The Aero themes, while visually attractive, consume many resources and slow down your OS a lot, especially on underpowered hardware. If you are willing to sacrifice eyecandy for performance, you must disable the Aero themes and select a basic theme.
To disable Aero themes, right click on your Desktop and click on Personalize. From the list of Themes, select a basic theme. This will disable the default Aero theme and enable a basic theme which consumes much less resources.
2. Disable Visual Effects in Windows 7
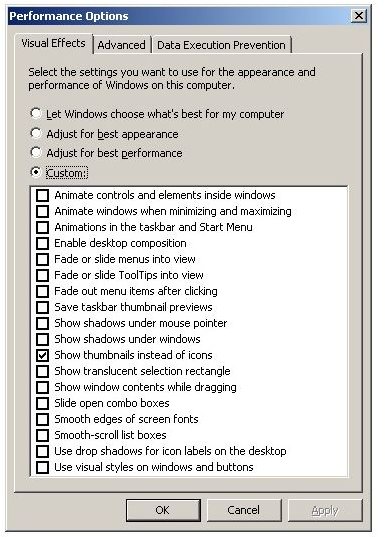
Disabling Aero will automatically disable many of the visual effects in Windows 7. However, if you want to keep the visual styles, you can still disable the visual effects to speed up Windows 7.
Just right click on My Computer and select Properties. Click on Advanced System Settings in the left tab and select the Advanced tab. Click on the Settings button under Performance, and disable all the effects in the Visual Effects tab. Just click on the last option “Use Visual Styles on Windows and Buttons” to retain the look and click on Apply. This should considerably speed up the operating system.
3. Remove Unwanted Applications from your Windows 7 PC
Removing unwanted, unused applications from your Windows 7 PC should also help in optimizing the performance.
To remove unwanted applications, go to Control Panel and select Programs and Features. Check the list of applications and remove any application that you don’t need.
You can also disable unwanted Windows 7 features. To do so, click on Turn Windows Features On of Off in the left tab and remove any Windows 7 feature that you don’t need.
4. Remove Unwanted Applications from Startup
If there are any applications that start up automatically when you restart Windows 7, they take up precious resources without you even knowing it.
You can disable them in order to save processing power and memory.
To remove applications from startup, Click on the Start menu and run “MSCONFIG”. This will open the System Configuration tool. Go to the Startup tab and deselect any application that you don’t want. Click on Apply and save the changes.
5. Remove Unwanted Services from Startup
Just like applications, there are also certain services that start up automatically when you boot up Windows. To disable them, follow the same process.
Click on the Start menu and run “MSCONFIG” to open the System Configuration tool. Go to the Services tab and deselect any services that you don’t want. Click on Apply and save the changes.
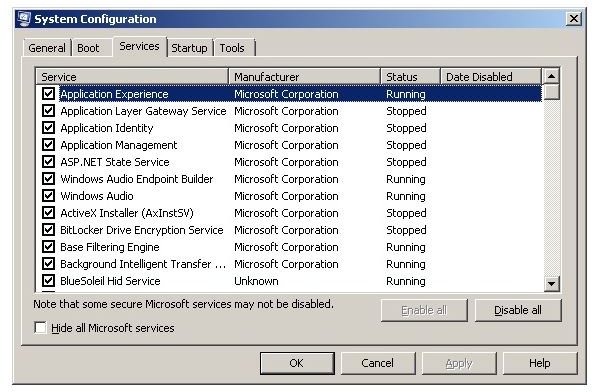
Note that disabling critical system services may lead to some serious problems with your Windows 7 installation. Only remove those services which you are sure are safe to remove. This tweak is not recommended for newbies.
6. Disable Search Indexing in Windows 7
Windows 7 dedicates a lot of your resources to create a search index in order to provide you with better search results every time you search for any file or service.
To speed up Win 7, you can disable the search indexing feature. Right click on My Computer and click on Manage. In the Computer Management window, select Services and Applications. From that, select Services.
This will bring up a list of Windows Services. Select Windows Search from this and right click on it to view Properties. In the Startup type box, select Disabled. This should speed up Win 7.

7. Use Ready Boost to Speed Up Win 7
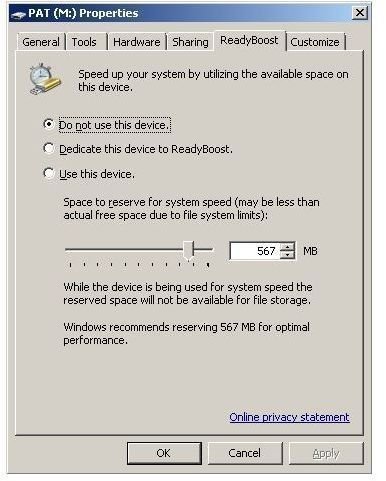
Windows Vista and Windows 7 have a nifty little feature called Ready Boost. Using Ready Boost , you can speed up your Windows 7 by using a compatible USB drive.
Just insert the pen drive into your PC. Go to My Computer and right click on the USB drive and select Properties. In the Ready Boost tab, it will display whether or not you can use the USB drive for Ready Boost. Select the Use This Device option and enter the amount of space you want to use for system speed and click OK.
8. Disable Desktop Gadgets in Windows 7
Desktop Gadgets / Windows Sidebar takes up a lot of resources and may slow your PC down considerably. The amount of resources it consumes increases with the number of gadgets being run.
To speed up Win 7, disable the Desktop Gadgets. Right click on the desktop and click on Gadgets to see the list of gadgets. To remove any gadget, just right click on the Gadget on the Desktop and select Close Gadget. You can also disable the Windows Gadget platform permanently by using the Turn Windows Features On or Off in Control Panel > Programs and Features.
9. Enable High Performance Power Plans in Windows 7
Windows 7 often automatically regulates performance and reduces it in order to conserve power. This has a more visible effect if you are using a laptop and are on battery usage.
You can enable high performance in your power options to speed up Windows 7. To do so, go to Control Panel and click on Power Options. Click on Show Additional Plans and select the High Performance plan.
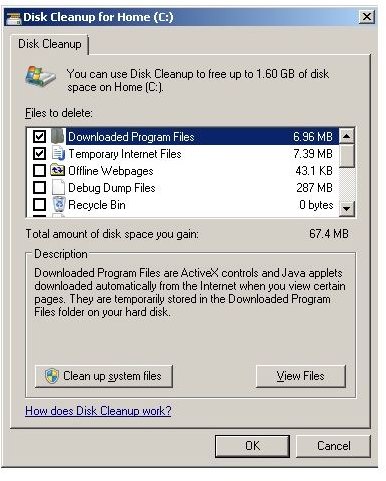
10. Use Disk Cleanup to Speed Up Win 7
Over time, your Windows 7 system accumulates a lot of junk files and temporary files which may slow down your PC.
You can use a built in tool called Disk Cleanup to clean all of them automatically. Just go to Start Menu > All Programs > Accessories and select System Tools and click Disk Cleanup. Select the drive partition you want to clean and it will scan for unwanted files. Click on the Clean Up System Files button to delete all the junk files. and speed up your Windows 7 system.
That was how to speed up Windows 7. Also, check out this tutorial to learn how How To Optimize Windows 7 On a Netbook .
Reference, Image Credit
Author’s own experience.
All images taken by author.


