Do you have Microsoft Works documents lingering around? Or have your coworkers, friends or family members sent you a document with an odd extension or weird icon? It may be because they sent you a Microsoft Works file. Find out how to convert Works files into Word files in this 3-step tutorial.
Converting Microsoft Works to Microsoft Word
Have you ever encountered a document with an odd extension or icon? It may be because it’s a Microsoft Works file . Changing Microsoft Works to Microsoft Word files can be done by following this step by step tutorial. An interesting fact is that Microsoft Word 2007 can actually convert Works files really well and the converting can be done easily and painlessly.
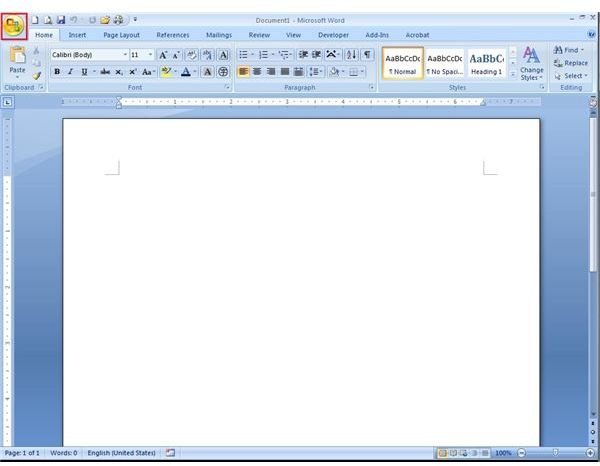
Step One - Open Microsoft Word 2007
- Since Microsoft Word 2007 can convert Microsoft Works files, the first step is to open Microsoft Word 2007.
Step Two - Open Your Microsoft Works File
-
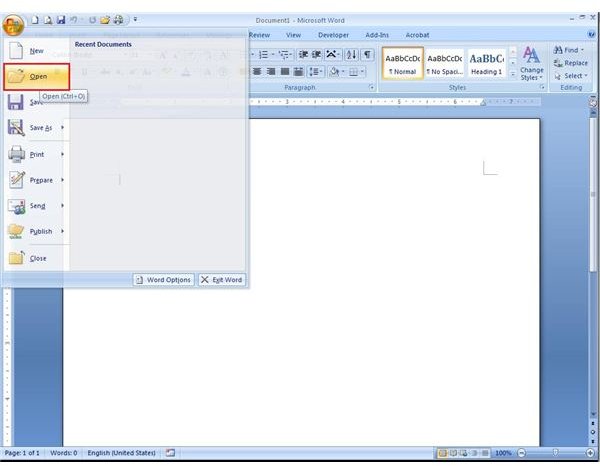
Once Word has started, scroll over to the Office Button and press it. The Office Button is the big Office logo located in the upper left hand corner.
Advertisement -
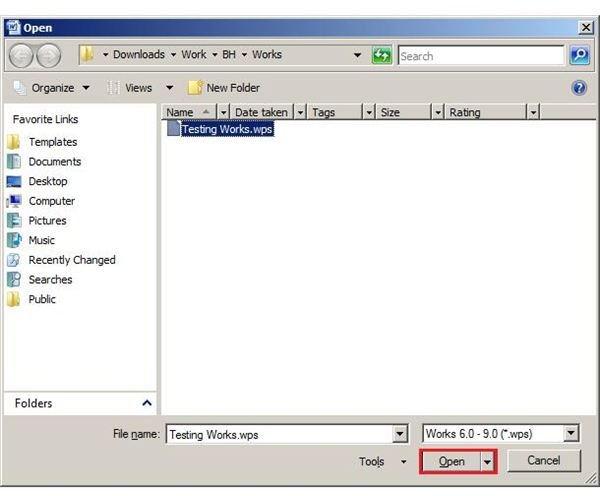
After clicking the Office Button, go down to Open to get an open dialog box.
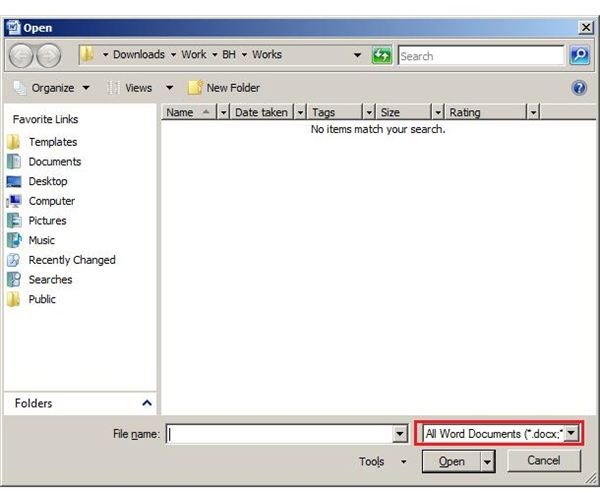
- Navigate to the folder containing your Microsoft Works file.
- In the Open Dialog Box there is a file type option. In Windows Vista, its the drop down box next to the File Name text field. Click on the drop down box and select Works 6.0 - 9.0 (*.wps) as your option.
- Your Microsoft Works files should now appear as available files. In this tutorial, I’ve chosen Testing Works.wps as the file I want to convert to a Word file.
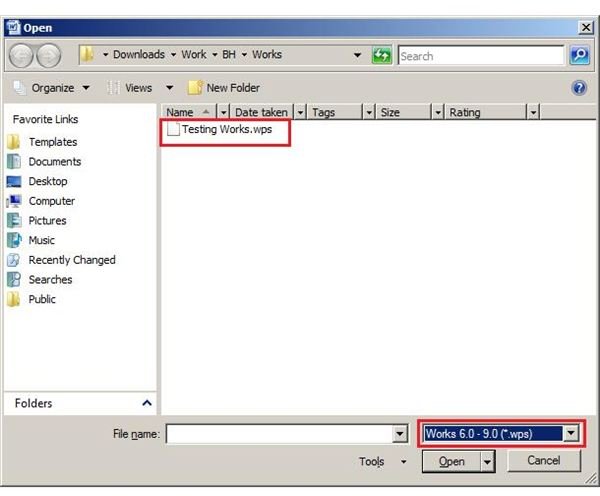
- Click on Open to have Word open your Works file.
Step Three - Save Your Microsoft Works File as a Microsoft Word File
-
Now that you’ve opened your Microsoft Works file, its time to change it into a Microsoft Word file. Word has the converting functionality built in for these cases.
-
Move your mouse back to the Office Button in the upper left hand corner of Word and press it again.
Advertisement -
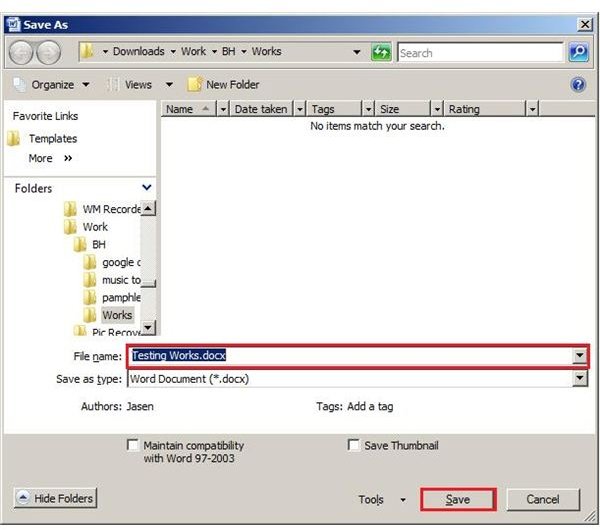
From the list of options that drop down, highlight Save As to get a list of options to the right.**
 Advertisement
**
-
From the options on the right, click on Word Document to get a save as dialog box.
Advertisement -
Name your file in the File Name: field then press Save.
Conversion from Micrsoft Works to Microsoft Word Complete!
In three easy steps you’ve converted your Microsoft Works file into a Microsoft Word file. Note that you can also save it as a Word 97 - 2003 document if you’re sending the file to friends, coworkers or family that don’t have Office 2007 installed on their computers. Now, any time you encounter a Works file, you know how to open and convert the file to a more familiar Word document. You can follow these same three steps for every Works file you have that you’d like to convert to Word. Once Word is open, you can start from Step Two and loop through until you’ve converted all your Works files.


